Red Onion Mexican Street Tacos

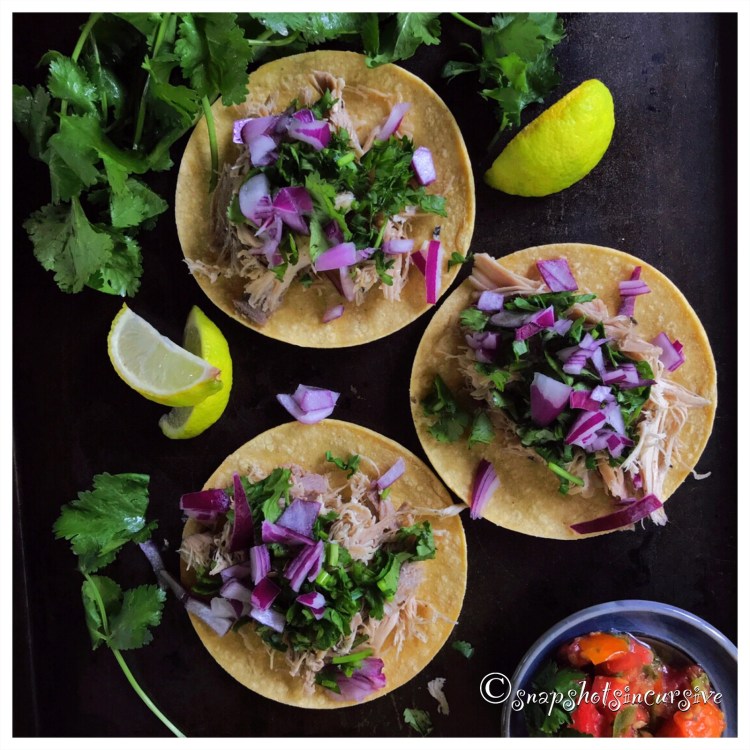
What’s Cooking in Gail’s Kitchen? Enjoyable Eats: Red Onion Mexican Street Tacos! As promised, today’s feature recipe takes us down the road to Jalisco-style tacos. Forget about the “loaded” tortilla shells you may be familiar with, or even default to when making Mexican food at home. This handheld taco steps “outside the box”. The ingredients are fewer, yet focus on freshness. For those who appreciate it, cilantro is a star attraction. Roasted meat, shredded into small pieces, and chopped red onions with a squeeze of lime wedge create a flavor explosion that, honestly, will pull you back enough to slow down and savor every bite. Perhaps you may even chew your food 20 or 30 times before swallowing to appreciate this virtual trip to a seldom-traveled Mexican village.

RED ONION MEXICAN STREET TACOS

Ingredients:

24-count street-size corn tortillas

1 pound seasoned shredded turkey or pork carnitas

1 red onion, chopped

1 bunch fresh cilantro, chopped

2 limes, cut into wedges

Jalisco Pico de Gallo*

Instructions:

Warm shredded carnita meat in a microwave-proof covered casserole dish until steamy and heated through. Set aside. To warm street-size corn tortillas, place a dry iron skillet on the stove top over medium heat. Cook tortillas 30 seconds per side. Wrap a stack of five or six in aluminum foil to keep warm in a 200° preheated oven. When ready to assemble, place a portion of carnitas on each corn tortilla. Layer with chopped cilantro and red onions. Squeeze a lime wedge over all. Top with Jalisco Pico de Gallo.

*Follow the link for recipe.
http://Snapshotsincursive.com/2019/11/15

Quiche From the Hen House

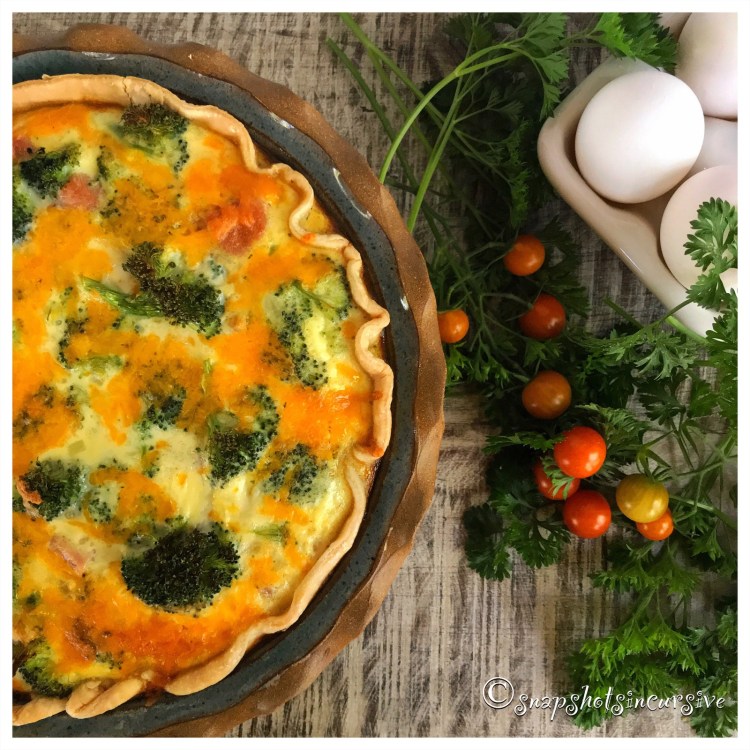
What’s Cooking in Gail’s Kitchen? Enjoyable Eats: Quiche From the Hen House! Certain foods are like time-travel. Take quiche, for instance. Elsewhere it’s no big deal, popular even. But in America, guys couldn’t stand it back in the ‘80s. Too sissy. Never mind that it was economical and the ingredients were pretty much on hand when the grocery budget was stretched to the max. But then came bacon, and everything changed. Suddenly quiche was raised to the level of deep dish pizza.

QUICHE FROM THE HEN HOUSE

Ingredients:

1 prepared pie crust

1 broccoli crown, cut into bite-size pieces

1/3 sweet onion, chopped

3 eggs

1 cup light cream

1/4 teaspoon seasoned salt

1/8 teaspoon black pepper

1 1/2 cups extra sharp cheddar cheese, finely shredded

Instructions:

Preheat oven to 350°. Spray a pie plate with nonstick oil. Place prepared pie crust in the pie plate. Crimp edges. Sprinkle 1/2 cup shredded cheddar cheese over bottom. Set aside. In a microwave-safe covered dish, steam broccoli for 2 minutes; drain. Set aside. Place chopped onion in a microwave-safe dish. Cook 2 minutes on High setting. Set aside. In a bowl, whisk together eggs, light cream, seasoned salt, and black pepper. Arrange broccoli pieces and chopped onion in the pie crust. Pour egg mixture over the vegetables. Sprinkle remaining cheese over the top. Bake, uncovered, for 45-50 minutes. Quiche is done when center is set and a knife inserted comes out clean. Serve warm.

Piquant Pear Passion

What’s Cooking in Gail’s Kitchen? Enjoyable Eats: Piquant Pear Passion! Did you know a little bit of cheese and fruit make a great dessert at the end of a meal? Sure you did. The French have been doing it for years. Europeans, too. Bleu cheese, or its milder cousins Roquefort and Gorgonzola, is a perfect match with sweet ripe pears. Nuts provide that little extra crunch you crave. If making ahead, to keep the pears from turning brown, simply dip them in a wash of lemon juice and water. It works. If you wish to top off the dessert plate with subtle sweetness, drizzle some natural honey over the pears before serving. Obviously I threw in the greens as garnish. Habit, that’s for sure.

PIQUANT PEAR PASSION

Ingredients:

1-2 ripe pears, cored and sliced

4-ounces Bleu cheese, crumbled

1/2 cup walnut pieces

Arugula leaves, for garnish

Natural Honey, for drizzling (optional)

Instructions:

Arrange pear slices in a dessert dish. Add the bleu cheese crumbles. Sprinkle with walnut pieces. Garnish with arugula leaves. Drizzle pears with natural honey.

Ole Smoky Cherry Drops

What’s Cooking in Gail’s Kitchen? Enjoyable Eats: Ole Smoky Cherry Drops! For those who think this is a strange name for something sweet, allow me to explain. The Great Smoky Mountains form one of the most beautiful mountain ranges along the Tennessee-North Carolina border. Nestled in “The Holler” is a distillery made famous by its 100-year-old recipe base for signature flavors of moonshine. Can you see where this is going? Stick with me. From the fermenting grains of the moonshine stills come the most extraordinary combinations you can ever imagine. Bottled in quart jars are what appear to be a dozen or more moonshine variations that go by names like Apple Pie, Hunch Punch, Blue Flame, Lemon Drop, Dill Pickles, and Moonshine Cherries. Since I found a jar in my pantry, I thought going into the holidays, this might present an interesting dessert opportunity. It definitely passed the “flame test” in my house.

OLE SMOKY CHERRY DROPS

Ingredients:

1 quart jar Ole Smoky Moonshine Cherries*

12-ounce bag white chocolate chips

4.6-ounce jar rainbow sprinkles

5.2-ounce jar sanding sugar

14-ounce bag sweetened coconut flakes

Party Picks

Instructions:

Several steps are necessary to prepare your workspace. Using a slotted spoon, carefully remove maraschino cherries from jar. Reserve moonshine for another use. Gently pat dry each cherry and set aside. This is important before coating them in white chocolate. Place each topping (rainbow sprinkles, sanding sugar, and coconut flakes) in a separate dish. Line a baking sheet with waxed paper. Set aside. To melt white chocolate, place half a bag of chips in a microwave-proof bowl. Warm at 30-second intervals, stirring after each interval. Repeat until the white chocolate is smooth and no lumps remain. Working quickly, pierce a cherry with a cake tester. Coat it halfway in the white chocolate, then dip it in one of the toppings. Place decorated cherry on the waxed paper-lined baking sheet. Repeat until all cherries are decorated. Chill to set. Two things: As the white chocolate cools, gently warm and stir. When it becomes necessary to use the remaining white chocolate chips, begin with a clean bowl. This will eliminate waste. Cherry Drops should be stored in the refrigerator until ready to serve. Serve with party picks.

*I receive no recompense for mentioning Ole Smoky Moonshine Cherries.

Noel Charcuterie Tray

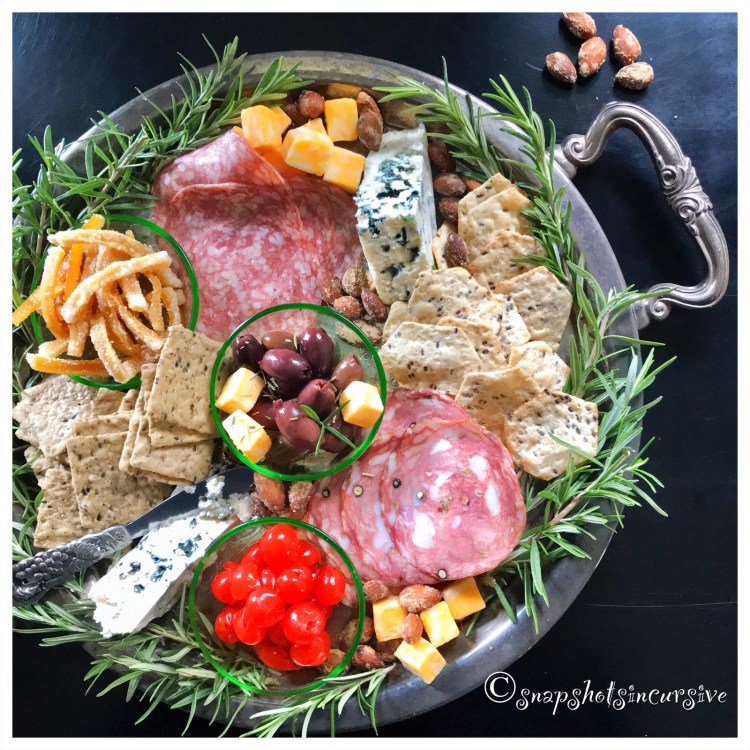
What’s Cooking in Gail’s Kitchen? Enjoyable Eats: Noel Charcuterie Tray! Everyone loves a party. As the host or hostess, you should too. Instead of picking up a ho-hum relish tray at the local supermarket, make a charcuterie tray because they’re fun…and easy entertaining. Basically, it consists of cured meats, cheeses, nuts, fruit, and olives. And there’s no rhyme or reason for arranging things on a tray or platter. The more random the pattern, the better. Fresh herbs can add an aromatic ambiance making your guests feel special. Candles have the same effect, as long as they are away from the direct line to finger food. Crackers or artisan bread are a nice platform for spreadable cheeses or gourmet jams. Getting ideas? I see you nodding your head in agreement, so let’s get this party started.

NOEL CHARCUTERIE TRAY

Ingredients:

4-ounce assorted Antipasto Italiano sliced meats

8-ounces Bleu cheese, wedge

8-ounces Colby Jack cheese cubes

6-ounces Wasabi & Soy Sauce almonds

6-ounce jar Kalamata olives, pitted

1 cup moonshine maraschino cherries

1 cup candied orange peel*

4.25-ounces sea salt snack crackers

4.25-ounces sesame artisan crackers

Fresh Rosemary, for garnish

Instructions:

First, arrange some items in small bowls, like olives, nuts, and fruits. It keeps them contained for easy replenishment. Cured meats and cheese wedges are often the spotlight. As larger items, place then on the tray once you have the bowls in place. Crackers or bread go next. Don’t be afraid to pile them on. Feel free to fill in the “spaces” with salty nuts, cheese cubes, and fresh rosemary sprigs. Enhance your presentation with knotted bamboo picks or cocktail toothpicks for spearing small bites.

*Follow the link for recipe.

http://Snapshotsincursive.com/2019/11/06

Mexican Shrimp Cocktail

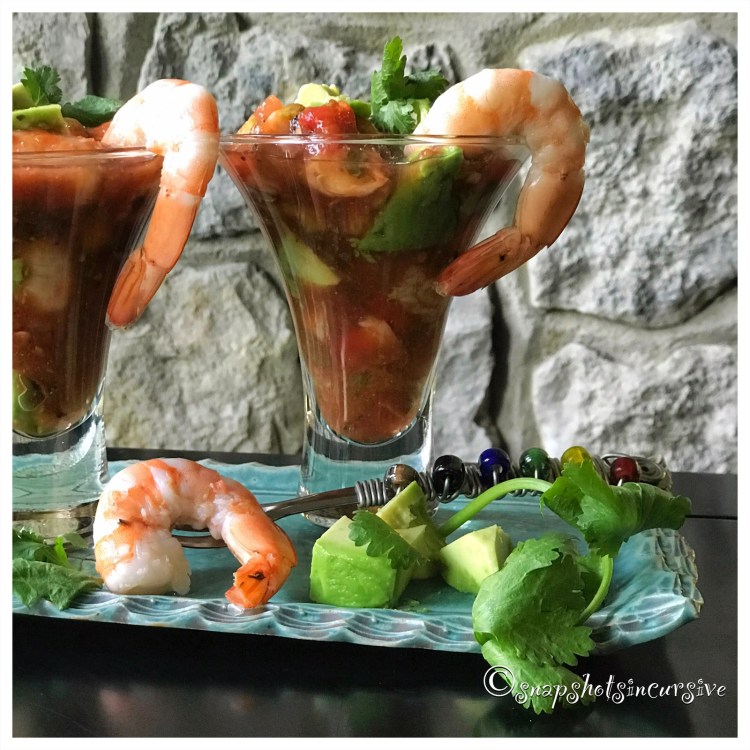
What’s Cooking in Gail’s Kitchen? Enjoyable Eats: Mexican Shrimp Cocktail! One bite, one little taste, will leave you wondering how you didn’t know about this version of an old classic. So what’s the difference, you ask. Actually, quite a bit. But I’m not gonna lie to you. If you’ve been following my blog, you can often see there’s a method to my madness. One recipe can be a critical ingredient to another dish. Like today. Recently I featured Jalisco Pico de Gallo. I’m gonna tell you it is a key ingredient in my Mexican Shrimp Cocktail, slightly tweaked. On the upside, it makes preparation a snap. Read on and you’ll see what I mean.

MEXICAN SHRIMP COCKTAIL

1 1/2 cups Jalisco Pico de Gallo*

1/2 cup Clamato Tomato Cocktail**

1/2 cup ketchup

1 pound jumbo shrimp, precooked but chilled

1 avocado, cut into medium chunks

Fresh cilantro, for garnish

Instructions:

In a bowl, combine Jalisco Pico de Gallo, Clamato Tomato Cocktail, and ketchup. Mix well. Take at least half the shrimp, discard tails, and cut into chunks. Add the shrimp chunks to the sauce mixture. The remaining whole shrimp will be used for dipping. Gently fold in avocado chunks. To serve, divide shrimp cocktail into parfait glasses. Arrange whole shrimp on the edge of the glass. Garnish with fresh cilantro.

*Follow the link for recipe.

http://Snapshotsincursive.com/2019/11/15

**I receive no recompense for mentioning this product.

Lavender Creamed Honey Pears

What’s Cooking in Gail’s Kitchen? Enjoyable Eats: Lavender Creamed Honey Pears! Whenever pears come into season, I feel as though a festive dessert is in order. But then again, I’m spoiled. Family members “gift” us with a different fruit-of-the-month selection all year long. A box gets delivered to our doorstep with a little card that tells us about the delectables inside. Often there are serving suggestions as well as ripening and storage tips. Then my mind begins to wander as I plan different ways to come up with recipes. That is, unless I simply succumb to their aroma and eat them as they are. Here’s a festive dessert that will get you raves through the holidays.

LAVENDER CREAMED HONEY PEARS

Ingredients:

1 large pear, skin on, halved, and cored with a melon scooper

2 tablespoons sweet white wine

2 tablespoons creamed honey

1/8 teaspoon cinnamon

1 tablespoon butter, room temperature

1 tablespoon vanilla extract

For Lavender Filling:

1/2 cup vanilla Greek yogurt

1 tablespoon creamed cheese, softened

2 drops lavender extract

1 smidgen dried lavender buds

1 drop lemon extract

1 nip granulated citrus peel

1 teaspoon granola, for garnish

Lavender buds, for garnish

Instructions:

Preheat oven to 375°. In a small baking dish, place pear halves upright. Pour sweet wine over them. Slightly warm creamed honey on Low setting in the microwave for 30 seconds. Drizzle honey over pears. Sprinkle with cinnamon. Dot each pear half with butter. Finish with vanilla extract. Bake, uncovered, for 40 minutes. Carefully remove dish from oven. Baste pears with the juice. Turn each pear over, skin side up. Bake 20 minutes longer until tender. Using a spoon, transfer each pear half, flipping over with skin side down, to a dessert dish. The sauce will thicken slightly as it cools. Spoon reserve sauce over pears. While pears are baking, make the Lavender Filling. Combine vanilla Greek yogurt and creamed cheese. Mix until smooth. Fold in lavender extract, dried lavender buds, lemon extract, and granulated citrus peel. Keep refrigerated until ready to use. To serve, place a heaping dollop of filling into each pear half. Sprinkle with granola. Garnish with lavender buds. Serve warm.