“There’s no such thing as aging,
but maturing and knowledge.
It’s beautiful; I call that beauty.”
~ Celine Dion

“There’s no such thing as aging,
but maturing and knowledge.
It’s beautiful; I call that beauty.”
~ Celine Dion

“There is a harmony in autumn,
and a luster in its sky, which through
the summer is not heard or seen,
as if it could not be,
as if it had not been!”
~ Percy Bysshe Shelley
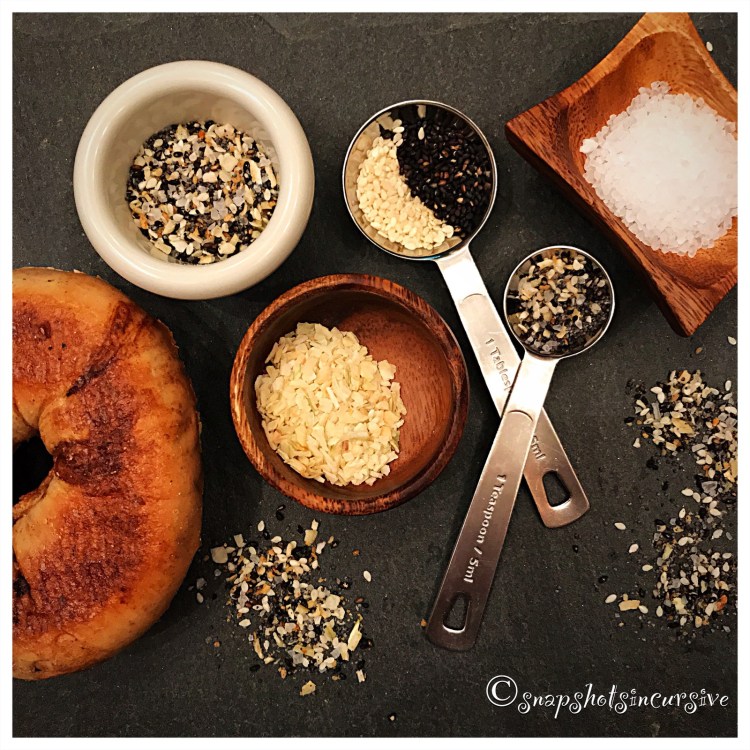
What’s Cooking in Gail’s Kitchen? Equal Measures: Everything But Bagel Seasoning! Anyone who has trekked to a coffeehouse for their morning cuppa joe has, at one time or another, nibbled on a bakery fresh bagel. That special blend of garlic flakes, minced onions, poppy seeds, sesame seeds, and pretzel salt is a coveted secret in some kitchens. Not mine, simply because you probably already have all these spices in your pantry at home. DIY to begin a journey of inspiration on foods beyond the bagel. For example, sprinkle it on everything from mac‘n cheese, avocados, and eggs to chicken, veggies, and popcorn. It’s genius!
EVERYTHING BUT BAGEL SEASONING
Ingredients:
1 tablespoon fried garlic
1 tablespoon dried minced onion
2 tablespoons poppy seeds
1 tablespoon white sesame seeds
1 tablespoon black sesame seeds
2 teaspoons coarse sea salt
Instructions:
Using a mortar and pestle, slightly crush fried garlic and dried minced onion. Add poppy seeds, white sesame seeds, black sesame seeds, and coarse sea salt. Mix well. Store in a spice jar.

What’s Cooking in Gail’s Kitchen? Equal Measures: Devils on Horseback! The name itself is a conversation starter. I know, right. The colors themselves resemble the “dark side” of our personalities. The small savory dish is made with pitted dates, smoked almonds, and crispy bacon or prosciutto. It’s pretty simple to prepare and is often served as an appetizer at social gatherings. Popular as a finger food, this hors d’oeuvre is perfect for small conversation at backyard parties. Watch yourself. Eating too many may find you a little mischievous.
DEVILS ON HORSEBACK
Ingredients:
1/4 cup soy sauce
1/2 teaspoon ground ginger
3/4 cup brown sugar
24 pitted dates, whole
24 smoked almonds, whole
3-ounce package prosciutto, deli sliced and cut in half lengthwise or 12 slices thin bacon, cut in half width wise
Instructions:
Preheat oven to 400°. Spray a baking dish with nonstick oil. Set aside. In a shallow bowl, combine soy sauce and ground ginger. Mix well. In a second dish, place brown sugar. Take a pitted date, open carefully, and stuff it with a smoked almond. Wrap the date with a half slice of prosciutto or half bacon slice. Dip it into the soy sauce mixture. Roll it in brown sugar and place seam side down into the prepared baking dish. Repeat until all dates are prepared. Bake in the preheated oven until the prosciutto or bacon is crisp, 15 to 25 minutes. Serve at room temperature.
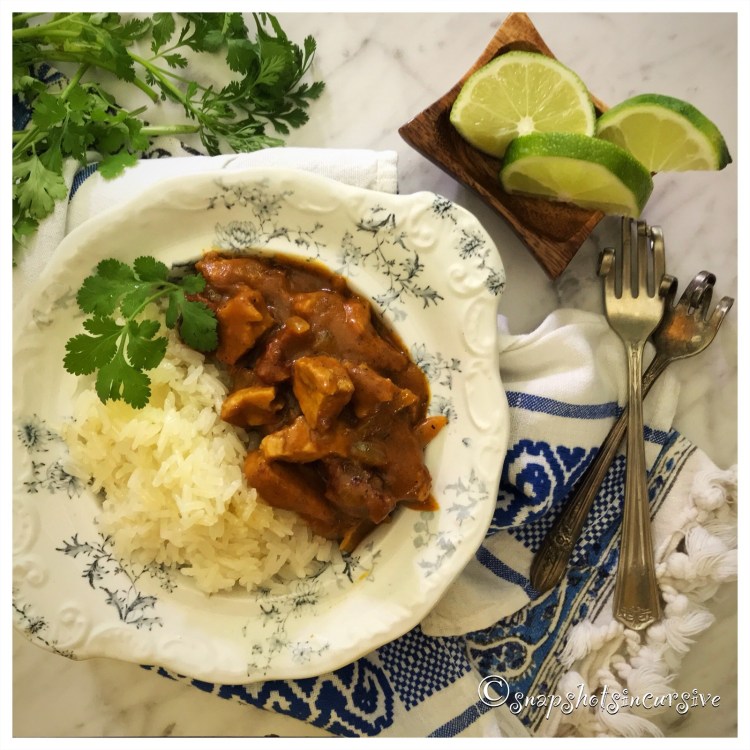
What’s Cooking in Gail’s Kitchen? Equal Measures: Coconut Curry Chicken! Every once in awhile you cross paths with someone who offers a product to enhance a food blog. Antonio @seasonalityspices offered me a free sample of handcrafted organic Indian Curry. Instantly, I knew the dish I would prepare. One bite of mild and spicy chicken, enhanced with the creamy flavor of organic coconut, is all it took to turn ordinary chicken into a flavorful obsession. Don’t mind if I do. Thanks, Antonio.
COCONUT CURRY CHICKEN
Ingredients:
1 cup water
1 1/4 cup sweet rice
1 tablespoon olive oil
1 tablespoon vegetable oil
1 pound chicken tenders, cut into bite-size pieces
1/2 cup yellow onion, chopped
2 teaspoons curry powder
3/4 teaspoon sea salt
1/4 teaspoon black pepper
13.5-ounce can organic coconut milk
2 tablespoons tomato paste
1 cup sun-dried tomatoes in olive oil, chopped
Cilantro, for garnish
Instructions:
Combine water, sweet rice, and olive oil. Cook in a rice cooker according to directions. (Package rice may be substituted on a stovetop.) In a large skillet, warm vegetable oil over medium-high heat. Sauté chicken and onion until chicken is no longer pink and onions are transparent. Sprinkle chicken mixture with curry powder, sea salt, and black pepper. Stir in organic coconut milk and tomato paste. Bring to a boil. Reduce heat to simmer and cook 5 minutes or until thickened. Add sun-dried tomatoes. Cook 2-3 minutes longer. Serve with sticky rice. Garnish with fresh cilantro.
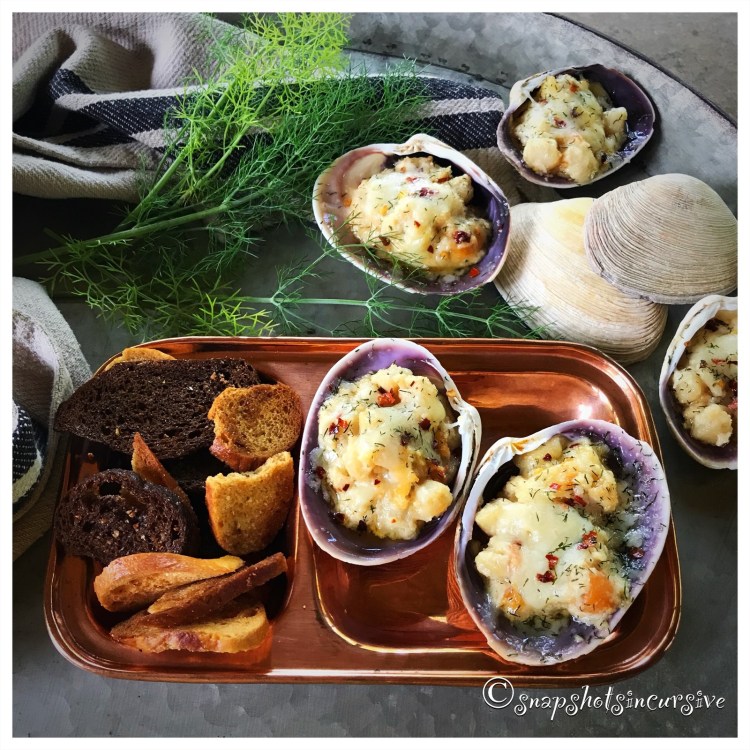
What’s Cooking in Gail’s Kitchen? Equal Measures: Broiled Bay Scallops! Tender and sweet, bay scallops are a miniature version of the large-size sea scallops. When sautéed in garlic butter and dill, with a light squeeze of lemon juice, the end result is a splendid appetizer. Be festive and serve them on a half shell.
BROILED BAY SCALLOPS
Ingredients:
1 tablespoon olive oil
1 tablespoon butter
1 clove garlic, minced
1 pound bay scallops
1/8 teaspoon red pepper flakes
1/8 teaspoon dill weed
1/4 teaspoon sea salt
1 teaspoon lemon juice
1 cup mayonnaise
1 cup parmesan cheese, grated
1/8 teaspoon garlic powder
Instructions:
Preheat oven to 350°. Warm olive oil and butter in a skillet over medium heat. Add garlic clove; sauté until fragrant, 2-3 minutes. Increase heat to medium-high, add scallops. Sprinkle with red pepper flakes, dill weed, and sea salt. Sauté until lightly browned. Squeeze lemon juice over all. Remove from heat. Combine mayonnaise, grated parmesan cheese, and garlic powder. Gently fold in bay scallops. Transfer mixture to a greased casserole dish or clam shells. Bake 20 minutes. Broil 3-4 minutes on High until tops are golden. Watch carefully. Remove from oven. Serve with bagel chips.

What’s Cooking in Gail’s Kitchen? Equal Measures: Astoria Salad! A classic salad that never loses its popularity, made famous when served at the Waldorf Astoria Hotel over a hundred years ago, gives you the flexibility of turning it into a family favorite. Feel free to add sweet raisins or chopped celery. Some even use yogurt in lieu of a mayonnaise dressing. Be creative, be adventurous, or be satisfied and try my version first.
ASTORIA SALAD
Ingredients:
1 cup mayonnaise
1 tablespoon sugar
2 red apples, cored and sliced
1 tablespoon lemon juice
1 cup green grapes, seedless and halved
1 cup walnuts, broken into pieces and toasted
1/2 teaspoon sea salt
Romaine lettuce, torn
Instructions:
Whisk together mayonnaise and sugar until blended. Set aside. Core and slice red apples. Gently toss in lemon juice. Combine apple slices, green grapes, and toasted walnuts. Coat mixture with mayonnaise dressing. Serve on a bed of romaine lettuce. Sprinkle with sea salt.

“The greatest glory never comes
from falling, but from rising
each time you fall.”
~ Clay Aiken

“You will enrich your life immeasurably
if you approach it with a sense of
wonder and discovery, and always
challenge yourself to try new things.”
~ Nate Berkus
