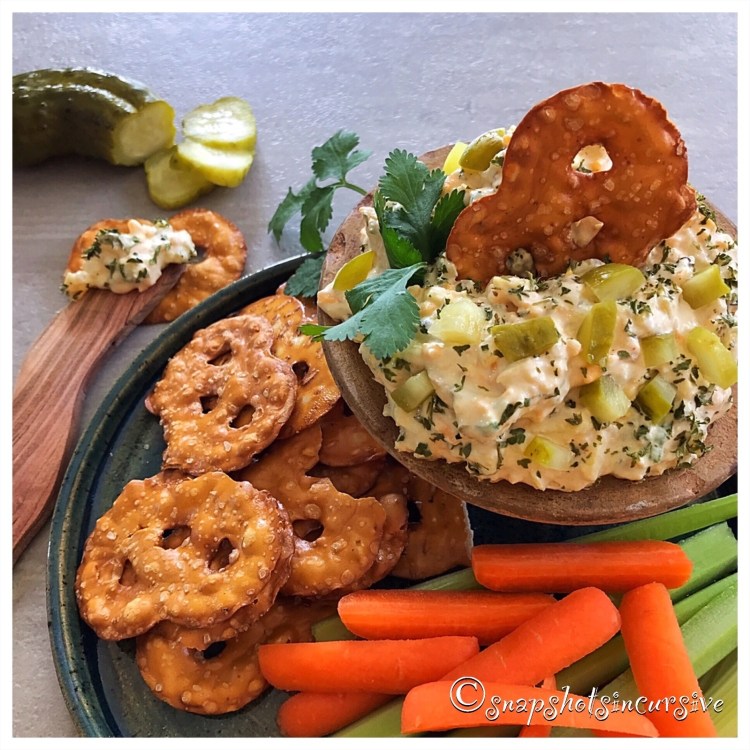
What’s Cooking in Gail’s Kitchen? Waste Not, Want Not: Jalapeño Celery Crack! I’m not ashamed to say I’ve found a new addiction. Hence the name. By the time I wrote this post, I had already made this recipe 3 times and shared it once with a close friend. Jalapeño Celery Crack has a spicy creaminess that screams, “just one more bite”. When I ran out of celery, I discovered it tastes amazing on tortilla corn chips. Sometimes you need an appetizer. Sometimes you want a snack. And sometimes making it part of a meal is justification enough. Perhaps you should try it. You know you want some.
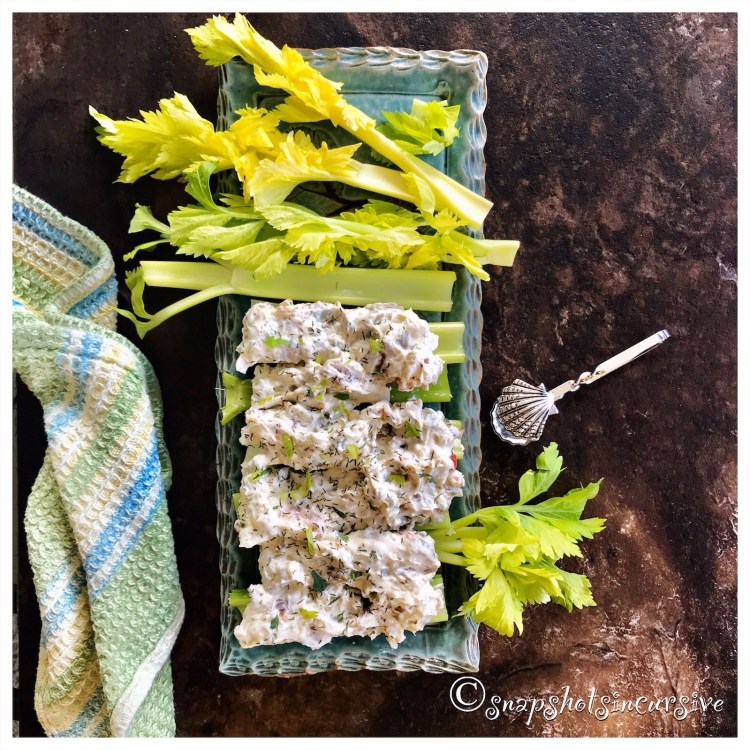
JALAPEÑO CELERY CRACK
Ingredients:
1 bunch of celery, cut into 4” pieces
8-ounce cream cheese, room temperature
3 tablespoons mayonnaise
1/4 teaspoon sea salt
1/4 teaspoon dill
1/2 teaspoon onion powder
1/2 teaspoon garlic powder
1/2 teaspoon parsley
2/3 cup pickled jalapeños, chopped
1 tablespoon pickled jalapeño juice
2 strips of applewood smoked bacon, cooked and crumbled
Instructions:
Cut celery into 4” pieces. Set aside.
Combine softened cream cheese and mayonnaise in a medium bowl. Mix until smooth. Add sea salt, dill, onion powder, garlic powder, and parsley. Mix thoroughly. Add chopped jalapeños, pickled jalapeño juice, and crumbled bacon. Stir well to blend. Refrigerate one hour. Arrange celery stalks on a platter. Fill with jalapeño mixture. Garnish with extra dill. Serve.