Yarrow Bowtie Pasta

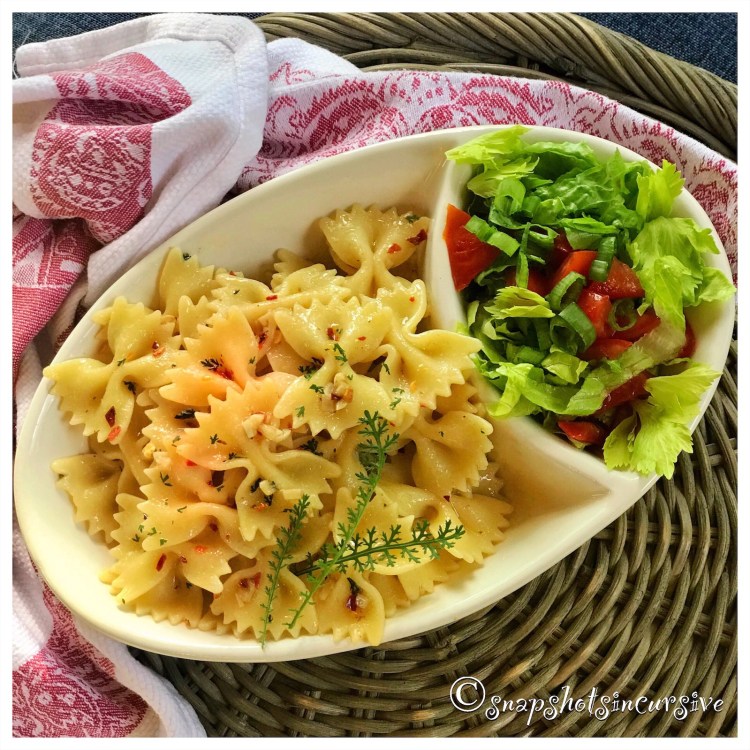
What’s Cooking in Gail’s Kitchen? Splurge-Worthy Goodness: Yarrow Bowtie Pasta! Every time I passed by my front porch, I got a pleasant whiff of licorice. It seemed to come and go, but I couldn’t figure out which plant produced it. Imagine my delight when I discovered the previous owners had planted the decorative flowering herb, Yarrow. I pinched off a fern-like leaf, rubbed it between my fingers, and bingo, that was the familiar scent. When it comes to cooking, a little yarrow goes a long way. Because the leaves are feathery and soft, high heat will destroy the flavor. It is very important to wait until the dish is prepared before utilizing the essence of yarrow. The taste is so distinct, it must be used sparingly.

YARROW BOWTIE PASTA

Ingredients:

1 teaspoon yarrow leaves, chopped

1/2 teaspoon red pepper flakes

4 ounce dried bowtie pasta

1 teaspoon kosher salt

1 tablespoon olive oil

1 tablespoon truffle oil

2 tablespoons garlic, chopped

2 anchovy fillets in oil, rinsed and chopped

2 tablespoons dry white wine

Parmesan cheese, for garnish

Instructions:

Combine yarrow leaves and red pepper flakes. Mince together. Set aside. Cook bowtie pasta in salt water, according to package directions. While pasta is cooking, warm olive oil and truffle in a skillet on low heat. Add chopped garlic and anchovies; cook until fragrant and lightly browned. Do not burn. Remove pan from heat; swirl to cool. Add dry white wine to pan. When pasta is done, drain well. Add pasta to skillet. Toss to coat, cooking on low heat for one minute. Remove from heat; add yarrow mixture. Toss to incorporate. Transfer pasta to individual serving bowls. Garnish with fresh parmesan cheese. Serve with a tossed garden salad.
Original Pistachio Party Ball

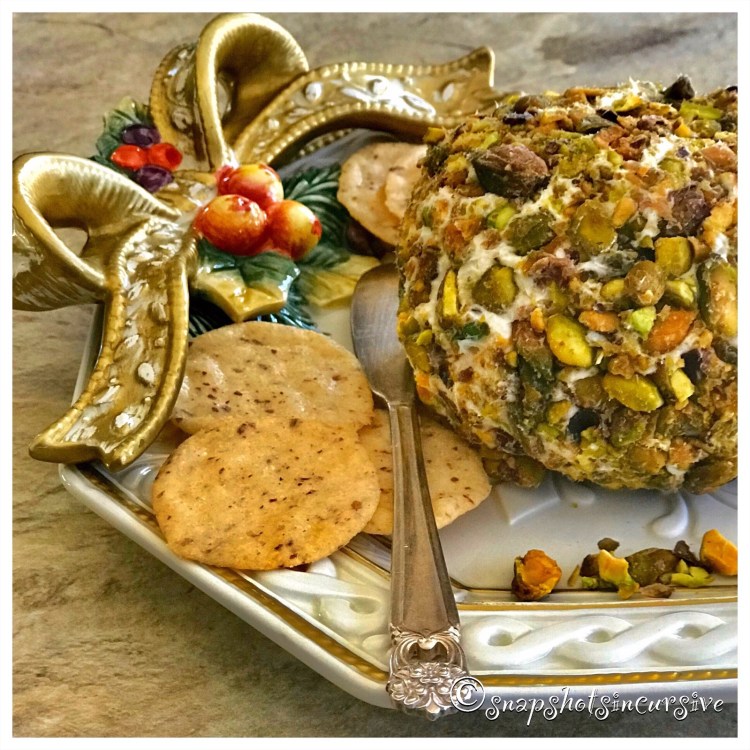
What’s Cooking in Gail’s Kitchen? Splurge-Worthy Goodness: Original Pistachio Party Ball! Nothing says par-tay like a holiday cheese ball. Instead of picking one up at the grocery store this year, why not surprise the family and make something a little different. Pistachios tend to be shoved aside in favor of walnuts and pecans, mostly due to their cost. But I guarantee you, people will sit up and take notice of them embedded in this party cheese ball. A little goes a long way, especially when rolled on the outside of the cheese ball. For those who enjoy the experience of cracking the shell to pluck out the pistachio, you not only get to nibble as you crack, you also justify the savings involved over the cost of pistachios without shells. Now there’s a thought worth considering.

ORIGINAL PISTACHIO PARTY BALL

Ingredients:

8 ounces Neufchâtel cheese, room temperature

4 tablespoons unsalted butter, softened

1 teaspoon zesty Italian salad dressing dry mix

1 teaspoon Worcestershire sauce

1/2 teaspoon red pepper flakes

1 cup extra sharp cheddar cheese, shredded

1 cup pistachios, roughly chopped

Instructions:

In a bowl, cream together Neufchâtel cheese and unsalted butter until smooth. Sprinkle in zesty Italian dry mix. Mix well. Add Worcestershire sauce and red pepper flakes. Fold in sharp cheddar cheese. Stir until well combined. Place a sheet of plastic wrap on the counter. Layer with chopped pistachio nuts. Transfer cheese mixture onto the nuts. Wearing disposable gloves, form the cheese mixture into a ball, turning to cover each side with chopped nuts. When completely covered, wrap the pistachio cheese ball in a clean piece of plastic wrap. Refrigerate at least one hour to intensify flavors. Serve with assorted crackers.

Kiwi Dessert Pizza

What’s Cooking in Gail’s Kitchen? Splurge-Worthy Goodness: Kiwi Dessert Pizza! What do you get when you cross a bakery crust with a sweet and creamy fruit topping? At first glance, it appears as though frosting is smeared over the mini flatbread crust. It kinda is. The secret is cream cheese with a hint of sweetened coconut. The rest is simply fresh fruit…until you detect the toasted coconut flakes. Now it’s tough to decide if this dessert is a cookie or a fruit tart. Either way, it’s a delightful change from traditional pies or standard cakes. Not too sweet, not too bland. It’s just right.

KIWI DESSERT PIZZA

Ingredients:

2 mini naan prepared flatbreads

4 ounces cream cheese

2 tablespoons sweetened condensed milk

1 teaspoon coconut syrup

2 strawberries, tops removed and quartered

1 kiwi, peeled, sliced, and quartered

3 sliced peaches, cubed

10 blueberries, divided

Toasted coconut, for garnish

Lemon thyme, for garnish

Instructions:

Remove naan from packaging. Spritz with water before heating. Place in toaster on medium setting. Transfer to a platter. In a bowl, combine cream cheese, sweetened condensed milk, and coconut syrup. Stir until smooth. Spread over surface of the naan. Arrange strawberries, kiwi, peaches, and blueberries. Garnish with toasted coconut and lemon thyme.

Heirloom Tomato Cheese Tart

What’s Cooking in Gail’s Kitchen? Splurge-Worthy Goodness: Heirloom Tomato Cheese Tart! The secret is in the cheese. I’m a fanatic when it comes to gourmet cheeses. I like the idea of something different and can often imagine the skilled cheesemakers concocting special blends with creamy textures, dried herbs, buttery hints, and natural aging. This cheese in particular has the qualities of cheddar and gruyère giving it a complex buttery nut flavor. Is it any wonder the earthy garden tomatoes pair so well with it. Some might say it’s on its way to becoming a time-honored tradition.

HEIRLOOM TOMATO CHEESE TART

Ingredients:

2 heirloom tomatoes, sliced

1 cup cherry tomatoes, halved

1 tablespoon kosher salt

I sheet frozen puff pastry, thawed

1/2 pound gourmet pesto cheese, grated

2 tablespoons fresh oregano, chopped

Olive oil, for drizzling

Instructions:

Arrange tomatoes in a single layer on a baking sheet lined with paper towels. Sprinkle with kosher salt. Allow to rest for 20 minutes to release juices. Pat dry. Preheat oven to 400°. On a lightly floured surface, roll out puff pastry into a 10”x13” rectangle. Transfer dough to a parchment paper-lined baking sheet. Using a paring knife, lightly trace a shallow border one inch from the edge. Do not cut through. Prick the inner rectangle all over with a fork. Refrigerate 15 minutes. Bake until lightly golden, 12-15 minutes. Remove from oven. Scatter cheese over dough, stopping at the perforated edge. Arrange large and small tomatoes over top. Scatter chopped oregano over tomatoes. Drizzle with olive oil. Bake 20-30 minutes. Serve immediately.

Decadent Chocolate Cheesecake Cookies

What’s Cooking in Gail’s Kitchen? Splurge-Worthy Goodness: Decadent Chocolate Cheesecake Cookies! Mention the word “cheesecake” and wait for an automatic human response. It might be a low sensuous moan or perhaps a catch of breath. Either way, the reaction is suggestive of a rewarding self-indulgence. Add chocolate for a superb combination. Now you can make your own bite-size cheesecake cookie that is worthy of bakery status. The cookie becomes a soft crust for the creamy vanilla filling. Can you imagine? If so, you’re only a few steps away from making it a dream-come-true.

DECADENT CHOCOLATE CHEESECAKE COOKIES

Ingredients:

1/4 cup butter, room temperature

1/4 cup vegetable oil

1 egg

1 teaspoon vanilla extract

1/4 teaspoon kosher salt

18-ounce box Dark Chocolate Fudge Cake mix

Powdered sugar, for dusting

Fresh strawberries, for garnish

Ingredients for Filling:

8-ounces cream cheese, softened

1/2 cup sugar

1 egg

1/2 teaspoon vanilla extract

Instructions:

In a large bowl, beat butter, vegetable oil, egg, and vanilla extract until smooth and creamy. Add kosher salt and prepared chocolate cake mix. Thoroughly blend together, scraping sides, as needed. Refrigerate dough for one hour. While cookie dough is chilling, beat cream cheese, sugar, egg, and vanilla extract until smooth. Set aside. Preheat oven to 350°. Remove chilled cookie dough from the refrigerator. Form tablespoon-size portions into a ball. Make an indentation in the center. Place onto ungreased baking sheet. Fill with one teaspoon of cream cheese filling. Repeat with remaining dough and filling. Bake until edges are set, about 12 minutes. Allow cookies to cool completely, about 20 minutes, before removing from baking sheet. Transfer cookies to a wire rack. Dust with powdered sugar. Serve with fresh strawberries.

Artichoke Chicken Flatbread

What’s Cooking in Gail’s Kitchen? Splurge-Worthy Goodness: Artichoke Chicken Flatbread! Marinated artichoke hearts are a luxury worth savoring. Let me repeat myself: Marinated artichoke hearts are a luxury worth savoring. Now that I’ve said it twice, tuck those words into your memory banks. The next time you go shopping for groceries, grab a jar off the shelf. Don’t worry, it won’t go to waste. For some reason, artichokes taste like a summer day, standing barefoot under a canopy of shade trees overlooking a babbling brook. Invigorating. Vivacious. And stimulating. Think about all the ways you can serve artichoke hearts: in dips, as appetizers, on charcuterie boards, roasted with veggies, or straight out of the jar. Just wait until you try them on flatbread.

ARTICHOKE CHICKEN FLATBREAD

Ingredients:

1 prepared flatbread

1 tablespoon olive oil

1 tablespoon cornmeal

1/3 cup prepared ranch dressing

1 1/2 cup Italian cheeses, shredded

1/2 cup grilled chicken strips, precooked and cut into chunks

1/3 cup marinated artichoke hearts, chopped

2 tablespoons red pepper, chopped

2 tablespoons green pepper, chopped

2 tablespoons sweet onion, chopped

Fresh oregano leaves, for garnish

Instructions:

Preheat oven to 400°. Brush olive oil on the bottom of the flatbread. Sprinkle with cornmeal. Bake on a pizza stone for 5 minutes. Spread ranch dressing over top of flatbread. Sprinkle with one cup of shredded Italian cheeses. Arrange grilled chicken chunks, marinated artichoke hearts, red peppers, green peppers, and sweet onions over all. Add remaining cheese. Bake 20 minutes or until cheese is melted and deeply golden around the edges. Garnish with fresh oregano before serving.

The Sherman in Batesville, Indiana

Dining Outside the Home: The Sherman in Batesville, Indiana. When a stay-cation makes sense to remain close to home, wander down the road a piece to The Sherman. Nestled in the rolling hills of southern Indiana, step over the threshold of this quaint inn and eatery. You may be taken aback by the lively music and intermittent laughter coming from the Black Forest Bar. Peek around the corner. Rub your eyes and look again. The deep dark interior almost resembles a magical forest where fairy tales come true. Do the walls have eyes? Enter if you dare. Check out that giant pretzel. The couple with their heads huddled together are nibbling on it as though they were Hänsel and Gretel. This is just one of many appetizers for dipping pleasure with gourmet mustards and bier cheese. The crafted cocktails and extensive beer selection complement house-baked specialties with Bavarian leanings. Go early, stay awhile, and above all…share dishes. The German-style food is so spot on, you’ll want to eat your fill…and then some.

Wheel of Camembert

What’s Cooking in Gail’s Kitchen? Elevated Edibles: Wheel of Camembert! To eat or not to eat the rind, that is the question. The answer? It’s totally up to you. As a general rule, the natural rinds of soft cheeses like Brie and Camembert are safe to eat. Some people can’t get past the idea that the rind looks “moldy”, simply because it appears white and fluffy. That essence is called “bloomy”, which sounds much more appealing in my opinion. If you’re a mushroom-lover, you may detect an earthy aroma that delivers a lusty taste. Bottom line: if it weren’t for the rind, the interior wouldn’t be nearly as creamy and buttery as it is. My advice for first-timers? Give it a try. With the luscious fruit, crunchy nuts, and raw honey you may find yourself giving it a fair chance.

WHEEL OF CAMEMBERT

Ingredients:

1 wheel of Camembert cheese, with wrapping removed and discarded

1-2 tablespoons raspberry jam, warmed

1/2 cup red raspberries

2 tablespoons Tupelo raw honey

2 tablespoons pistachios, roughly chopped

Multigrain baked crackers

Instructions:

Preheat oven to 350°. Line a baking sheet with parchment paper. Place the wheel of Camembert cheese onto prepared pan. Bake for 12-15 minutes, or until the top and sides of the rind feel soft to the touch. Another sign is when areas of gooey cheese begin to ooze through the rind. Meanwhile, warm the raspberry jam 30 seconds in a microwave-safe dish. Stir. Gently add the raspberries; toss to coat. Transfer the baked Camembert cheese to a rimmed plate. Top the cheese wheel with raspberry compote. Drizzle raw honey over all. Sprinkle with chopped pistachios. Serve warm with multigrain crackers.

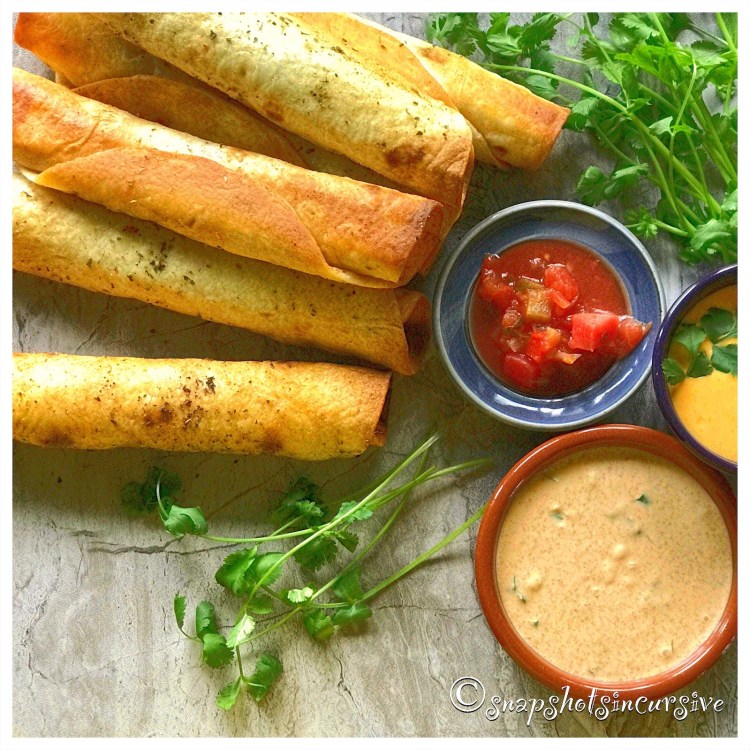
Queso Chicken Flautas

What’s Cooking in Gail’s Kitchen? Elevated Edibles: Queso Chicken Flautas! Are you as torn between corn tortillas and flour tortillas as I am? There are days, and certain dishes, where nothing but corn will do: tamales, taquitos, enchiladas, tacos, and chips. Corn tortillas, generally, are much smaller and easier to hold. When they are soaked in sauce, they are more pliable and suitable for baking. If you like the taste of toasted corn as well as the chewy texture, corn tortillas are for you. The same applies to flour tortillas: quesadillas, flautas, fajitas, chimichangas, and burritos. Flour tortillas are bigger, not to mention softer for folding. You already know this if you’ve ever eaten a monster burrito or ginormous chimichanga. One is baked, the latter is fried. Today’s recipe features the sturdiness of a flour tortilla to hold the juicy chicken and melted cheese filling without turning soggy or falling apart. What a delicious dilemma.

QUESO CHICKEN FLAUTAS

Ingredients for Herbed Sour Cream:

8 ounces sour cream

1 tablespoon honey

1 tablespoon lime juice

1/4 teaspoon sea salt

1/4 cup cilantro leaves, chopped

2 tablespoons green onions, chopped

Ingredients:

1 cup cooked chicken, shredded

1 cup Mexican cheese blend, shredded

4 ounces cream cheese, softened

4.5 ounce can green chiles, drained and diced

1 envelope taco seasoning mix, less 1 tablespoon for remaining recipe

12-count flour tortillas

2 tablespoons vegetable oil

15-ounce jar queso cheese dip, warmed

Instructions:

To make the herbed sour cream, combine sour cream, honey, lime juice, and sea salt in a bowl. Stir until smooth. Gently fold in chopped cilantro leaves and green onions. Cover and refrigerate until ready to serve. In a medium bowl, combine shredded chicken, Mexican cheese blend, cream cheese, and diced green chilies. Sprinkle with taco seasoning mix (less 1 tablespoon of mix). Stir thoroughly. Set aside. In a small dish, whisk vegetable oil with reserved taco seasoning mix. Set aside. Preheat oven to 425°. Spray a baking sheet with nonstick oil. To assemble flautas, place 1/4 cup chicken mixture on bottom third of each flour tortilla. Roll up tightly, leaving ends open. Place seam-side down on prepared baking sheet. Brush filled chicken flautas with seasoned oil mixture. Repeat until all tortillas are filled. Bake 10-12 minutes, or until flautas are crispy. Serve with warmed queso cheese dip, herbed sour cream, and chunky salsa.