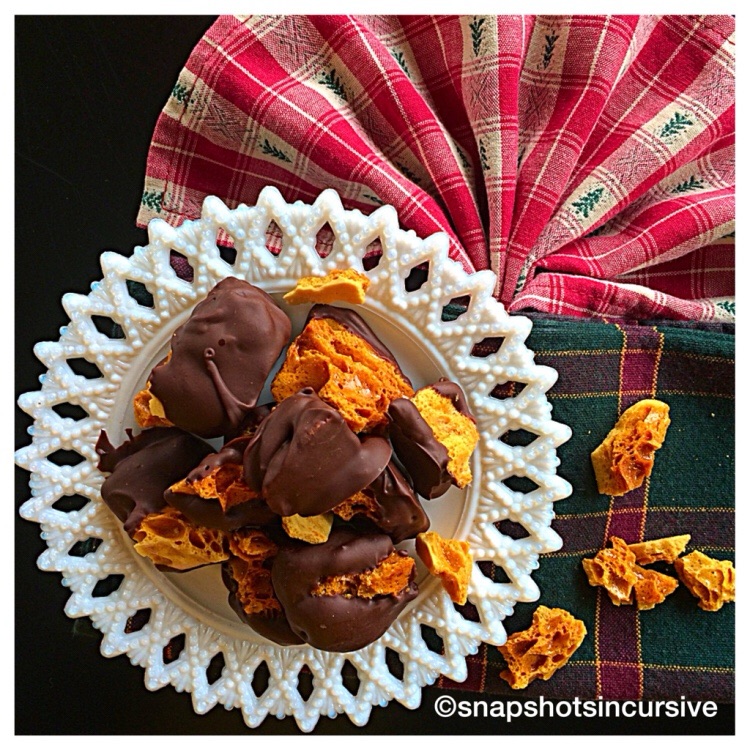
What’s Cooking in Gail’s Kitchen? Appetizers to Desserts: Sugar-Spun Sponge Candy! Take a walk down Memory Lane. Wonderful childhood memories come flooding back with this old-time classic favorite. You will seldom find it in candy stores unless you happen to stumble upon a family-owned place where the bell above the doorjamb jingles as you cross the threshold. Once inside, the glass showcase will feature this honeycomb-type toffee, golden in color, nestled inside a rich chocolate covering. It’s crisp and air-filled with a sponge-like appearance. Once you’ve had it, the memories linger on. Spoil yourself and make up a batch. Just like magic, it can be whipped up in about 15 minutes. Carry on the tradition, or begin your own this year.
SUGAR-SPUN SPONGE CANDY
Ingredients:
1 cup sugar
1 cup dark corn syrup
1 tablespoon vinegar
1 tablespoon baking soda
2 cups semi-sweet chocolate morsels
3 teaspoons vegetable oil
Instructions:
Combine sugar, corn syrup, and vinegar in a heavy-bottomed 3-quart pan. Cook over medium heat, stirring until sugar dissolves. Continue cooking about 10 minutes until mixture reaches 300° on a candy thermometer, or a drop of syrup becomes brittle in a glass of cold water. Immediately remove pan from heat and sift in baking soda. Mixture will foam up madly. Stir gently but thoroughly. Pour into well-buttered 9″ square pan. Do not spread. Let cool. Remove from pan and break into pieces over a large bowl. Sugary crumbs will appear all over the counter if the bowl is too small.
Instructions for Chocolate Coating:
Pour chocolate morsels into a glass bowl. Add 3 teaspoons of vegetable oil. Stir. Place in microwave for 5 minutes on 30% power. Halfway through, stir to blend smooth. Do not over cook. Keep warm on the stovetop over a double boiler. Dip each piece of sponge candy into chocolate. Coat completely or halfway depending on preference. The honeycomb and chocolate look appealing, in my opinion. Place pieces on waxed paper lined sheet pan. Chill to set.