Eating My Way Through the Holidays! Yuletide Favs: “Quazy” Carrot Cake!

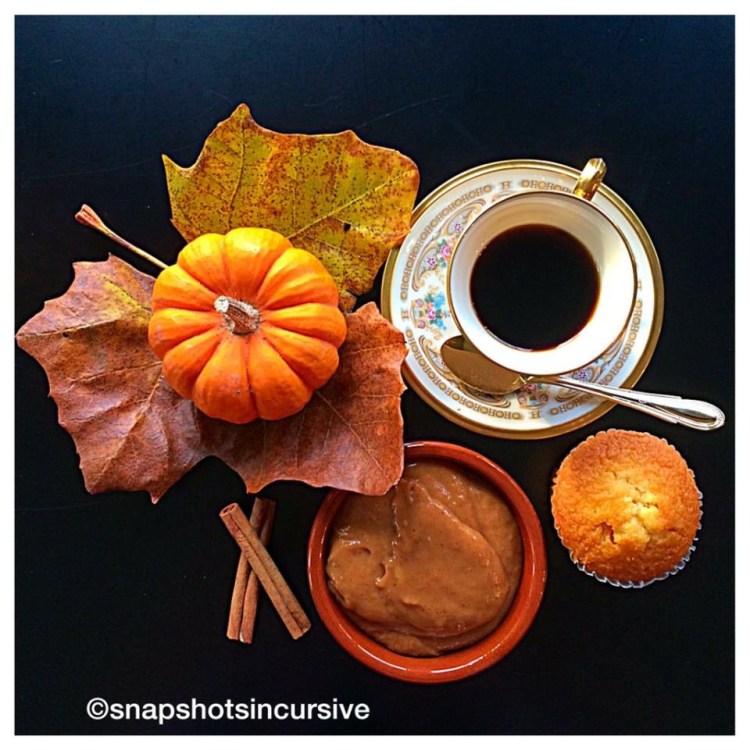
Eating My Way Through the Holidays! Yuletide Favs: Quazy Carrot Cake! “What’s up, Doc?” is something we’ve all heard Bugs Bunny say more than once. You may find yourself asking the same question when you take a bite of this tasty version of Carrot Cake. It’s loaded with fresh carrots, pineapple tidbits, and chopped pecans. The crowning moment comes when you smack your lips together over the wonderful cream cheese icing. I have seen expressions of jubilation over this award-winning dessert. Treat yourself to something special this weekend.

QUAZY CARROT CAKE

Ingredients:

2 cups flour

2 cups sugar

1 teaspoon baking soda

2 teaspoons baking powder

2 teaspoons cinnamon

1 1/4 cups vegetable oil

4 eggs

3 cups carrots, grated

1 cup crushed pineapple, drained

1 cup pecans, chopped

Ingredients for Icing:

1/2 cup butter, softened

8 ounces Neufchâtel cheese, softened

3 1/2 cups powdered sugar

1 teaspoon vanilla

Instructions:

Preheat oven to 350°. Spray a 9″x13″ pan with nonstick oil. Combine flour, sugar, baking soda, baking powder, and cinnamon. Mix well. Add oil, eggs, carrots, pineapple, and nuts. Beat for 2 minutes on medium speed. Transfer to baking dish. Bake for 45 minutes or until done. Meanwhile, cream together the butter and Neufchâtel cheese. Add powdered sugar and vanilla. Beat until smooth and creamy. When cake is cool, top with cream cheese icing. Garnish with a pecan half.

Eating My Way Through the Holidays! Yuletide Favs: Judy’s Pumpkin Sea Salt Caramel Sauce!

Eating My Way Through the Holidays! Yuletide Favs: Judy’s Pumpkin Sea Salt Caramel Sauce! I always get excited when I receive the gift of food. My friend, Judy, thrilled me beyond measure when she shared this treat from her kitchen. It’s the perfect combination of sea salt caramel and pumpkin purée. It not only transforms a cup of coffee into a pumpkin spice addiction, but it also tastes incredible on a breakfast muffin. If you ask my husband, he’ll say you can eat it over ice cream by the spoonful.

JUDY’S PUMPKIN SEA SALT CARAMEL SAUCE

Ingredients:

1 cup sugar

1 tablespoon water

3/4 cup heavy cream, room temperature

4 tablespoons unsalted butter, melted

1/3 cup pumpkin purée

1/2 teaspoon cinnamon

1/8 teaspoon nutmeg

1/4 teaspoon sea salt

1 teaspoon vanilla

Instructions:

In a 2-quart heavy-bottomed pan over medium-low heat, combine sugar and water. Bring to a boil, stirring often to avoid scorching. Continue cooking until sugar turns light amber in color and all sugar crystals have dissolved, about 8-10 minutes. Remove from heat. Add butter and mix well. Change utensils to a heat-resistant whisk and quickly whisk in the cream and pumpkin. Lastly, add cinnamon, nutmeg, sea salt, and vanilla. Whisk until smooth, removing all lumps. Transfer to a jar. Cool at room temperature, seal, and store in the refrigerator.

Eating My Way Through the Holidays: Yuletide Favs!

Eating My Way Through the Holidays: Yuletide Favs! Good times naturally accompany good food. Every family has its favorites. Some indulge in time-worn traditions while others enjoy modern classics. As you embrace the holidays with companionship, nostalgia, food, or festivities, celebrate the spirit of the season. In the next few weeks, join me as I share favorite foods as well as healthy options. Bring it home for the holidays with Yuletide Favs! Follow me on Instagram @gail_dorna or check in with me on Twitter @Snapshotsincursive. 

Eating My Way Through the Alphabet: Letter X

What’s Cooking in Gail’s Kitchen? The Chow Down: Xmas Pizzelle Cookies! I’m obsessed with food that has eye appeal. That’s one reason I was drawn to pizzelles, a traditional Italian waffle cookie. I could make you crazy by telling you we’re going to make them from scratch, but hey, my time is in high demand just like yours. Besides, since I don’t own a pizzelle iron, sometimes it’s better to leave things to an expert. I’m here today to save you time when someone suggests a Holiday Cookie Exchange. Pick up a package of Classic Italian Pizzelles on your way home from work, dip the cookies in melted chocolate, and sprinkle with nuts. You can thank me later when you’re sitting back relaxing with a glass of wine. 
XMAS PIZZELLE COOKIES 
Ingredients:

7-ounce package Vanilla Flavored Pizzelle Cookies

2 cups semisweet chocolate chips

1 tablespoon vegetable oil

4 ounces pistachios, chopped
Instructions:

Line a baking sheet with waxed paper. In a microwave-safe bowl, combine semisweet chocolate chips and vegetable oil. Heat in microwave on 50% setting for 30 seconds. Stir. Repeat in 30-second intervals until melted. Stir until smooth. Dip half of each pizzelle cookie into melted chocolate. Sprinkle both sides with chopped pistachios. Place on baking sheet. Refrigerate for 30 minutes or until set. 

Eating My Way Through the Alphabet: Letter U

What’s Cooking in Gail’s Kitchen? The Chow Down: Unicorn Holiday Bark! Everyone remembers a childhood of mythical creatures, especially the unicorn which resembled a horse with a pointed horn spiraling out of its forehead. Some believed it had magical powers in addition to being a symbol of purity and grace. Only a virgin had the power to tame the unicorn, according to art from the Middle Ages now hanging on museum walls. Today the thought of unicorns make us happy. Perhaps they represent childhood dreams, or wishes, filled with hope for a future. It should be no surprise that pink swirls of white chocolate and candy glitter in sparkly hues appear in food to further those good feelings. Think of Unicorn Holiday Bark for your next festive occasion. Kid-friendly, husband-approved. 
UNICORN HOLIDAY BARK
Ingredients:

2 pounds white chocolate chips

Food coloring of choice

1 tablespoon rainbow sprinkles

1 tablespoon glitter sprinkles 

1 tablespoon candy pearls
Instructions:

Line a baking sheet with waxed paper. Depending on how many colors you choose (I used 3), place 1/3 cup white chocolate chips per color in separate microwave-safe bowls. Warm on Low setting for 15 second intervals in microwave, stirring often. Continue until chips are melted. Add food coloring to desired tint. Hint: One drop of red will produce a pastel pink. Prepare tinted chocolate first before finishing with the remaining plain white chocolate. Once the white chocolate is melted, spread it onto the baking sheet. Smooth into an even layer, approximately 1/4” thick. Working quickly, dot tinted colors over the white chocolate in a random pattern. Take a wooden skewer, or toothpick, and drag it through the colors creating swirls. Next, scatter the rainbow sprinkles, glitter sprinkles, and candy pearls on top. Refrigerate baking sheet for 30 minutes, or until firm. Once set, break the bark into pieces, reserving a curved edge for the unicorn’s horn. Let the magic begin!

Eating My Way Through the Alphabet: Letter M

What’s Cooking in Gail’s Kitchen? The Chow Down: Marble Loaf Quick Bread! When I was a little girl one of my favorite memories was making marble cake from a box mix. Not necessarily the ease of preparation, but the fact that I could be very artistic with the chocolate and vanilla swirls. There’s no way to get it wrong. And it’s pretty. Today’s version is a buttery classic with a moist center using plain yogurt. Just remember to have the melted butter, eggs, and yogurt at room temperature. If not, they won’t blend properly and you may end up with slightly cooked eggs and chunky batter. Nobody wants that, especially the one who licks the bowl. 
MARBLE LOAF QUICK BREAD
Ingredients:

2 cups flour

3/4 cup sugar

2 teaspoons baking powder 

1/2 teaspoon baking soda 

1/4 teaspoon sea salt

2 eggs, room temperature 

2 teaspoons vanilla extract 

1/2 cup butter, melted 

1 cup Greek yogurt, room temperature 

2 tablespoons cocoa powder 
Instructions:

Preheat oven to 350°. Spray a loaf pan with nonstick oil. In a large bowl, combine flour, sugar, baking powder, baking soda, and sea salt. Mix well. Set aside. In another bowl, combine the eggs, vanilla extract, butter, and Greek yogurt. Whisk until blended. Pour the wet ingredients into the dry ingredients. Stir just until combined. Do not over mix. Pour half the batter into a medium bowl. Gently fold in cocoa powder until mixed. Alternate spoonfuls of plain batter and cocoa batter into the prepared loaf pan. Take a table knife and swirl the two mixtures together. Bake 45-55 minutes, or until a cake tester comes out clean. Do not burn. Remove from oven and cool slightly on a wire rack before removing from pan. 

Eating My Way Through the Alphabet: Letter J

What’s Cooking in Gail’s Kitchen? The Chow Down: Java Chip Cookies! Anyone will tell you the aroma of coffee triggers good feelings. If you don’t believe me, check out the neighborhood coffee shops and you’ll find a local place where people hang out. It’s not just the free Wi-Fi either. Coffee is one of the most popular beverages around, especially now with intense flavorings topped with a mound of whipped cream. Transform the blend of coffee and sugar into a cookie, charged with caffeine, and you’ll be as popular as the Pied Piper. People will follow you anywhere!
JAVA CHIP COOKIES
Ingredients:

1 cup butter, room temperature 

1 1/2 cups sugar

1/2 cup brown sugar, firmly packed

3 tablespoons espresso instant coffee

1 tablespoon vanilla extract 

2 eggs

3 1/2 cups flour

1/2 teaspoon baking soda

1/2 teaspoon sea salt

1 cup toffee bits

1/4 cup chocolate covered espresso beans, roughly chopped 

1/4 cup mini chocolate chips
Instructions:

Preheat oven to 350°. Line two baking sheets with parchment paper. Set aside. In a food processor beat butter, sugar, brown sugar, espresso instant coffee, and vanilla extract until fluffy. Add eggs, one at a time, until blended. Combine flour, baking soda, and sea salt in a separate bowl. Gradually add flour mixture to butter mixture until it forms a dough. Fold in toffee bits, chopped espresso beans, and mini chocolate chips. Chill dough slightly. Using a melon ball scoop, drop cookie dough onto a baking sheet. Bake 10-12 minutes. Do not burn. Remove from oven. Let cool for 2 minutes. Dredge java chip cookies in sugar, if desired, before transferring them to a wire rack. Repeat with remaining dough. Yield: 3 dozen, large cookies. 

Eating My Way Through the Alphabet: Letter H

What’s Cooking in Gail’s Kitchen? The Chow Down: Hawaiian Crunch PB Bars! When I asked my grandson what his favorite food was, he shrugged his shoulders and said, “That’s easy, Nana. It’s peanut butter.” It was all I needed to know to head to my kitchen to prepare something special for him for the weekend. By twitching things up a bit with Hawaiian shortbread cookies, the results produced an amazing crunch that teamed well with the hazelnut spread frosting. How’s that for double coverage? His opinion, you wonder? Being a teenager, a thumb’s up was approval enough. 
HAWAIIAN CRUNCH PB BARS
Ingredients:

12 ounces Hawaiian banzai furikake shortbread cookies or vanilla wafers

1 cup butter, room temperature 

1 cup natural peanut butter, chunky

2 cups powdered sugar

12 ounces mini semisweet chocolate chips

13 ounces hazelnut cocoa spread

1/2 cup honey roasted peanuts, chopped 
Instructions:

Pulse cookies in a food processor until crumbly. Set aside. Spray a 9”x13” pan with nonstick oil. Combine butter and natural chunky peanut butter until smooth. Gradually add powdered sugar until blended. Next fold in cookie crumbs and mini chocolate chips. Mix to combine. Spread evenly in the prepared pan. Warm hazelnut spread in a microwave until it is easy to spread. Cover the peanut butter layer completely. Sprinkle with chopped honey roasted peanuts. Refrigerate one hour. Cut into squares. Store in the refrigerator until ready to serve. 

Eating My Way Through the Alphabet: Letter B

What’s Cooking in Gail’s Kitchen? The Chow Down: Buttered Plum Galette! You don’t have to be a perfectionist to create the perfect galette. The whole idea is to make it appear rustic and charming. By forming an irregular pie crust, it conjures images of the bucolic countryside we often yearn for in an unpolished way. This is how plain country kitchens capture that homey feeling. You can, too. Indeed, the Buttered Plum Galette is as delicious as it sounds. 
BUTTERED PLUM GALETTE 
Ingredients for Crust:

1/3 cup plus 1 tablespoon butter, cold

1 cup flour

1/2 teaspoon sea salt

2 tablespoons ice water
Ingredients for Plum Filling:

4 medium-size plums, stone removed and sliced thin

1/3-1/2 cup mulberries, or blackberries 

Scant lemon juice

1/4 cup sugar

1/4 teaspoon nutmeg

1/4 teaspoon cinnamon 

1/8 teaspoon cardamom 

1/3 cup plum jam, slightly warmed

3 tablespoons butter

1 egg yolk
Instructions:

Recipe makes two individual galettes. Preheat oven to 425°. Using a food processor, pulse cold butter, flour, and salt to the size of small peas. Sprinkle in ice water one tablespoon at a time until dough forms a ball. Wrap the dough in plastic wrap and refrigerate for 1/2 hour. Remove wrap and place dough on a lightly floured surface. Cut in half. Roll each half into an 8” circle. Place on a parchment-lined baking sheet. Beginning in the center, spiral plums like a fan. Be sure to leave a border. Top with berries. Fold edges of dough toward the center, creating a rustic crust. Press gently to seal. Repeat for second galette. Sprinkle fruit with lemon juice. Cover fruit with sugar, nutmeg, cinnamon, and cardamom. Spread plum jam over fruit. Dot with butter. Whisk together egg yolk and a little water. Brush the egg wash along the edges of the dough. Bake 10 minutes. Reduce oven temperature to 350° but do not remove galettes. Bake an additional 45 minutes until lightly browned. Transfer the buttered plum galettes from the baking sheet by lifting with the parchment paper. Cool on wire rack to keep the bottoms from getting soggy. Serve warm with ice cream or whipped cream.