Prime Rib Dinner Salad

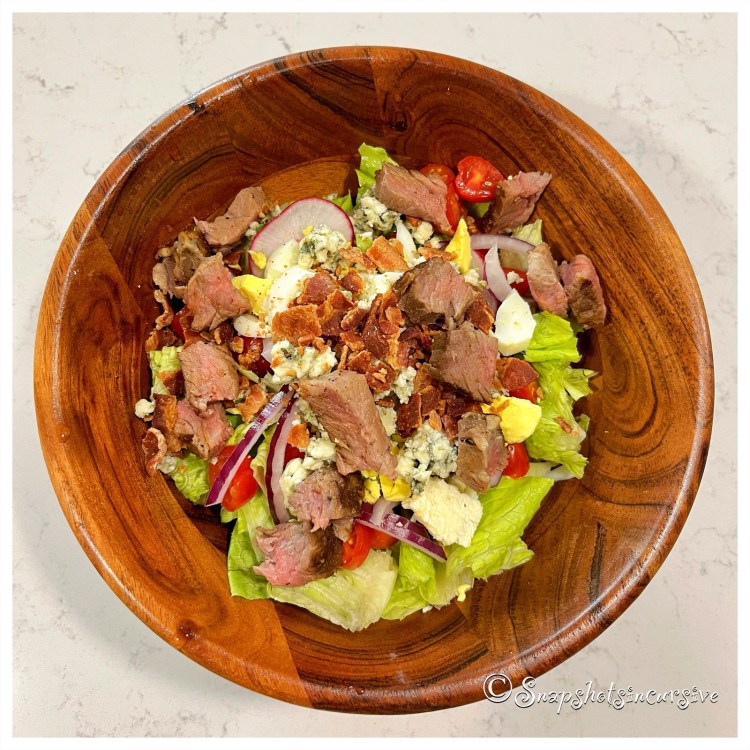
What’s Cooking in Gail’s Kitchen? Time To Eat: Prime Rib Dinner Salad! Have you ever noticed when you order a meal salad, the waiter asks if you want to add protein to that? Somewhere down the line the “Great Wizard” of salad creation decided it was time to crank up the price by enticing customers with “added protein”. Steak? Chicken? Shrimp? Sure, we nixed the sub rolls and hamburger buns in exchange for crunchy croutons and sugared nuts, but are we really making a difference in making healthy choices? The answer is actually, Yes. By adding protein, believe it or not, the natural fat actually helps the body digest carbs a little slower and increase energy levels. The bottom line is, protein does fill you up more and keep you from binge eating before the next meal. So the next time you’re asked about protein, boldly nod your head up and down and go for it.

PRIME RIB DINNER SALAD

Ingredients:

1 pound prime rib steak, cooked and cut into chunks

2 cups iceberg lettuce, gently torn

1/2 pint cherry tomatoes, halved

1/4 red onion, sliced

1 radish, thinly sliced

1 hard-boiled egg, chopped

2 slices bacon, crispy and crumbled

2 ounces blue cheese, crumbled

Dressing, of choice

Instructions:

Warm the steak slightly. Divide the following ingredients into two salad bowls: iceberg lettuce, cherry tomatoes, red onion slices, radishes, hard-boiled egg, bacon crumbles, and blue cheese. Top with prime rib chunks. Add dressing of choice. Serve.

Pan-Fried Corn Tacos

What’s Cooking in Gail’s Kitchen? Stir. Spread. Flip. Repeat: Pan-Fried Corn Tacos! The aroma of toasted corn tortillas, flash-fried in hot oil, seasoned to perfection, is one you will always remember. The savory beef and cheese fillings are only enhanced by the brown and blistered outer shells. You can still stuff them with your favorite combinations.

PAN-FRIED CORN TACOS

Ingredients:

1 pound lean ground beef

1 yellow onion, chopped

1/4 teaspoon garlic powder

3 tablespoons taco seasoning mix

2 cups Mexican blend cheese, shredded

3/4 cup salsa

10 corn tortillas

Assorted toppings

Instructions:

In a large skillet over medium-high heat, sauté ground beef and chopped onion. Cook until the beef is completely cooked and onions are soft. Remove and discard the grease from the ground beef. Add garlic powder and taco seasoning mix. Combine and simmer until no liquid remains. Divide the shredded cheese among the tortillas; spoon seasoned beef on top. Fold each corn tortilla in half. Clean the skillet. Warm vegetable oil over medium-high heat. Place one stuffed tortilla into the oil for 10-15 seconds; flip and repeat until the shells are crispy. Allow the oil to drain off. Then transfer to a baking sheet. Repeat until all tacos are pan-fried. Keep warm in a 300° oven until ready to serve. Serve with additional toppings of shredded lettuce, chopped tomatoes, and salsa.

Halibut Grilled to Perfection

What’s Cooking in Gail’s Kitchen? Stir. Spread. Flip. Repeat: Halibut Grilled to Perfection! An outdoor kitchen sure makes my life easier. I had no idea how much I would appreciate the convenience, entertainment value, and dining alfresco by the pool. What a backdrop for casual conversation and cherished memories. I’m still learning to be a seasoned “grillmaster”, but then again, that’s the fun of cooking.

HALIBUT GRILLED TO PERFECTION

Ingredients:

2 fresh halibut fillets

1 tablespoon lemon juice

2 tablespoons olive oil

1/4 teaspoon garlic powder

1/8 teaspoon sea salt

1/8 teaspoon cracked black pepper

1/8 teaspoon dried dill

Lemon wedges, for garnish

Instructions:

Preheat grill to medium-high heat. While the grill is heating, squeeze lemon juice over halibut fillets. Brush with olive oil. Season with garlic powder, sea salt, cracked black pepper, and dried dill. Once the grill is hot, spray the grill grates with nonstick oil. Place the fillets on the grill. Close the lid; cook for 5 minutes. Then flip fish fillets over and cook 5 minutes longer. Close lid. The internal temperature should be 145°. Remove the fillets from the grill and serve. Garnish with lemon wedges.

Ginger Glazed Baked Tilapia

What’s Cooking in Gail’s Kitchen? Stir. Spread. Flip. Repeat: Ginger Glazed Baked Tilapia! Do you bypass those brownish stems in the produce department that resemble tree roots? Think twice about ignoring them. Ginger is a plant-based spice that produces an energized aroma. It adds a wonderful zing to bakery items, carbonated beverages, and today’s feature, tilapia fish. Embrace the flavor without regrets.

GINGER GLAZED BAKED TILAPIA

Ingredients:

2 tilapia fish filets

1/3 cup orange juice

3 tablespoons soy sauce

2 tablespoons olive oil

1 teaspoon ground ginger

1 teaspoon brown sugar

Instructions:

Season tilapia filets with sea salt and black pepper. Place in a shallow baking dish. In a small bowl, whisk together orange juice, soy sauce, olive oil, ginger, and brown sugar. Pour over tilapia. Cover; marinate in refrigerator for 20 minutes. Preheat oven to 400°. Place baking dish in oven. Bake fish for 13-15 minutes, or until fish flakes easily with a fork.

Butter Chicken

What’s Cooking in Gail’s Kitchen? Country Casual Cravings: Butter Chicken! At first glance, this dish looks surprisingly similar to curry chicken, doesn’t it? Sooo, what is the difference, you wonder. The secret is in the name. It’s made with butter! The tomatoes, coconut milk, and seasonings are cooked slow enough to transform the sauce into a gravy-like consistency with a nice kick of flavor. Also, by slow-cooking the chicken, it becomes fork tender and juicy. Ahhh, now I have your attention. Sounds like a grocery list is in order. Bravo. Your family will thank you.

BUTTER CHICKEN

Ingredients:

2 pounds chicken breasts, skinless and cut into chunks

1/2 sweet onion, chopped

1 jalapeño, seeds removed and diced

1/2 teaspoon garlic powder

2 tablespoons unsalted butter

1 tablespoon curry powder

2 teaspoons garam masala

1/2 teaspoon turmeric

1 teaspoon chili powder

1/2 teaspoon ground ginger

1/4 teaspoon cayenne pepper

14.5 ounce can coconut milk

6 ounce can tomato paste

Fresh cilantro, for garnish

Dollop of Greek yogurt, for garnish

Instructions:

In a slow cooker, add chicken chunks, chopped onion, diced jalapeño, and garlic powder. Stir to combine. Dot with cubes of butter. In a medium bowl, stir together curry powder, garam masala, turmeric, chili powder, ground ginger, and cayenne pepper. Add coconut milk and tomato paste. Whisk to combine. Pour over chicken mixture. Cover slow cooker; heat contents on LOW for 5 hours. Serve with cooked rice and naan bread. Garnish with cilantro and a dollop of Greek yogurt. Serve immediately.

Rosemary Lemon Roasted Turkey

What’s Cooking in Gail’s Kitchen? Here Come the Holidays: Rosemary Lemon Roasted Turkey! Did you know a frozen turkey will last up to two years in the freezer? First and foremost, it’s only a bargain if you have the space to store it. That being said, roasting a turkey is a great source of lean protein. A whole bird provides healthy meat that can be served several different ways. Unfortunately, our bodies need protein and cannot store it. We need to replenish protein in order to build strong bones, repair muscle, heal skin, and help keep blood sugar levels even. All the other vitamins and minerals are a bonus. A few words of advice: Remove and discard the skin of the roasted turkey, no matter how tempting that crispy, golden outer covering calls your name. It’s main purpose is to keep the meat moist. That, and for taking fabulous snapshots, of course.

ROSEMARY LEMON ROASTED TURKEY

Ingredients:

4-6 sprigs of fresh rosemary

2 lemons, quartered

12-pound turkey, thawed

2 tablespoons butter, melted

1 teaspoon kosher salt

1/2 teaspoon garlic powder

Instructions:

Preheat oven to 325°. Rinse turkey, pat dry. Insert rosemary and lemon pieces in the cavity of the turkey. Truss the turkey by wrapping the bird in cooking twine. Secure the legs and tuck the wings underneath. Transfer turkey to the roasting pan with the breast side up. Brush with melted butter. Sprinkle with kosher salt and garlic powder. Bake uncovered for 4 hours, or until a meat thermometer reads 180°. The juice of the turkey will run clear when the center of the thigh is cut. Remove from oven. Cover. Allow turkey to rest for 15 minutes before carving. Garnish with fresh rosemary sprigs and lemons.

Grill Pan Pork Loins

What’s Cooking in Gail’s Kitchen? Here Come the Holidays: Grill Pan Pork Loins! My latest kitchen essential is an enameled cast iron skinny grill that just happens to fit perfectly across two burners on my newly installed glass stovetop. As you can see, the vibrant red handles not only allow for attractive table service, but also make it easy to manage while cooking. Now I get that unique grilled taste all year long, no matter what the weather. The cast iron feature is the secret to even cooking. Plus, the nonstick finish makes cleanup a flash, in addition to enhanced seasoning qualities. I like the idea that foods, once grilled, show the little black grill marks. After all, it’s about the presentation, isn’t it? In addition, vegetables work out quite nicely. No more frustrating pieces falling through the grill grates. I can see you agree with me.

GRILL PAN PORK LOINS

Ingredients:

4 pork loins, boneless, and one-inch thick

1 tablespoon olive oil

1/8 teaspoon sea salt

1/8 teaspoon black pepper

1/8 teaspoon garlic powder

1/4 red onion, sliced

1 cup broccoli florets

1/3 cup pineapple chunks

4 fingerling potatoes, halved

Instructions:

Preheat the stovetop grill pan on medium heat setting. Brush lightly with olive oil. Sprinkle the pork loins with sea salt, black pepper, and garlic powder. Arrange on grill pan. Add red onion slices, broccoli florets, and pineapple chunks in a single layer. Pierce fingerling potatoes with a fork. Microwave on High setting for two minutes. Cut in half and add to grill pan. Cook pork loins until golden brown, about 7 minutes per side. Turn vegetables as needed to prevent scorching. When pork reaches 145° on a meat thermometer, transfer loins to a cutting board; tent with foil for 5 minutes. Turn stovetop setting to Off. Divide food into four portions. Serve warm.

Quintessential Steak and Asparagus

What’s Cooking in Gail’s Kitchen? Uplifting Aromas: Quintessential Steak and Asparagus! The next time you want to prepare a romantic dinner for two, nix the tossed salad and go for a terrific steak dinner served on a bed of grilled asparagus. I mean, just look at that gorgeous grassy green color! You can almost taste the smoky crunch of the charred asparagus before sinking your teeth into the luscious buttery goodness of the filet mignon. The toasted saltiness of the crispy fried onions may create a magical finish that could lead to an increased libido for later on. Hey, I’m a hopeful romantic.

QUINTESSENTIAL STEAK AND ASPARAGUS

Ingredients:

2 6-ounce filet mignon steaks

2 tablespoons olive oil, divided

1/2 teaspoon seasoned salt

1 pound fresh asparagus, trimmed

1/2 teaspoon herb and garlic seasoning

1/4 cup crispy fried onions

Instructions:

Rub one tablespoon of olive oil onto both sides of the filet mignon steaks, sprinkle with seasoned salt, and allow to marinate in a shallow dish for 20 minutes at room temperature. Wash asparagus in cold water. Remove woody ends. Place asparagus in a ziplock bag. Add one tablespoon olive oil. Sprinkle with herb and garlic seasoning. Zip bag; mix well. Allow to marinate for 20 minutes at room temperature. Preheat gas grill to 450°. Place a grill pan on a baking sheet; then spray grill pan with nonstick oil. Arrange asparagus in a single layer on the grill pan. Place pan on preheated grill. Cook for 10 minutes, turning occasionally to char. In the meantime, place filet mignon steaks directly onto grill grates. Grill for 5 minutes, then flip and cook 4 minutes longer for medium-rare. Allow steaks to sit for 3 minutes before slicing. Arrange filet mignon pieces over grilled asparagus. Top with fried onion rings. Serve immediately.

Queso Chicken Flautas

What’s Cooking in Gail’s Kitchen? Elevated Edibles: Queso Chicken Flautas! Are you as torn between corn tortillas and flour tortillas as I am? There are days, and certain dishes, where nothing but corn will do: tamales, taquitos, enchiladas, tacos, and chips. Corn tortillas, generally, are much smaller and easier to hold. When they are soaked in sauce, they are more pliable and suitable for baking. If you like the taste of toasted corn as well as the chewy texture, corn tortillas are for you. The same applies to flour tortillas: quesadillas, flautas, fajitas, chimichangas, and burritos. Flour tortillas are bigger, not to mention softer for folding. You already know this if you’ve ever eaten a monster burrito or ginormous chimichanga. One is baked, the latter is fried. Today’s recipe features the sturdiness of a flour tortilla to hold the juicy chicken and melted cheese filling without turning soggy or falling apart. What a delicious dilemma.

QUESO CHICKEN FLAUTAS

Ingredients for Herbed Sour Cream:

8 ounces sour cream

1 tablespoon honey

1 tablespoon lime juice

1/4 teaspoon sea salt

1/4 cup cilantro leaves, chopped

2 tablespoons green onions, chopped

Ingredients:

1 cup cooked chicken, shredded

1 cup Mexican cheese blend, shredded

4 ounces cream cheese, softened

4.5 ounce can green chiles, drained and diced

1 envelope taco seasoning mix, less 1 tablespoon for remaining recipe

12-count flour tortillas

2 tablespoons vegetable oil

15-ounce jar queso cheese dip, warmed

Instructions:

To make the herbed sour cream, combine sour cream, honey, lime juice, and sea salt in a bowl. Stir until smooth. Gently fold in chopped cilantro leaves and green onions. Cover and refrigerate until ready to serve. In a medium bowl, combine shredded chicken, Mexican cheese blend, cream cheese, and diced green chilies. Sprinkle with taco seasoning mix (less 1 tablespoon of mix). Stir thoroughly. Set aside. In a small dish, whisk vegetable oil with reserved taco seasoning mix. Set aside. Preheat oven to 425°. Spray a baking sheet with nonstick oil. To assemble flautas, place 1/4 cup chicken mixture on bottom third of each flour tortilla. Roll up tightly, leaving ends open. Place seam-side down on prepared baking sheet. Brush filled chicken flautas with seasoned oil mixture. Repeat until all tortillas are filled. Bake 10-12 minutes, or until flautas are crispy. Serve with warmed queso cheese dip, herbed sour cream, and chunky salsa.