Zia Marianna’s Grilled Peppers

What’s Cooking in Gail’s Kitchen? Cheerful Choices: Zia Marianna’s Grilled Peppers! Did you know there are three ways to roast peppers? You can use a grill pan over a burner flame, a broiler for fast charring, or roast them in the oven. The results are amazing, compared to raw peppers sliced into a salad. The incredible flavor is so smoky and sweet you may wonder why you don’t take the time more often. Pay attention to your taste buds! This is how we add depth to any dish, I promise you that.

ZIA MARIANNA’S GRILLED PEPPERS

Ingredients:

10 mini sweet peppers, mix of red and orange

5 cloves garlic

1/2 cup vegetable oil

1/2 teaspoon seasoned salt

1/2 teaspoon cracked black pepper

Celery leaves

Instructions:

Heat a grill pan on high heat until hot. Rinse the mini sweet peppers and garlic cloves; pat dry. Place the whole peppers and garlic cloves onto the grill pan, charring the skin completely on all sides until black on the outside and soft on the inside, 5-8 minutes per side. Remove and discard charred skin of peppers, seeds, and stems. Cut the peppers into thin slices about 1/4” thick. Transfer the charred pepper slices and garlic cloves into a container with a lid. Slightly wilt celery leaves on grill pan. Add to pepper mixture. Drizzle with vegetable oil. Add the seasoned salt and cracked black pepper. Mix well. Cover and refrigerate overnight. Warm slightly before serving.

Xtra Tender Grilled Radishes

What’s Cooking in Gail’s Kitchen? Cheerful Choices: Xtra Tender Grilled Radishes! If you’ve avoided radishes because of their bitter earthy taste when eaten raw, perhaps it’s time to give them another chance. Keep in mind radishes are simply a root vegetable, no different than a potato or turnip. Once they are cooked, a natural sweetness emerges. Surprise! The slightly crisp outer core reveals a nice soft middle that makes your mouth go “Mmmm.”

XTRA TENDER GRILLED RADISHES

Ingredients:

4 cups radishes, stems removed and halved lengthwise

1 tablespoon olive oil

1 teaspoon garlic and herb seasoning

2 tablespoons butter, melted

1 teaspoon fresh thyme, chopped

1/2 teaspoon sea salt

1/4 teaspoon black pepper

Instructions:

Warm an iron skillet or grill pan over medium-high heat. Toss the radishes in olive oil to coat. Sprinkle with garlic and herb seasoning. Reduce the heat to medium. Place the radishes, cut side down, on the iron skillet. Sear the radishes for 3-4 minutes per side. They will start to soften without losing their crunch. Remove pan from heat. Drizzle the radishes with melted butter. Sprinkle with chopped thyme leaves, sea salt, and black pepper. Serve immediately.

Tomato Herb Cheese Naan

What’s Cooking in Gail’s Kitchen? Cheerful Choices: Tomato Herb Cheese Naan! The other day I sent my husband to the grocery store with a short list of produce items. Sounds simple, right? Within 15 minutes, I had several frantic texts asking me to clarify the type of tomatoes I needed him to buy. Perhaps you can understand his quandary. Years ago, a shopper had their choice of garden tomatoes or cherry tomatoes. Nowadays, you practically need an Old Farmer’s Almanac to clarify all the different varieties like Cherry, Grape, Green, Roma, Beefsteak, Campari, Cocktail, San Marzano, and Vine-Ripened tomatoes. Sheesh! All I really wanted were fresh tomatoes.

TOMATO HERB CHEESE NAAN

Ingredients:

1 prepared naan, store bought

1 tablespoon olive oil

1 tablespoon cornmeal

6-8 cocktail tomatoes, sliced

1 teaspoon kosher salt

8 ounces fresh mozzarella, sliced

1/4 teaspoon garlic powder

1/8 teaspoon oregano

1/8 teaspoon basil

1/8 teaspoon marjoram

Fresh oregano leaves, for garnish

Instructions:

Preheat oven 400°. Spray a baking sheet with nonstick oil. Set aside. Brush the bottom of the naan. Sprinkle with cornmeal. Transfer naan to the baking sheet, bottom side down. Bake 5 minutes. Remove pan and set aside. Meanwhile, to prepare tomatoes, arrange sliced cocktail tomatoes on a cutting board; sprinkle with kosher sea salt. Allow to rest for 5 minutes. Arrange sliced fresh mozzarella over naan. Layer with cocktail tomatoes. Sprinkle with garlic powder, oregano, basil, and marjoram. Bake 15 minutes longer, or until cheese is melted and golden. Cool slightly, cut into portions. Garnish with fresh oregano leaves. Serve warm.

Pork Tamales

What’s Cooking in Gail’s Kitchen? Cheerful Choices: Pork Tamales! I have high respect for the Mexican culture, especially when it comes to cooking. For years I have procrastinated about making tamales, probably because I love them and really don’t want that to change. Seriously though, for me the Mexican homemade version is labor intensive. Most little girls were taught the family traditions by their mothers and grannies. To them it comes easily as an art form after decades of making the traditional dish. Sauces from scratch can take an entire day if you begin with boiling the chilies and blending the spices. I left that labor of love for the pros. Now if you’re game, roll up your sleeves, tie on an apron, and let’s get started.

PORK TAMALES

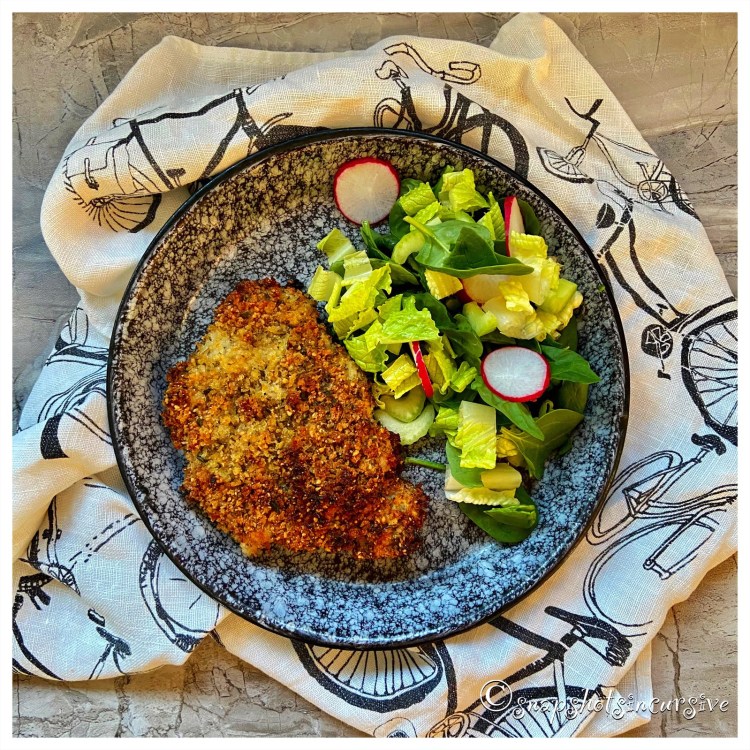
Ingredient Toppings for Tamales:

Tomatoes, diced

Green onions, sliced

Lettuce, chopped

Lime wedge, for garnish

Ingredients for Corn Husks:

6-ounce package dried corn husks

Instructions:

Soak corn husks in hot water for one hour or until softened. Drain husks; pat dry. Set aside.

Ingredients for Cornmeal Dough:

1 1/4 cups solid shortening

4 cups corn masa mix

1 3/4 cups warm chicken broth

1 tablespoon salt

2 teaspoons paprika

Instructions for Cornmeal Dough:

In a large bowl, beat solid shortening on medium speed with an electric mixer until creamy, about 3 minutes. In another bowl, stir corn masa mix, chicken broth, salt, and paprika until combined. Gradually add corn masa mixture to shortening, beating on medium speed just until blended after each addition. Cover dough with plastic wrap until ready to use. Set aside.

Ingredients for Pork Filling:

2 cups fully cooked roast pork, shredded

10-ounce can mild diced tomatoes and green chiles, drained

3/4 cup barbecue sauce

1 teaspoon garlic powder

1 teaspoon onion powder

1 teaspoon chili powder

1/2 teaspoon red pepper flakes

1/4 teaspoon salt

Instructions for Pork Filling:

In a bowl, combine shredded pork, diced tomatoes and green chilies, barbecue sauce, garlic powder, onion powder, chili powder, red pepper flakes, and salt. Stir until well blended. Set aside.

Ingredients for Tamale Sauce:

2 tablespoons unsalted butter

3 tablespoons flour

2 cups unsalted beef broth

2 tablespoons adobo sauce from chipotles in adobo

2 teaspoons taco seasoning

Instructions for Tamale Sauce:

In a skillet over medium heat, warm unsalted butter. Do not scorch. Sprinkle in flour, whisking until a paste is formed. Stir 2 minutes longer. Gradually add beef broth, stirring constantly. Allow mixture to slightly thicken, about 5 minutes. Add adobo sauce and taco seasoning. Stir until combined. Set aside. Serve warm over tamales.

Instructions for Assembling Tamales:

Spread about 3 tablespoons of Cornmeal Dough into a 3”x3 1/2” rectangle in center of one corn husk. Spoon one heaping tablespoon of meat filling down the center of the Cornmeal Dough rectangle. Fold long side of husk over, enclosing meat filling with Cornmeal Dough. Fold bottom of husk over folded sides, leaving top end open. Tie with strips of corn husk or bakery twine. Transfer to a platter. Repeat with remaining ingredients. In a 16-quart tamale steamer pot, fill water to about 1/2” from the bottom of the rack. Stand tamales above the water level, closed end down, on rack in steamer.* Cover the tamales with leftover husks and a clean cloth before placing the lid on the pot. Bring to a boil, reduce heat and steam over medium heat for two hours until masa is no longer doughy. Add water as necessary. Take one tamale from the middle to check it is done before turning pot off. When done, allow tamales to cool for 10 minutes to set properly. To serve, transfer tamales to a platter. Unwrap a tamale, ladle on the sauce, and top with diced tomatoes, green onion slices, and chopped lettuce. Garnish with lime wedge. Serve immediately.

*In order to keep the tamales upright, put a heat-proof cup, bottom up, in the middle of the rack. It will help the tamales to balance upright.

Italian Meatball Manicotti

What’s Cooking in Gail’s Kitchen? Cheerful Choices: Italian Meatball Manicotti! Pasta tubes, known as manicotti, are mere vessels for holding melted cheese, savory meat, Italian herbs, and certain vegetables like spinach or mushrooms. The marinara sauce is spread on the bottom of the dish to prevent the pasta from sticking, or tearing, which would ruin the whole idea of creating the perfect pocket of delicious fillings. With a crowning layer of marinara sauce on top, it deserves a round of applause for the extra cheese sprinkled there for good measure. Cray, Cray!

ITALIAN MEATBALL MANICOTTI

Ingredients:

6 dried manicotti shells

1 tablespoon olive oil

1 clove garlic

12 Italian meatballs, cut in quarters

1/2 teaspoon sea salt

1/8 teaspoon cracked black pepper

1/2 teaspoon dried Italian herb blend

8 ounces marinara sauce, prepared

1/2 cup ricotta cheese

1/2 cup parmesan cheese, shredded

2 tablespoons parmesan cheese, shredded

Instructions:

Preheat oven to 400°. Spray an 8.5”x5.5” baking dish with nonstick oil. Set aside. Cook manicotti shells in boiling water for 9 minutes. Drain and cool on a baking sheet pan. Set aside. In a skillet, warm olive oil over medium heat. Add garlic clove, meatballs, sea salt, cracked black pepper, and Italian herb blend. Cook until heated through, stirring occasionally. Remove and set aside to cool slightly for 5 minutes. Meanwhile, spread half the marinara sauce in the bottom of the prepared baking dish. In a bowl, mix ricotta cheese and 1/2 cup parmesan cheese. Gently fold in meatball mixture. Fill each manicotti shell with meat and cheese mixture; place in the prepared baking dish over the marinara layer. Top with remaining marinara sauce. Cover dish with foil. Bake 30 minutes. Serve immediately.

Vineyard Pork Tenderloins

What’s Cooking in Gail’s Kitchen? Country Casual Cravings: Vineyard Pork Tenderloin! Pinot Noir is one of my favorite wines. Despite its complex flavors of woodsy cherry and forest-path raspberry, it leans toward a drier side without making your tongue stick to the roof of your mouth. That being said, it’s often challenging to figure out what food pairings work well with it. Obviously, pasta dishes provide a natural choice. But have you thought about grilled steak, roasted chicken, or pork tenderloin? Pause a moment; take a deep breath. Now transport yourself to a sun-soaked villa along a pebbled path to a harvest table overlooking acres of rolling hills bursting with ripe grape clusters. Taste and sip. Eventually you’re going to take a seat and linger over dinner. Read on.

VINEYARD PORK TENDERLOIN

Ingredients:

1 tablespoon olive oil

3/4 cup panko breadcrumbs

2 medium pork tenderloins, boneless

2 tablespoons mayonnaise

1 egg, beaten

1/4 teaspoon kosher salt

1/8 teaspoon black pepper

1/2 cup parmesan cheese, grated

1 tablespoon parsley flakes

1/2 teaspoon garlic powder

Instructions:

Preheat oven to 425°. Spray a wire rack with nonstick oil. Place rack onto a baking sheet. Set aside. Warm olive oil in a skillet over medium heat. Add panko breadcrumbs, stirring constantly, for 2 minutes until golden brown. Transfer crumbs to a shallow dish. Set aside to cool. To prepare pork tenderloins, place one piece in a gallon-size ziploc bag. Using a rolling pin, flatten the meat to 1/4” thickness. Place the pork loin aside and repeat with second piece. Pat dry on paper towels. In a shallow dish, whisk together mayonnaise, egg, kosher salt, and black pepper. Mix well. To the panko breadcrumbs, add parmesan cheese, parsley flakes, and garlic powder. Mix well. Dip each pork tenderloin in the egg mixture. Dredge completely in the breadcrumb mixture, pressing to stick. Repeat for extra crispy crust. Place tenderloins on wire rack. Bake for 15-20 minutes until tenderloins are golden brown. Serve immediately.

Lemon Garlic Hummus

What’s Cooking in Gail’s Kitchen? Country Casual Cravings: Lemon Garlic Hummus! If you go crazy over hummus and veggies, here’s a variation that adds flavorful notes of citrus. The use of pink-colored Himalayan salt equals an added bonus of less sodium than table salt plus trace elements of healthy minerals like iron, which translates to protein that maintains good body chemistry. But that’s the boring news. The best part, in my opinion, is the guilt-free buttery taste of hummus. Discover how one creamy spoonful practically melts in your mouth. Then scoop away with crisp and zesty radish slices. It’s finger food on steroids.

LEMON GARLIC HUMMUS

Ingredients:

15-ounce can chickpeas, rinsed and drained, hulls removed

2 tablespoons olive oil

2 tablespoons fresh lemon juice

1/8 teaspoon garlic powder

1/2 teaspoon pink Himalayan salt

2 teaspoons sesame oil

Paprika, toasted sesame seeds, for garnish

Radish slices, for serving

Instructions:

In a food processor, combine chickpeas, olive oil, lemon juice, garlic powder, pink Himalayan salt, and sesame oil. Press Pulse to blend until very smooth. If necessary, add a tablespoon of water to create a smoother consistency. Transfer hummus to a serving bowl. Garnish with a sprinkling of paprika and toasted sesame seeds. Serve with sliced radishes.

Neufchâtel Nibblets

Eating My Way Through the Holidays. Holiday Food Gifts: Neufchâtel Nibblets! Instead of serving the traditional large cheese ball at your next group gathering, think about individual portions. As a centerpiece on a buffet table, a cheeseball makes a great focal point until someone digs in. Then it immediately loses its form. On the other hand, nibblets remain appealing. Finger food is always a good idea, in my opinion. Not only are they fun to eat, they make things easier for walking around the edge of a party. Grab a few crackers and nibble away.

NEUFCHÂTEL NIBBLETS

Ingredients:

8 tablespoons Neufchâtel cheese, softened

4 tablespoons butter, softened

1/3 cup Swiss cheese, shredded

1/3 cup cheddar cheese, shredded

1/4 teaspoon onion powder

1/4 teaspoon garlic powder

1/4 teaspoon sea salt

1/2 teaspoon smoked paprika

2 tablespoons fresh chives, chopped

1/4 cup pecans, finely chopped

Carrot sticks, cut 3 inches long

Celery sticks, cut 3 inches long

Instructions:

Line a baking sheet with wax paper. In a mixing bowl combine Neufchâtel cheese, softened butter, Swiss cheese, cheddar cheese, onion powder, garlic powder, sea salt, and smoked paprika. Mix well. Using a cookie scoop, form mixture into balls, transfer to prepared baking sheet, and refrigerate one hour or until balls are firm. In a shallow dish, combine fresh chives and chopped pecans. Gently press chilled cheeseballs in nut mixture. Insert vegetable stick into each cheeseball. Arrange a platter and serve.

Pickled Banana Peppers

What’s Cooking in Gail’s Kitchen? The Food Whisperer: Pickled Banana Peppers! Harvesting a vegetable garden has its advantages: convenience, great taste, chemical-free, and healthy. We’ve pretty much been of the theory, “Plant it and it will grow.” A little neglect will only make it thrive, right? So why in the world does my husband go overboard with so many plants? They all act like they’re on steroids in some kind of competitive race, so I end up with produce bursting off the vines. In any event, I often shrug my shoulders, come up with creative recipes, and make the best of it. A gal’s gotta do what a gal’s gotta do.

PICKLED BANANA PEPPERS

Ingredients:

1 cup vinegar

1 cup apple cider vinegar

1/2 cup sugar

1/2 teaspoon celery seeds

2 garlic cloves, whole

1/2 pound banana peppers, seeded and sliced

Instructions:

In a 2-quart pan over medium heat, combine vinegar, apple cider vinegar, sugar, celery seeds, and garlic cloves. Bring to a rolling boil. Add the banana peppers. Keep them submerged under the pickling liquids. Remove the pan from heat. Let sit for 8-10 minutes. Using a slotted spoon, transfer the banana peppers and garlic to a clean jar. Ladle the pickling juices to fill the jar within 1/2” of the top. Wipe off the rim and add the lid. Store in the refrigerator.