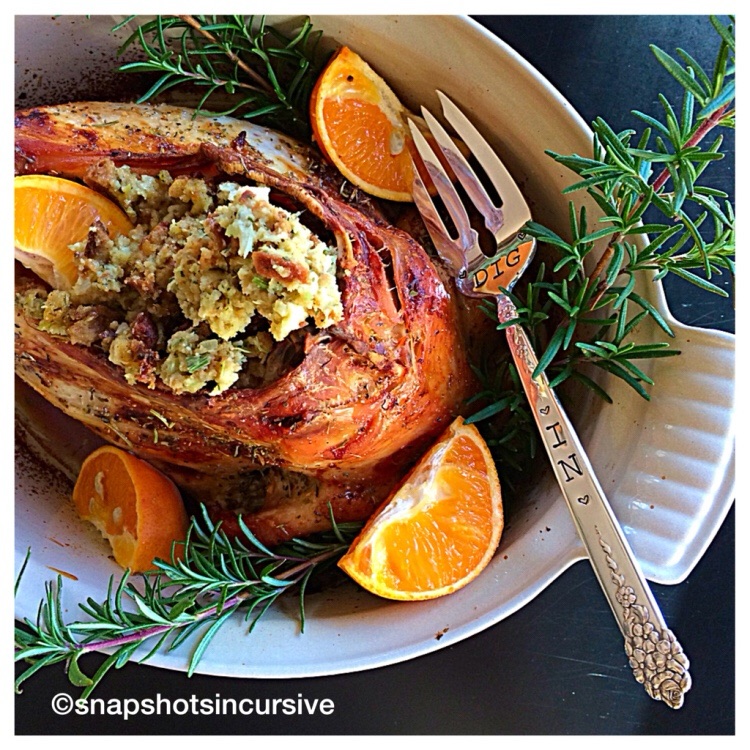
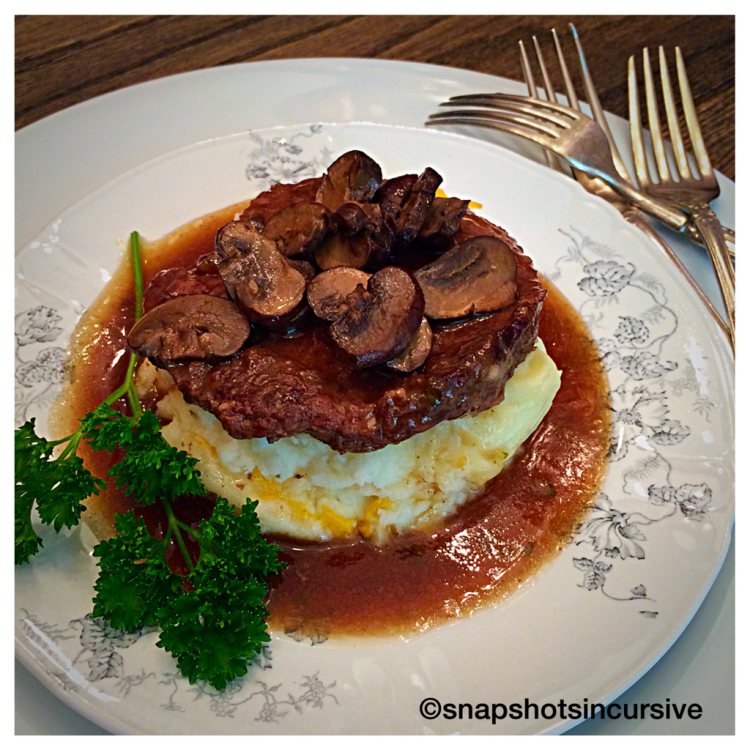
Zippy Olive Pesto

What’s Cooking in Gail’s Kitchen? Talking Points: Zippy Olive Pesto! Your last visit to the doctor may have been one where you received a good report, yet were advised to lean more toward a Mediterranean diet. What does that mean exactly, you wonder. In layman’s terms it simply suggests making a couple of substitutions in food choices to maintain a healthy weight, prevent heart disease, live longer, and travel often. “The healthy fats in olives are extracted to produce olive oil, one of the key components of the incredibly healthy Mediterranean diet”, according to Healthline, a provider of health information.* For many this may not be the advice you wish to hear, but for an olive-lover, like me, it is the Best.News.Ever.

ZIPPY OLIVE PESTO

Ingredients:

1/4 cup pine nuts

1 bunch parsley, leaves only

1 clove garlic, minced

1/2 teaspoon red pepper flakes

1/4 cup parmesan cheese, finely grated

5 tablespoons olive oil

1/4 cup organic green olives, chopped

3 tablespoons water (optional)

1/8 teaspoon kosher salt

Instructions:

In a skillet over medium-high heat, toast pine nuts turning occasionally until slightly golden, about 3 minutes. Set aside to cool. In a food processor, combine parsley leaves, minced garlic, and red pepper flakes. Pulse until almost smooth. Add toasted pine nuts and parmesan cheese. Pulse slightly. With the machine running on low, drizzle in the olive oil until combined. Transfer pesto to a bowl. Fold in the chopped green olives. Add water, if needed. Season with kosher salt. Serve over toasted bread.

*I receive no recompense for mentioning this website.

Dutch Baby Buttery Potatoes

What’s Cooking in Gail’s Kitchen? Food With Soul: Dutch Baby Buttery Potatoes! These naturally buttery potatoes have a silky skin that can be eaten when baked. The creamy yellow flesh has a slightly nutty flavor that will give you reason enough to make an entire meal out of these gourmet nuggets. In fact, the aroma was so enticing, my husband and I did that exact thing. You see, once you’re an adult, you can make up any rule you want when it comes to meal-planning.

DUTCH BABY BUTTERY POTATOES

Ingredients:

24-ounce bag of Dutch Baby Yellow Potatoes

4 tablespoons butter, melted

1/4 teaspoon garlic powder

1 teaspoon parsley flakes

1 teaspoon dried oregano

1 teaspoon kosher salt

1/2 cup parmesan cheese, grated

Green onion snips, for garnish

Instructions:

Preheat oven to 400°. Boil whole potatoes on the stove in a pan of salted water for 15 minutes. Drain and allow potatoes to cool enough to handle. In a glass baking dish, combine melted butter, garlic powder, parsley flakes, dried oregano, kosher salt, and parmesan cheese. Cut boiled potatoes in half lengthwise. Arrange in a single layer. Using a pastry brush, cover the potatoes with the herbed butter and cheese mixture. Bake, uncovered, for 20 minutes until potato bottoms are crispy. Serve immediately.

Yellow Squash Panko

What’s Cooking in Gail’s Kitchen? Palatable Possibilities: Yellow Squash Panko! Many of you already know this particular vegetable is a second cousin to zucchini. The skin is tender, glossy smooth, and edible which makes it a no-fuss dinner companion. Although its flavor is mild, when cooked it actually becomes buttery sweet with a slightly nutty nuance. Try to buy yellow squash that is 6”-8” in size. You’ll know because the larger it is, the more likely the skin will appear bumpy and less tender. You’ll also notice a lot of seeds, once you cut into it. By then you’ll need to rethink dinner and purée it for soup. Hindsight is 20/20 after all.

YELLOW SQUASH PANKO

Ingredients:

2 yellow squash

1-2 tablespoons olive oil, for sauté

Ingredients for Herbed Oil:

1 tablespoon lemon juice

1 tablespoon olive oil

1/8 teaspoon garlic powder

1 teaspoon dried parsley

1/4 teaspoon sea salt

1/8 teaspoon cracked black pepper

Ingredients for Crumb Topping:

1/4 cup panko bread crumbs

1/4 cup parmesan cheese, grated

1 teaspoon dried parsley

1/4 teaspoon sea salt

1/8 teaspoon red pepper flakes

Instructions:

Wash and pat dry yellow squash. Slice into 1/4” rounds; set aside. To make the herbed oil, whisk together lemon juice, olive oil, garlic powder, dried parsley, sea salt, and cracked black pepper. Set aside. To make the crumb topping, toss panko bread crumbs, grated parmesan cheese, dried parsley, sea salt, and red pepper flakes into a bowl. Mix well; set aside. To prepare yellow squash, warm olive oil in a large skillet over medium heat. Add the yellow squash and sauté for 8 minutes. Turn occasionally to cook both sides. Squash should be soft, but not mushy. Remove from heat. Drizzle herbed oil over yellow squash. Transfer to a platter. Top with panko crumb topping mixture. Garnish with fresh basil leaves, if desired. Serve immediately.

Turmeric Roast Beef

What’s Cooking in Gail’s Kitchen? Bright Ideas: Turmeric Roast Beef! Turmeric is a spice in the world of superfoods. It begins as a plant, but the roots hold all the benefits. Turmeric can usually be found in the spice aisle of your favorite grocery store. Its golden-orange color makes a quick scan for identification pretty easy. The aroma has an earthiness to it, which is a compliment for vegetables and beef. Once you try it, your mind may wander to curry dishes, chili soup, and beyond.

TURMERIC ROAST BEEF

Ingredients:

1 1/2 pound chuck roast

2 cups beef broth

1 teaspoon turmeric

1 tablespoon Salty Wahine Hawaiian Seasoning*

5-6 potatoes, washed with skin on, cut into bite-size chunks

16 ounces baby carrots, whole

10 ounces pearl onions, whole

1/4 teaspoon parsley flakes

Instructions:

Place the chuck roast in the slow cooker. Pour beef broth over meat. Sprinkle with turmeric and Salty Wahine Hawaiian Seasoning. Set slow cooker on Low heat for 4 hours. After that time, add the potato chunks, baby carrots, and pearl onions. Continue on Low setting for 4 more hours. Remove roast and vegetables to a platter. Garnish with parsley flakes. Reserve juices for au jus, gravy base, or soup starter.

*I receive no recompense for mentioning Salty Wahine Hawaiian Seasoning.

Lemon Butter Chilean Sea Bass

What’s Cooking in Gail’s Kitchen? Bright Ideas: Lemon Butter Chilean Sea Bass! Anyone, besides me, a fan of butter on seafood? Lobster. Crab Legs. Chilean Sea Bass. Shrimp. Scallops. You name it…if the seafood is slightly sweet, mild in flavor, moist and tender, or flaky yet firm, I practically kick everything else to the curb in favor of rich and decadent seafood. Now that I live in Florida, I can stretch my palate a bit with fresh seafood harvested or caught off the coastline. Not only does it support local fishermen, it also puts me in touch with seafood retail markets that thrive on this economy. And, yes, I’m spoiled. Some of the vendors even come directly to my community on a weekly basis. I see more fish in my future.

LEMON BUTTER CHILEAN SEA BASS

Ingredients:

2 8-ounce Chilean Sea Bass fillets

1/4 cup salted butter

1/8 teaspoon garlic powder

1/8 teaspoon parsley flakes

Juice of fresh 1/2 lemon

Instructions:

Preheat gas grill to 400°. Form a piece of aluminum foil into a baking sheet to accommodate the fillets. Be sure to raise the sides to contain the buttery juices. Spray foil with nonstick oil. Set aside. In a microwave-safe dish, warm the salted butter. Add garlic powder, parsley flakes, and lemon juice. Gently whisk. Wash Chilean sea bass fillets; pat dry with a paper towel. Before placing the fillets on the foil, brush both sides with melted lemon butter. Save the extra butter mixture for serving. Grill the Chilean Sea Bass for 5-6 minutes with the lid closed to maintain the internal temperature. Turn the grilled sea bass and repeat cooking time 5-6 minutes longer for even grilling. Brush with remaining butter mixture. Serve immediately.

Fabulous Seafood Lasagna

What’s Cooking in Gail’s Kitchen? Bright Ideas: Fabulous Seafood Lasagna! Because I really like seafood, and for the first time in my life I have access to it, I decided to think “outside the box” for a new dinner idea. Combining pasta and seafood seemed like a nice transition. To keep the cost down, I did end up substituting imitation crabmeat, but of course you may use the real deal, especially if you have connections with a fisherman. I’m working on that.

FABULOUS SEAFOOD LASAGNA

Ingredients:

9 uncooked lasagna noodles

1/4 cup butter

1/2 cup sweet onion, chopped

2 cloves garlic, minced

1/4 cup flour

2 cups light cream

1 cup chicken broth

1/3 cup dry sherry

1/2 teaspoon sea salt

1/4 teaspoon black pepper

1 egg, slightly beaten

1/2 cup parmesan cheese, grated

15-ounce container ricotta cheese

1 tablespoon dried parsley

16 ounces imitation crabmeat, salad-style, drained, and chopped

8 ounces precooked salad shrimp, drained

3 cups mozzarella cheese, shredded

Freshly grated parmesan cheese, for garnish

Instructions:

Preheat oven to 350°. Spray a 9”x13” glass baking dish with nonstick oil. Cook lasagna noodles as directed on package. Set aside. In a 4-quart pan, warm butter over medium heat. Add chopped onion and minced garlic. Cook 3 minutes, stirring occasionally, until onions are tender. Gradually add flour, stirring constantly. Cook and stir until bubbly. Slowly stir in the light cream, chicken broth, dry sherry, sea salt, and black pepper. Heat to boiling, stirring constantly. Boil and stir for one minute longer. Do not scorch. Remove white sauce from heat and set aside. In a bowl, combine beaten egg, parmesan cheese, ricotta cheese, and dried parsley. Mix well; set aside. Drain lasagna noodles. Spread 3/4 cup white sauce in the bottom of the baking dish. Top with 3 lasagna noodles. Layer half the crabmeat and half the shrimp over the noodles. Add another 3/4 cup white sauce over seafood. Sprinkle one cup mozzarella cheese on top. Next, add a layer of 3 lasagna noodles. Spread ricotta mixture over noodles. Add 3/4 cup white sauce. Sprinkle with one cup mozzarella cheese; layer with 3 lasagna noodles. Spread the remaining seafood and sauce over all. Sprinkle with the last cup of mozzarella cheese. Bake 40-45 minutes, or until cheese is light golden brown. Let stand 15 minutes before cutting. Sprinkle with freshly grated parmesan cheese. Serve immediately.

Quick Savory Butter

What’s Cooking in Gail’s Kitchen? Start Smart: Quick Savory Butter! For some time now we’ve gotten pretty spoiled by restaurants, bistros, and cafés serving compound butter with the artisan bread basket. You almost hear us clapping our hands as we sink our teeth into the savory herbs or sweet concoctions. I know it makes me feel special. Chefs have been creating compound butters for years, though. It’s one of the ways they save time and add a level of sophistication for the customer. In my own kitchen, I found it’s best to begin with unsalted butter. That way I can add just enough sea salt to tease the palate. Lemon, believe it or not, adds a hint of flavor that embellishes steak or seafood. I see you nodding your head in agreement. Although I began smearing this combination on rolls and crackers, I couldn’t resist warming it to pour over a bowl of freshly popped popcorn. Talk about gourmet!

QUICK SAVORY BUTTER

Ingredients:

1 stick (1/2 cup) unsalted butter, room temperature

1 tablespoon lemon juice

1/4 teaspoon garlic powder

1/2 teaspoon sea salt

1 tablespoon fresh rosemary, chopped

2 tablespoons fresh parsley, chopped

Instructions:

In a mixing bowl, cream butter with lemon juice. Add garlic powder and sea salt; stir. Fold in fresh rosemary and parsley leaves. Mix until combined. Place a sheet of waxed paper on the counter. Spoon compound butter onto sheet. Roll the waxed paper over butter to form a log. Roll tight and twist both ends. Refrigerate one hour or until firm.

No-Fuss Turkey Gravy

What’s Cooking in Gail’s Kitchen? Start Smart: No-Fuss Turkey Gravy! So today’s post is one that will either have you running out to the store or shopping online. I’m honestly asking myself why I waited so long. My son introduced me to the secret of having incredibly lump-free gravy. He gifted me with a fat separator which takes all the effort out of skimming the fat from the top of the pan drippings. Just in time for the upcoming holidays, too. This gadget is amazing. It looks like a regular measuring cup with the exception of a spout stopper and strainer. Here’s how it works: make sure the rubber stopper is in the spout. Pour the pan drippings into the cup through the strainer. Allow the drippings to “rest” and separate. The stopper actually prevents fat from flowing into the spout. Remove the stopper and slowly pour the clear broth into a pan. Then discard the fat. You may have to repeat the process if you are making gravy for a crowd. It works like magic.

NO-FUSS TURKEY GRAVY

Ingredients:

4 tablespoons cornstarch

1/2 cup water

3-4 cups turkey broth, separated

Parsley flakes

Instructions:

Transfer meat drippings from the roaster pan to a sauté pan on the stove over medium heat. Dissolve the cornstarch in water to create a slurry. Slowly pour the cornstarch mixture into the pan, blending with a wire whisk. Continue to stir as the gravy begins to thicken. At this time, gradually add the strained turkey broth. Alternate stirring and adding liquid until you get the consistency you want. While the gravy is simmering, it will begin to evaporate, making it thicker. If need be, you can add water to thin it down. (My mother taught me to use the potato water I used to boil the mashed potatoes. It adds flavor.) Before serving, sprinkle parsley over top.

Tortilla Crusted Tilapia

What’s Cooking in Gail’s Kitchen? The Next Step: Tortilla-Crusted Tilapia! I never thought of tilapia as an interesting choice of fish until I mixed things up with a Santa Fe style coating. The robust crunch of tortilla chips is a surprising prelude to the tender moist fish inside. It had me wishing I prepared seconds for the hubs and me. If you’re looking for a meatless meal, give it a whirl. Who knows, you may find yourself adding tilapia to the weekly menu.

TORTILLA CRUSTED TILAPIA

Ingredients:

1/2 cup Santa Fe style tortilla strips, crushed

1 tablespoon natural cornmeal

1 tablespoon panko bread crumbs

1/4 teaspoon lemon pepper

1/4 teaspoon cayenne pepper

1/4 teaspoon kosher salt

1/4 teaspoon parsley flakes

2 tilapia fish fillets

1 egg, room temperature

Fresh cilantro, garnish

Instructions:

Preheat oven to 425°. Spray a baking sheet with nonstick oil. Set aside. Whisk egg in a shallow dish. Set aside. On a sheet of waxed paper, combine crushed tortilla strips, natural cornmeal, panko bread crumbs, lemon pepper, cayenne pepper, kosher salt, and parsley flakes. Mix well with a fork. Working one at a time, dip a tilapia fillet into the beaten egg. Flip over to coat both sides. Press fillet onto the crumb mixture; turn over and repeat. For an extra crispy crust repeat process. Carefully transfer crusted fish fillet to the baking sheet. Continue with second fillet. Bake 10 minutes or until crust is golden and crunchy. Serve with fresh cilantro.