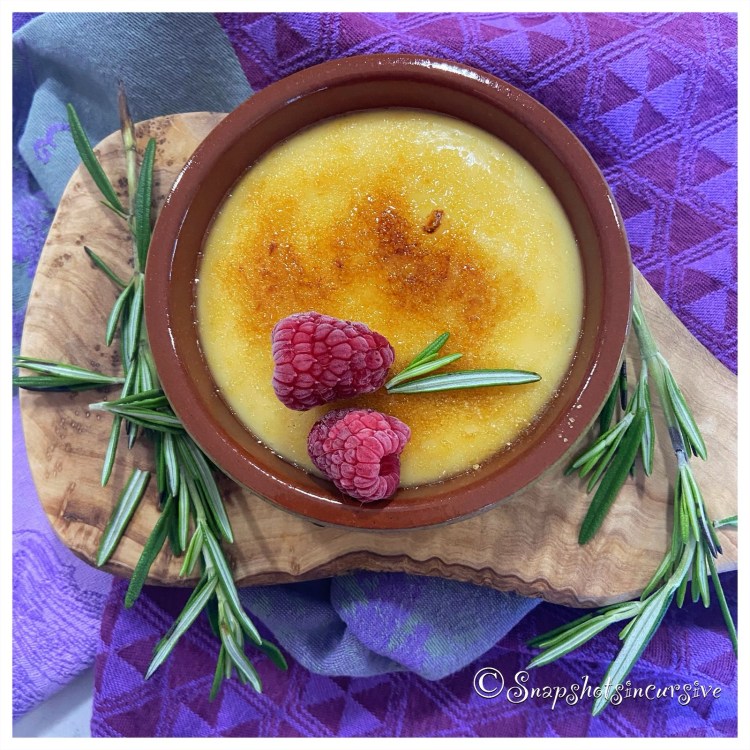
What’s Cooking in Gail’s Kitchen? Test Kitchen Favorites: Xanthic Crème Brûlée! Whenever you’re feeling a little “French”, imagine yourself at the Palace of Versailles, where everything reeks of opulence and grandeur. The popular “burnt cream” custard dessert boasts of its crackly, caramelized coating in shades of deep golden brown. Take the back of a dessert spoon and snap it onto the surface, thereby causing the top layer to separate for a glimpse of the silky creamed filling beneath. Just for kicks, I invite my guests to torch their own dessert, catching a whiff of the slightly burnt sugar aroma up close and personal. Pay no attention to the fine trickle of drool leaking from the corner of their mouths. This is sheer entertainment at its finest.
XANTHIC CRÈME BRÛLÉE
Ingredients:
1 1/2 cups heavy cream
1 teaspoon vanilla paste
4 large egg yolks
Pinch of sea salt
1/4 cup sugar
Instructions:
Preheat the oven to 300°. Over medium-high heat, bring two cups of water to a boil. Set aside. This will be used for the water bath. In a saucepan over low heat, warm the heavy cream and vanilla paste. Allow the mixture to start to simmer, stirring gently. In a mixing bowl, combine the egg yolks, sea salt, and sugar. Whisk together until the yolks break down. Once the cream mixture is simmering, slowly pour a fourth of it into the egg yolk mixture, whisking as you work. This step tempers the eggs so they will not curdle. Add the remaining cream and whisk gently until thoroughly combined. Do not over mix to avoid air bubbles from forming. Pour the custard through a fine mesh sieve to remove any lumps. Divide the custard equally between 4 (6-ounce) ramekins, filling almost to the top. Place the ramekins inside a baking tray. Carefully add the boiling water to the tray, avoiding the ramekins. The water should reach halfway up the height of the ramekins. Carefully transfer the tray to the oven. Bake 30-40 minutes, or until the crème brûlées are set around the edges. The centers should still remain wobbly in the middle when gently shaken. Immediately transfer the ramekins to the refrigerator for at least 4 hours, or overnight. The next day, sprinkle a thin layer of granulated sugar over the surface of each ramekin. Use a blowtorch to caramelize the sugar to a deep brown color. Add fresh fruit, if desired. Enjoy.

