Pine Berry Appetizer

What’s Cooking in Gail’s Kitchen? Food Plating: Pine Berry Appetizer! If you are a strawberry lover, think outside the box with a tropical twist this unique berry carries. The texture remains sweet and juicy, yet highlights subtle notes of pineapple, pear, and apricot. The creamy white flesh is an indication the berry is ripe enough to eat. I only mention that because on first glance you may suspect I am trying to encourage you to eat underripe strawberries. I think not. The “seeds”, so to speak, should appear red in color. For those who wonder, pine berries are the natural result of cross-pollination. This often does make them a little more expensive than regular strawberries. For special occasions, they are perfect! 

PINE BERRY APPETIZER

Ingredients: 

8 ounces Florida pine berries, washed, patted dry, and cut in half

4 ounces goat cheese, room temperature

2 ounces cream cheese, softened

1/2 teaspoon Tupelo honey

1 pinch sea salt (optional)

Fresh thyme, for garnish

Rosemary Sesame Flatbread Crackers, for serving

Instructions: 

In a mixing bowl, combine goat cheese, cream cheese, and Tupelo honey. Blend until thoroughly mixed and the consistency of whipped cream. Taste before adding a pinch of sea salt. Refrigerate for 30 minutes. To assemble the pine berry appetizer, slather a dollop of whipped cheese onto a rosemary sesame flatbread cracker. Garnish with a sprig of fresh thyme. Serve immediately. 

Onion Cucumber Tomato Salad

What’s Cooking in Gail’s Kitchen? Food Plating: Onion Cucumber Tomato Salad! Here’s a creamy salad that makes your meal-planning easy. Anyone who has had a garden will tell you it’s a no-brainer and goes with practically any meal you have planned. Farmers Markets typically have an abundance of these ingredients, should you choose to visit them instead. There’s a debate over whether to salt the vegetables as you layer them or simply add it to the dressing ingredients. I’ve done both. The way I presented it here allows a thicker dressing. Salt will draw out the water in the cucumbers and tomatoes, making the dressing thinner. It also enhances the taste of the veggies, so you be the judge.  In any event, keep a spoon handy. You’re going to want to slurp the dressing in the bottom of the bowl anyway. 

ONION CUCUMBER TOMATO SALAD

Ingredients: 

1 English cucumber, skin on and sliced

2 ripe tomatoes, sliced and quartered

1/4 red onion, sliced and quartered

Dill weed, for garnish

Ingredients for Dressing: 

1/4 cup mayonnaise 

1/4 cup sour cream 

1 tablespoon vinegar

1 teaspoon sea salt

1/4 teaspoon black pepper

Instructions: 

In a large salad bowl, alternate layers of sliced cucumbers, ripe tomatoes, and red onions. In another bowl, whisk together mayonnaise, sour cream, vinegar, sea salt, and black pepper. Pour over vegetables and gently toss to coat. Cover the bowl with plastic wrap and refrigerate up to one hour. Before serving, gently toss and sprinkle with dill weed. Enjoy! 

Green Onions With Sea Salt

What’s Cooking in Gail’s Kitchen? Food Plating: Green Onions with Sea Salt! My family could not have a picnic without a jar of raw green onions nearby. Typically the jar had a little water in bottom to keep the onions garden fresh. The vibrant color against a rustic backdrop served as a personal invitation to indulge. No matter who hosted the gathering, it wasn’t complete without the popular southern-style simple pleasure. Grab a lawn chair, kick off your shoes, let the grass tickle your toes, and be a child again. 

GREEN ONIONS WITH SEA SALT

Ingredients:

1 bunch of green onions

Individual condiment saucer, or salt cellar, of sea salt

Instructions:

Wash the green onions thoroughly, removing any wilted leaves from the outer layer. Trim the white root ends where the bulb is formed. Angle cut the green stalks at the opposite end. Place a bowl of coarse sea salt nearby. To eat, dip the white end of the green onion into the sea salt. Take a crunchy bite. Repeat until the entire green onion is consumed. 

Impressive Pizza Crust

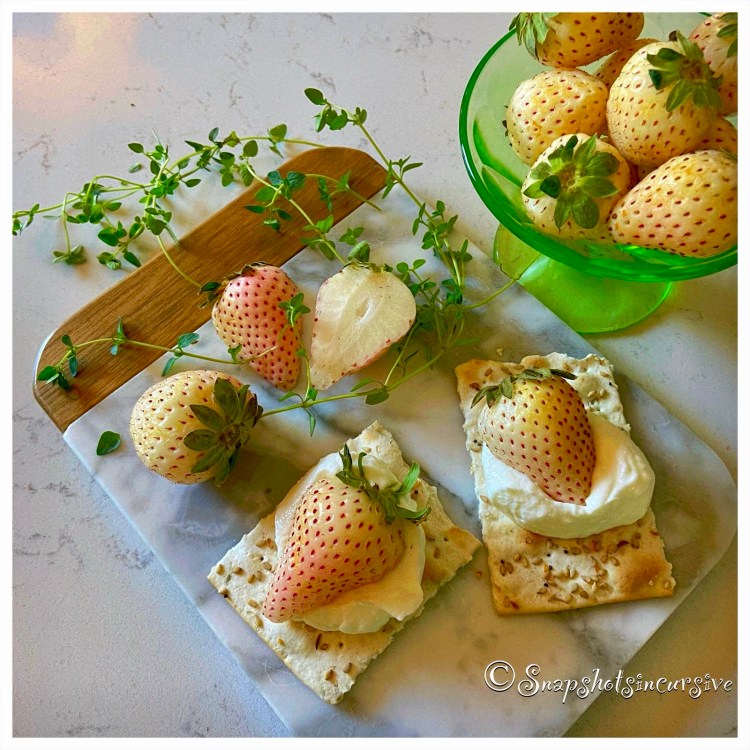
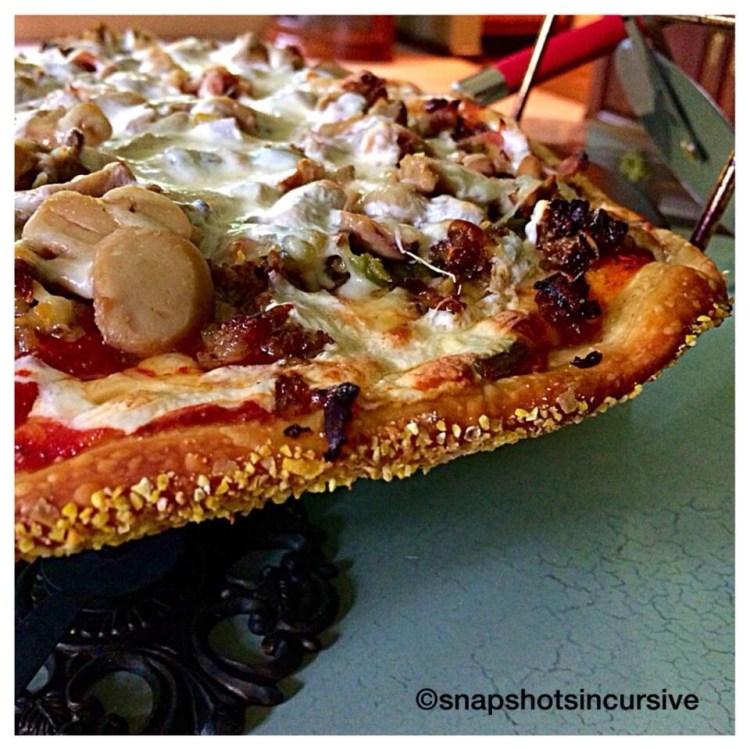
What’s Cooking in Gail’s Kitchen? The Daily Special: Impressive Pizza Crust! When it comes to making homemade pizza, two factors are critical to taste: Crust and Sauce. (We’ll address pizza sauce another day.) It becomes personal whether you prefer a thin and crispy crust or a deep dish pizza pie. Fortunately, my husband and I are partial to a thin crust. Choosing your “method of madness” takes practice as well. Experts recommend kneading the dough and getting pretty rough to develop the gluten. Others use a bread machine for maximum results. I found my food processor passed the test with this impressive crust. Later on, I may try another. 

IMPRESSIVE PIZZA CRUST

Ingredients:

2 cups bread flour, plus more for work surface

1 tablespoon sugar

1 1/2 teaspoons active dry yeast

1 cup warm water

1 tablespoon olive oil, plus more for work surface

1/3 teaspoon sea salt

Cornmeal for pizza pan

Instructions:

In food processor fitted with metal blade, process flour, sugar, and yeast until combined, about 2 seconds. With machine running, slowly add water through feed tube. Process until dough is just combined and no dry flour remains, about 10 seconds. Let dough rest for 10 minutes.  Then add olive oil and salt to dough. Process until dough forms a satiny, sticky ball that clears the sides of the bowl, 30-60 seconds. Remove dough from bowl and knead briefly on a lightly oiled countertop until smooth, about 1 minute. Shape dough into a tight ball and place in a large, lightly oiled bowl. Cover tightly with plastic wrap and refrigerate for at least 24 hours and up to 3 days. 

After 24 hours divide the dough into 2 equal portions. (Wrap one tightly with plastic wrap and return to the refrigerator for later use if you are only making one pizza pie at this time.) Shape dough on lightly oiled baking sheet; cover loosely with plastic wrap coated with nonstick cooking spray. Let stand one hour. Preheat the oven to 425°. Then coat the ball of dough with flour and place on a well-floured countertop. Knead and stretch the dough without breaking. Spread olive oil lightly to grease pizza pan. Sprinkle corn meal over the olive oil forming a thin even layer. This keeps the crust from getting soggy and adds a nice crunch to the texture of the crust. Transfer dough to pizza pan. Using fingertips, gently flatten and stretch as you go, until it reaches the edges. Press down around the edges of the pan to create a border, which will keep the sauce and toppings from seeping while baking. Place in oven and bake crust for 10 minutes without toppings. Remove and add pizza sauce plus desired ingredients. Reduce oven heat to 400° and bake an additional 20 minutes until crust is crispy and toppings bubbly. 

Ina Garten’s Crispy Potatoes

What’s Cooking in Gail’s Kitchen? A Cut Above: Ina Garten’s Crispy Potatoes! One chef’s secret to crispy roasted potatoes begins with boiling them on the stove beforehand. The results create tender and fluffy potatoes on the inside while crispy and crunchy on the outside. The herbs and seasonings enhance layers of flavor, making it a comforting delight to the senses. Serve with a side of ranch dressing or natural ketchup. Oh……remember to share. These aren’t meant for the baker to finish off the entire batch, no matter how tempting that may be. 

INA GARTEN’S CRISPY POTATOES

Ingredients: 

1 1/2 pounds baby gold potatoes, halved, skin on

1/2 cup olive oil

1 teaspoon kosher salt

1/8 teaspoon black pepper 

1/4 teaspoon dried oregano 

1/8 teaspoon dried parsley 

Instructions: 

Place baby gold potatoes in a saucepan; cover with an inch of water; bring to boil; simmer for 10 minutes. Drain completely. Return potatoes to the pan. Cover the saucepan tightly with a lid. Shake the pan for a few seconds. This makes the edges rough and craggy, allowing them to crisp up nicely when roasted. Preheat oven to 400°. Combine olive oil, kosher salt, black pepper, dried oregano, and dried parsley. Mix well. Pour over the potatoes, coating all sides. Transfer potatoes to a nonstick baking sheet, beginning with cut side down in a single layer. Bake for 45 minutes, tossing occasionally to brown the sides. Serve immediately. 

Flour Shell Taco Seasoning

What’s Cooking in Gail’s Kitchen? A Cut Above: Flour Shell Taco Seasoning! In case you weren’t already aware, foodie taco lovers will justify any version of homemade tacos. For instance, have you ever thought of sprinkling spiced seasoning on the outside of the tortilla? Me either, until now. Not only does it control the amount of salt that is used, it also renders immediate satisfaction of crispy saltiness before your teeth sink into the scrumptious filling inside. Talk about drool-worthy. Game on!

FLOUR SHELL TACO SEASONING

Ingredients:

1 teaspoon Himalayan salt, finely ground

1/2 teaspoon onion powder

1/2 teaspoon garlic powder

1/2 teaspoon cumin powder

1/2 teaspoon smoked paprika 

1/2 teaspoon chili powder

1/8 teaspoon cayenne pepper 

Instructions:

Combine together Himalayan salt, onion powder, garlic powder, cumin powder, smoked paprika, chili powder, and cayenne pepper seasonings. Mix well; set aside. Prepare homemade tacos according to your favorite recipe. Preheat the oven to 350°. Using a nonstick baking sheet, arrange the meat-and-cheese-filled flour tacos in rows. Spray each outer shell with nonstick oil. Sprinkle taco seasoning on each side; flip and repeat. Bake until the cheese inside is melted and the tortillas have crisped up, about 5-6 minutes.  Serve with micro-greens and jalapeño pepper slices, if desired. Serve warm. 

Indiana Sweet Corn

What’s Cooking in Gail’s Kitchen? Home Cooking: Indiana Sweet Corn! With July on the horizon, already the taste buds begin yearning for that extra juicy sweet corn freshly picked straight from the farmer’s field. After all, it’s best eaten the day it’s picked. There’s no taste quite like it. Get connected to the Farmers Market in your area for the best produce. Then do what I do, freeze extra for those cold, wintry days. 

INDIANA SWEET CORN

Ingredients:

4 ears of Indiana sweet corn

Sea salt to taste

Butter for slathering

Instructions by Boiling:

Fill a stock pot with enough water to cover the corn. Bring it to a boil. Dissolve a tablespoon of salt in the water. Remove outer husk and silk from corn. Rinse corn. Carefully drop each ear into boiling water. Cover with lid and lower heat to medium. Cook 3-5 minutes. Remove with tongs and serve immediately with butter and sea salt. 

Instructions for Microwaving:

I cook one ear at a time when I’m only preparing a few ears for a meal. Leave corn in husk. With a sharp knife, cut off the pointed end of the corn cob. Rinse under running water. While the ear of corn is wet, wrap a paper towel around it. The water will moisten the paper towel. Place the ear of corn in the microwave and cook on 100% power for 2-3 minutes. The husk will trap and steam the corn. Watch!  Remove from microwave and let sit for a couple minutes. Use the paper towel to carefully shuck the corn. The silks come off easily. 

Whichever method you choose, the reward is a taste of sugary-sweet Indiana heaven. Enjoy!

Deviled Eggs

What’s Cooking in Gail’s Kitchen? Home Cooking: Deviled Eggs!  People ask me all the time how I can eat everything I make and not weigh 100 pounds more than I do. Well, portion control has a lot to do with it……plus the fact that I truly DO share much of what I make. And then there are days when I know I’m going to pig out, so I eat a lunch that looks like this! Trust me, it works. 

DEVILED EGGS

Ingredients:

6 hard-cooked eggs, peeled and halved

1/4 cup real mayonnaise 

1 teaspoon Dijon mustard

1/4 teaspoon sea salt

Dash white pepper

Paprika 

Instructions:

Separate egg whites from egg yolks. Smash egg yolks with a fork in a small bowl. Stir in mayonnaise, mustard, salt, and pepper. Spoon yolk filling into egg white halves. Garnish with paprika. Chill, if desired. 

Wonderful Waffles

What’s Cooking in Gail’s Kitchen? Simple Sensations: Wonderful Waffles! This is perfect for that weekend brunch when it’s fun to plan things a little different. Add fruit and nuts, sausage or bacon, but top it off with real maple syrup. Then serve with mimosas on the side and you’ll be smiling all day long!

WONDERFUL WAFFLES

Ingredients:

2 cups flour

3/4 cup sugar

3 1/2 teaspoons baking powder 

1/2 teaspoon sea salt

1 1/2 cups milk

1 cup butter, melted 

2 eggs, separated 

1 teaspoon vanilla

Instructions:

Preheat waffle iron. In a bowl, combine flour, sugar, salt, and baking powder. In a second bowl, lightly beat egg yolks. Add milk, butter, and vanilla. Mix well. Stir into dry ingredients until moistened. Beat egg whites until stiff peaks form. Gently fold into batter. Spray the waffle iron with nonstick spray. Pour enough batter to just cover the waffle grid. Bake waffles until crisp on the outside, yet light and fluffy on the inside, about 2 to 3 minutes. They will appear golden brown. Sprinkle with powdered sugar and warm syrup. Serve immediately.