Fresh Peach Mozzarella Salad

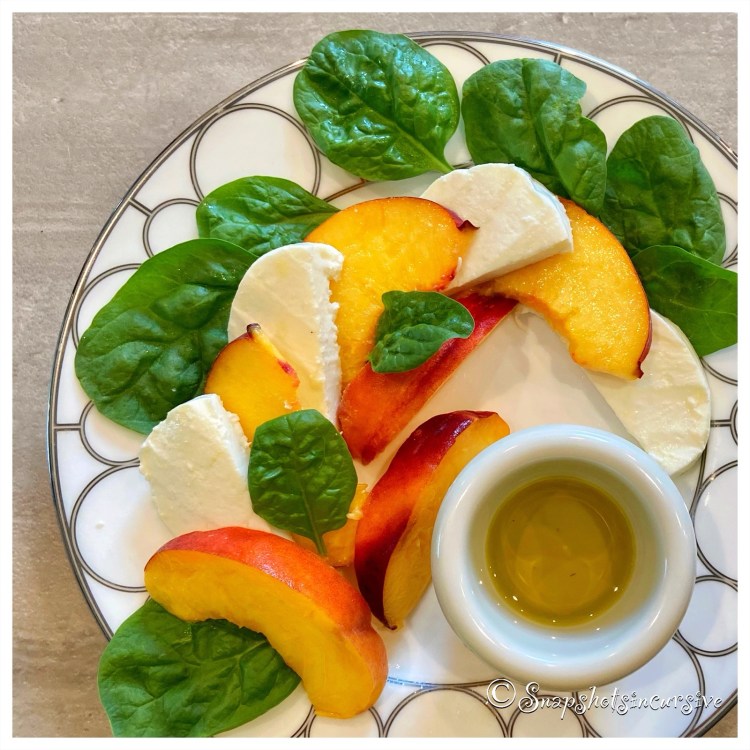
What’s Cooking in Gail’s Kitchen? Stir. Spread. Flip. Repeat: Fresh Peach Mozzarella Salad! Turn an ordinary fruit salad into a peachy pinwheel. It’s like offering sunshine on a plate. Think about it. Glorious peaches have a floral sweetness with a juicy delivery that satisfies any palate. The milky tenderness of the fresh mozzarella compares itself to a luscious layer of cream. Is it any wonder cheese lovers rave about it?

FRESH PEACH MOZZARELLA SALAD

Ingredients:

16 ounces fresh mozzarella cheese, sliced and cut in halves

3 peaches, pitted and sliced

3 tablespoons olive oil

1/4 teaspoon sea salt

1/8 teaspoon white pepper

Baby spinach leaves

Instructions:

On salad plates, arrange fresh mozzarella halves, peach slices, and baby spinach leaves. In a small bowl, combine olive oil, sea salt, and white pepper. Drizzle dressing over all. Serve immediately.

Lemon Garlic Hummus

What’s Cooking in Gail’s Kitchen? Country Casual Cravings: Lemon Garlic Hummus! If you go crazy over hummus and veggies, here’s a variation that adds flavorful notes of citrus. The use of pink-colored Himalayan salt equals an added bonus of less sodium than table salt plus trace elements of healthy minerals like iron, which translates to protein that maintains good body chemistry. But that’s the boring news. The best part, in my opinion, is the guilt-free buttery taste of hummus. Discover how one creamy spoonful practically melts in your mouth. Then scoop away with crisp and zesty radish slices. It’s finger food on steroids.

LEMON GARLIC HUMMUS

Ingredients:

15-ounce can chickpeas, rinsed and drained, hulls removed

2 tablespoons olive oil

2 tablespoons fresh lemon juice

1/8 teaspoon garlic powder

1/2 teaspoon pink Himalayan salt

2 teaspoons sesame oil

Paprika, toasted sesame seeds, for garnish

Radish slices, for serving

Instructions:

In a food processor, combine chickpeas, olive oil, lemon juice, garlic powder, pink Himalayan salt, and sesame oil. Press Pulse to blend until very smooth. If necessary, add a tablespoon of water to create a smoother consistency. Transfer hummus to a serving bowl. Garnish with a sprinkling of paprika and toasted sesame seeds. Serve with sliced radishes.

Tails of Maine Lobster

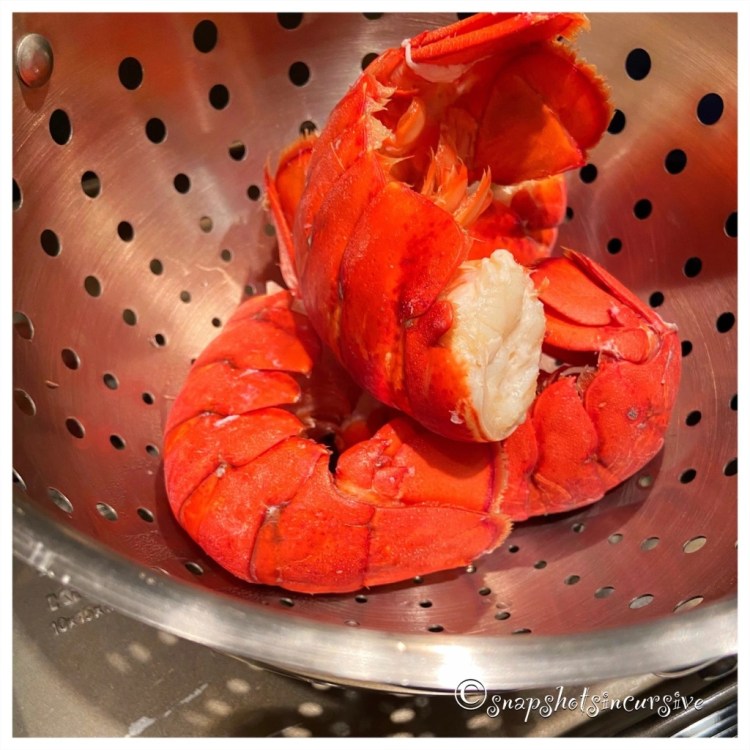
What’s Cooking in Gail’s Kitchen? Here Come the Holidays: Tails of Maine Lobster! There’s an upside to living through a pandemic. Practically everything is available to order from computer-to-doorstep. And that includes Maine hard shell lobsters, especially when you live in a state that is landlocked. Of course, you still have to do a little homework by reading reviews and asking questions on Live Chat websites. We found talking directly to a customer service representative can answer a lot of confusing questions and bring clarity. In turn, you never know when an actual salesperson of the company will offer an unexpected special to entice the purchase further. I guarantee you, it’s absolutely worth the time. The results are simply delicious.

TAILS OF MAINE LOBSTER

Ingredients:

2 6-ounce frozen lobster tails, thawed

2 tablespoons sea salt

1 cup unsalted butter

1 lemon, for zest

1 lemon, quartered for garnish

Instructions:

Before cooking the lobster tails, make the clarified butter. In a small, heavy bottomed saucepan, warm the butter over medium-low heat. Do not stir. Allow the butter to melt without turning brown. Gradually a white foam will appear on the surface. Allow the melted butter to stand for 5 minutes. Tilt the saucepan to carefully spoon the white foam off the top. This may take several steps. Strain the clarified butter through a cheesecloth to remove any milk solids. This will discard any brown bits on the bottom of the pan. Transfer clarified butter back to the saucepan to keep warm. Divide the lemon zest into single-serving dipping bowls. Set aside. To make the lobster tails, bring a pot of water to a boil. Reduce heat to a soft boil and add sea salt. Drop tails in one at a time. Cook the lobster for 5 minutes. Set a timer to avoid overcooking. The lobsters will be bright red when done. Using metal tongs and a large strainer, take the tails out of the boiling water. Transfer to two dinner plates. Pour the clarified butter over the lemon zest in the dipping bowls. Garnish with lemon wedge. Serve immediately.

Zapata Tequila Shots

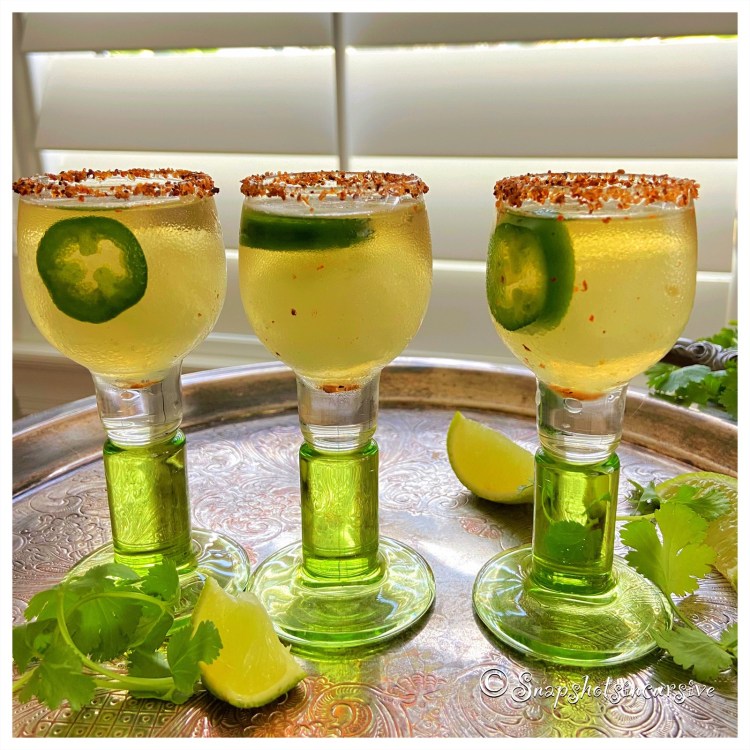
What’s Cooking in Gail’s Kitchen? Uplifting Aromas: Zapata Tequila Shots! You’re either going to love me or hate me for this recipe, so first hear me out. I’m a tequila-girl; not a crazy one, but one who has a zest for life. I like chili peppers, too. As you read through the recipe, let me offer alternative ways to “tone down” the cocktail. Because the non-alcoholic margarita mix is frozen into cubes, they can be dropped into a blender and made into a tasty frozen margarita. Simply adjust the amount of spicy tequila (or not) to suit your taste. A slushy is also very tasty, using the non-alcoholic margarita mix ice cubes and adding sparkling water. Now you see, everyone can be happy with this tasty margarita.

ZAPATA TEQUILA SHOTS

Ingredients:

Chili-lime seasoning blend

1 cube of frozen margarita mix*

1 1/2 ounces pepper-infused tequila**

Jalapeño slice, for garnish

Lime wedge, for garnish

Instructions:

Sprinkle the chili-lime seasoning onto a saucer. Circle the rim of a stemmed cocktail shot glass with a fresh cut lime. Dip the glass onto the saucer of chili-lime seasoning to create a flavorful rim. Add one cube of frozen margarita mix. Pour the pepper-infused tequila over the ice cube. Add a jalapeño slice and lime wedge for garnish. Serve.

Advanced Instructions for Frozen Margarita Mix Ice Cubes:

*Using small 15-count square silicone ice cube trays, fill each tray with your favorite margarita mix. Freeze overnight. Remove cocktail ice cubes and store in zipper freezer bags. Repeat until all the margarita mix is frozen into ice cubes.

Advanced Instructions for Pepper-Infused Tequila:

**To make your own version of pepper-infused tequila, begin with 750 mL of blue agave tequila gold. Using gloves, slice 2-3 chili peppers. Remove stems and partial seeds to control heat; discard. Add the sliced chili peppers to bottle of tequila. Reseal; shake bottle. Store in a cool, dry area for one week. Then pour the tequila through a fine mesh sieve into a large measuring cup. Transfer the pepper-infused tequila back into the bottle. Seal and store in the refrigerator.
Another Egg Salad Recipe

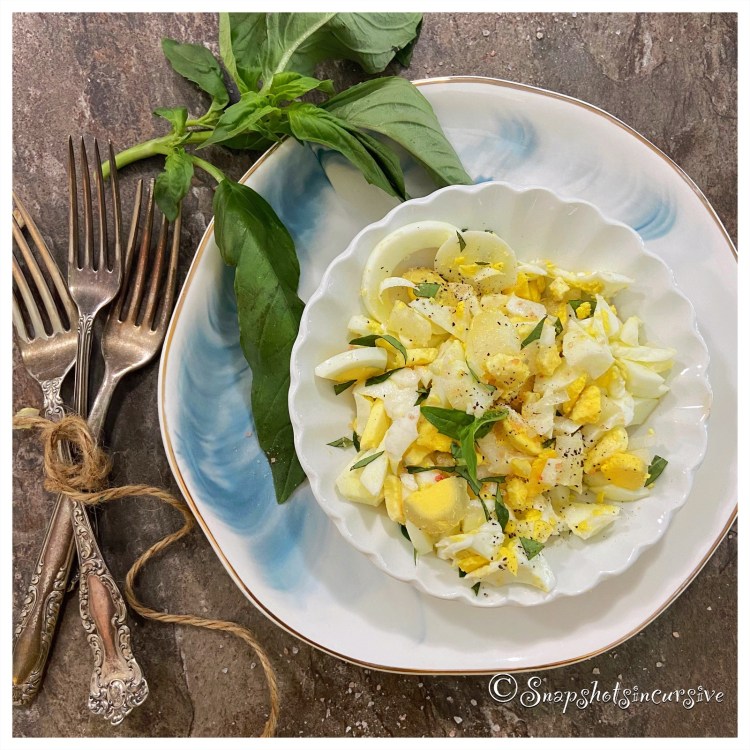
What’s Cooking in Gail’s Kitchen? Uplifting Aromas: Another Egg Salad Recipe! Just what you need…….another way to make egg salad at home. What’s the mystery, you ask, rolling your eyes and shaking your head from side to side. Well sometimes those extra calories in mayonnaise can blow up a diet, if you know what I mean. Besides, I’m a huge fan of olive oil and fresh basil to make a dish flavorful. Sweet vidalia onions are a nice compromise to its distant cousin, the purplish-red onions, so you choose which way to go. Fair warning, though, this scaled down version of egg salad won’t stick together like glue. You’re better off eating it with a fork, spooning it onto a bed of baby spinach leaves, or scooping it off the plate onto a multigrain cracker.

ANOTHER EGG SALAD RECIPE

Ingredients:

4 hard boiled eggs, cooked and chopped

1/2 cup sweet onion, chopped

2 tablespoons olive oil

1 teaspoon Himalayan sea salt

2 stems fresh basil leaves, snipped

Instructions:

In a serving bowl, combine chopped hard boiled eggs and sweet onion pieces. Drizzle olive oil over all. Sprinkle Himalayan sea salt to taste. Add fresh basil snips. Gently toss and serve.

Yeast Artisan Bread

What’s Cooking in Gail’s Kitchen? Elevated Edibles: Yeast Artisan Bread! There’s no doubt bread can be a family’s comfort food, even if you seldom bake it yourself. With more people setting up a home office or home schooling, suddenly bread-baking has turned into a thing. And if you own a bread machine, better yet. Dust it off and give it center stage on the quartz countertop in your gourmet kitchen. Baking bread is like therapy for the soul. We combine ingredients, knead dough, make decorative slits on top, and bake it to a rich golden color. From start to finish, it becomes a focused project. When the house begins to smell like the neighborhood corner bakery, everyone notices. It’s time to slice it up and slather on the butter.

YEAST ARTISAN BREAD

Ingredients:

1 cup water

2 tablespoons olive oil

1 teaspoon sea salt

3 cups flour

1/4 cup sugar

1 packet active yeast

Instructions:

Using a bread machine, add ingredients in the order listed. Always add the yeast last, creating a small indentation on the top of the dry ingredients. Pour yeast into indentation. Select the “Dough” setting. At the end of the cycle, turn the dough onto a lightly floured surface. Knead for one minute. Grease a bowl with olive oil. Transfer the dough to the bowl. Cover with plastic wrap and let rise in a warm place until doubled in size, about one hour. Cover bowl with a damp cloth. Turn the dough onto a lightly floured surface. Punch the dough down and knead for a few seconds. Form the dough into a ball and return to the bowl. Cover again and allow it to rise in a warm place 30 minutes longer. To bake in an iron skillet, preheat oven to 400°. Put the iron skillet in the oven while it is preheating. Place a roasting pan on the bottom shelf of the oven. Fill it with one inch of hot water. Using oven mitts, remove the hot skillet from the oven. Grease the inside of the skillet with olive oil. Sprinkle with one tablespoon cornmeal. Carefully transfer the puffed bread dough to the iron skillet. Dip a kitchen shears in hot water. Cut slits in the top of the dough. Sprinkle generously with water. Bake for 30-35 minutes until the loaf is a deep golden brown. When a cake tester is inserted in the center, it comes out clean. Remove the iron skillet from the oven. Immediately remove artisan bread to prevent over baking. Allow it to cool on a wire rack for 10 minutes before cutting.

Xanadu Pasta Salad

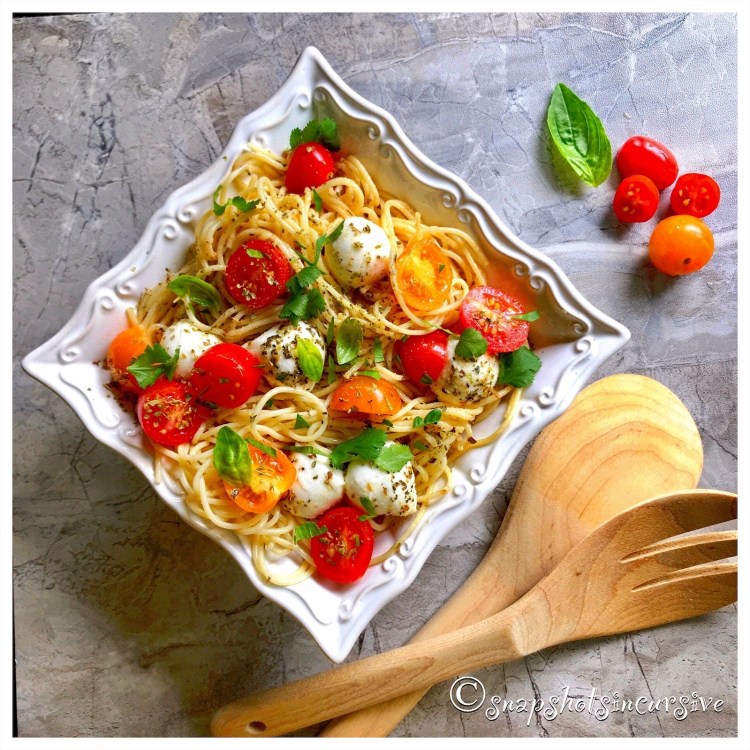
What’s Cooking in Gail’s Kitchen? Table Food: Xanadu Pasta Salad! At first glance, this may appear as a five-minute throw-together meal. Think again. In actuality, the magic begins once half the ingredients are combined and tucked away in the refrigerator for a couple days to marinate. At this point, the pasta actually transforms into a gourmet dish you are likely to have tasted at a family-owned sandwich shoppe or small town deli. One forkful may leave you wondering if this is all a dream. Is that music I hear in the background? Xanadu. Quickly, store those thoughts in your memory bank. I have no doubt you’ll return there for more.

XANADU PASTA SALAD

Ingredients:

16 ounces vermicelli spaghetti pasta

1 1/2 tablespoons kosher salt

2 tablespoons seasoned salt

1/2 cup lemon juice

1/3 cup vegetable oil

1 pint red and yellow cherry tomatoes, halved

8 ounces small mozzarella balls, halved

1 teaspoon crushed oregano

Fresh basil, for garnish

Instructions:

Cook vermicelli according to package directions. Drain. Transfer to a large bowl. Combine cooked pasta, kosher salt, seasoned salt, lemon juice, and vegetable oil. Pour mixture into a gallon ziplock bag. Refrigerate for two days, turning a couple times to marinate flavors. Then pour seasoned pasta into a large bowl. Spoon in red and yellow cherry tomatoes. Add small mozzarella balls. Sprinkle with crushed oregano. Gently toss. Garnish with fresh basil. Serve immediately. Refrigerate leftovers.

Wild Ramps Charbroiled

What’s Cooking in Gail’s Kitchen? Table Food: Wild Ramps Charbroiled! Whether you stumble upon this coveted crop at your neighborhood Farmers Market, or are fortunate enough to forage them yourself, wild ramps are as rare as hens teeth. You better have a plan. Unless you pickle them or freeze them, the best you can hope for is a 4-5 day shelf life in the refrigerator. At that point they will begin to deteriorate, develop an offensive odor, and you will have lost your window of opportunity for the year. Practice sustainable harvest. Never take more than you intend to eat.

WILD RAMPS CHARBROILED

Ingredients:

1/2 pound wild ramps

1/3 cup olive oil

1 teaspoon sea salt

1/4 teaspoon crushed oregano

Instructions:

Preheat oven to 425°. Wash thoroughly every crevice and leaf stem of each ramp. Cut off and discard bulb roots. Rinse again. Gently pat dry with paper towels. Transfer ramps to a baking sheet that has been sprayed with nonstick oil. Arrange ramps in a single layer, alternating ends and extending leaves to lay flat. Brush with olive oil. Sprinkle with sea salt and crushed oregano. Bake until bulbs are tender golden, leaves have shrunk, and several spots are charred. Allow to cool slightly before serving. Leftover ramps maybe crushed into a topping for sprinkling over Wild Ramp Bacon Chowder.*

*Follow the link for Wild Ramp Bacon Chowder

http://Snapshotsincursive.com/2020/09/15

Oregano Hasselback Sweet Potato

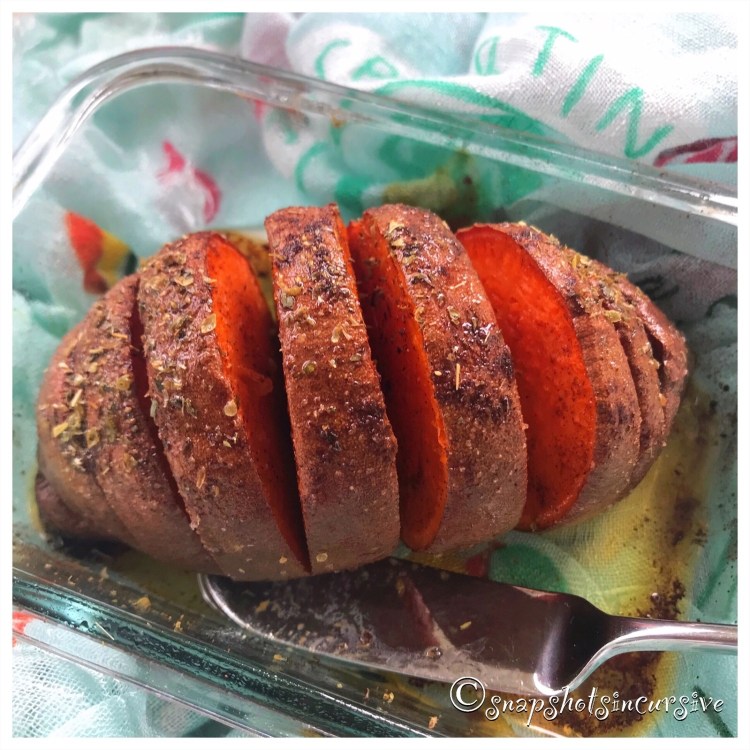
What’s Cooking in Gail’s Kitchen? Table Food: Oregano Hasselback Sweet Potato! Have you ever stepped foot in a grocery store and been greeted by a warmer filled with foil-wrapped oven-baked sweet potatoes? The naturally sweet, earthy aromas trigger the tastebuds the same way rotisserie chicken and sizzling bacon do. You want it and gotta have it. Wait until you bite into the creamy texture infused with oregano and cinnamon. Sounds like a sensual adventure, doesn’t it?

OREGANO HASSELBACK SWEET POTATO

Ingredients:

2 sweet potatoes, skin on

2 tablespoons olive oil

1/4 teaspoon oregano, crushed

1/4 teaspoon seasoned salt

1/8 teaspoon cinnamon

Instructions:

Preheat oven to 350°. Leaving skin on potatoes, wash thoroughly and pat dry. Put one potato on a cutting board. Beginning at one end, slice in strips, being careful to stop before slicing the bottom skin. Transfer to a shallow baking dish. Continue until both potatoes are sliced. In a small bowl, mix olive oil, crushed oregano, seasoned salt, and cinnamon. Brush each potato with olive oil mixture, separating slices to coat both sides. Drizzle remaining oil over all. Bake potatoes one hour until crispy, basting occasionally. Serve immediately.