Yummy Spud Fries

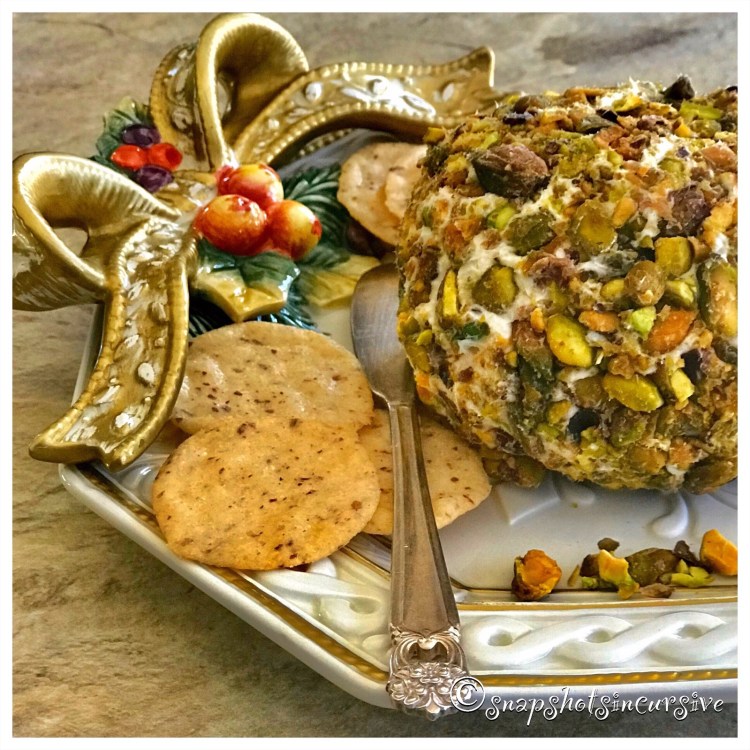
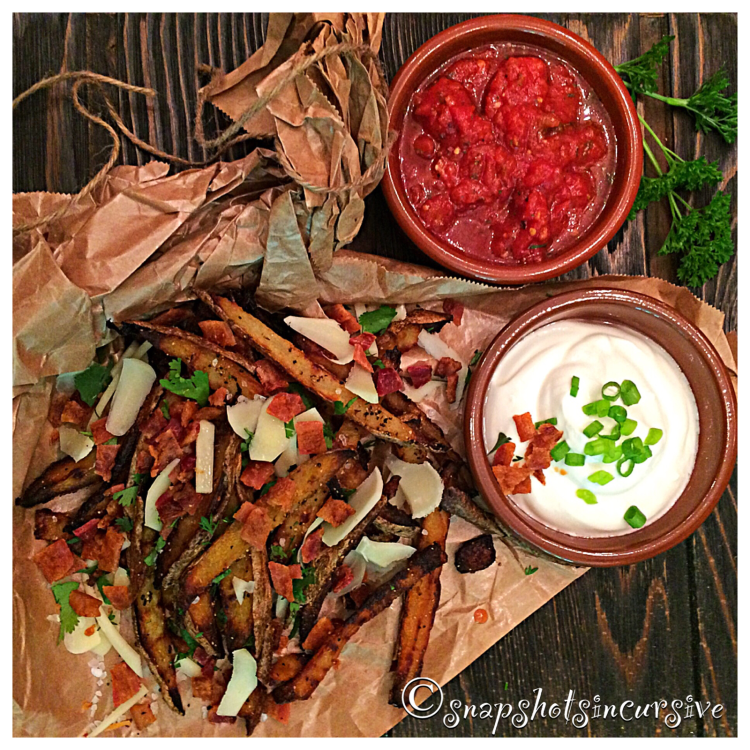
What’s Cooking in Gail’s Kitchen? Foodstuff Redefined: Yummy Spud Fries! Choose a healthier way to have your fries and eat them, too. Take regular potatoes, preferably russet, cut them into thick strips leaving the skin on, and bake until crispy before adding a mound of toppings. I use both grated and shaved Parmesan cheese. You’ll know perfection when the outside is a lovely sunset golden color. One bite reveals a fluffy potato within. Now dunk them in sour cream and chives or slather on thick tomato ketchup. Mmmmm.

YUMMY SPUD FRIES

Ingredients:

4 russet potatoes, washed and cut into thick strips

1/4 cup olive oil

1/2 teaspoon garlic powder

1/2 teaspoon thyme

1 teaspoon seasoned salt

1/2 cup Parmesan cheese, grated

1/4 cup fresh parsley, chopped

1/4 cup Parmesan cheese, shaved

Garnish with bacon crumbles

Instructions:

Preheat oven to 425°. Put potato strips in a large bowl. Drizzle with olive oil. Toss to coat. Season with garlic powder, thyme, and seasoned salt. Coat well. Transfer potatoes to a nonstick baking sheet. Spread into a single layer. Reserve oil in bowl. Bake 15 minutes. Turn potatoes and bake 15 minutes longer. Transfer potatoes back into the bowl with reserved olive oil. Sprinkle with grated Parmesan cheese and fresh parsley. Coat well. Layer fries onto baking sheet. Return to oven for 10 minutes, or until cheese is melted. Before serving sprinkle spud fries with shaved Parmesan cheese and bacon crumbles. Serve immediately.

Xavier Grilled Steak

What’s Cooking in Gail’s Kitchen? Foodstuff Redefined: Xavier Grilled Steak! Just when you thought a juicy New York Strip steak couldn’t get any better, here you go. Grilled to taste, smothered in gooey Swiss cheese and crowned with fresh asparagus spears is a meal-in-one guaranteed to make anyone feel like royalty. For those who love onions, take it one step further. Sprinkle crispy French-fried onions over all before serving. Looks good, doesn’t it? Try not to stare.

XAVIER GRILLED STEAK

Ingredients:

2 New York Strip steaks, 1 1/2 inches thick

2 tablespoons olive oil

Sea salt and cracked black pepper to taste

10 asparagus spears, ends trimmed

4 slices Swiss cheese

1/4 cup French-fried onions

Instructions:

Rub both sides of the New York Strip steak with olive oil. Season to taste with sea salt and cracked pepper. Place in a shallow dish. Marinate steak for 45 minutes in the refrigerator, turning once. Remove from refrigerator to allow meat to come to room temperature, approximately 15 minutes. Preheat outdoor grill. Cook steaks over medium heat 4-5 minutes until slightly charred. Turn the steaks over and grill 3 minutes longer for medium-rare, 5 minutes longer for medium, or 8 minutes longer for medium-well. Meanwhile to steam asparagus spears, bring water to a boil. Reduce to simmer. Place asparagus spears into the steamer basket. Cover and steam approximately 3-5 minutes until asparagus turns bright green, but is still tender. Remove from steamer. When steaks are cooked to perfection, place them on a platter to rest so the juices are absorbed. (This is the secret to juicy steak.) While the meat is resting, place two slices of Swiss cheese on each. Divide asparagus spears between them. Tent with foil. Let rest 5-7 minutes. Top with crispy French-fried onions before serving.

Watermelon Salsa

What’s Cooking in Gail’s Kitchen? Foodstuff Redefined: Watermelon Salsa! Want a conversation-starter? The next time you’re in a group, pose the simple question: “Do you eat watermelon WITH or WITHOUT a sprinkling of salt?” Then stand clear and let the debate begin. Some insist that a pinch of salt awakens the taste buds. Others believe it interferes with the natural sweetness. Me? I gotta tell you, I kinda prefer the whole sweet & salty thing. Like mixing buttered movie popcorn with kettle corn. But that’s another story.

WATERMELON SALSA

Ingredients:

1/4 pound seedless watermelon, rind removed and cut into chunks

1 ripe peach, peeled, pit removed, and cut into chunks

1/4 cup red onion, chopped

1/4 cup cilantro, chopped

1-2 jalapeño peppers, stem removed, finely diced

Juice of 1 fresh lime

Raspberry Chipotle seasoned salt (optional)

Instructions:

Combine watermelon, peach, red onion, cilantro, and jalapeño peppers. Gently toss all ingredients together. Squeeze fresh lime juice over all. Chill one hour. Before serving add a sprinkling of raspberry chipotle seasoned salt or have the shaker available as an option.

Grilled Corn-on-the-Cob

What’s Cooking in Gail’s Kitchen? Foodstuff Redefined: Grilled Corn-on-the-Cob! Here’s an alternative to stovetop corn on the cob or microwave cooking. Throw the corn on the grill while the burgers are on their way to being well-done. You won’t believe the incredible taste. Or will you? If the results are slightly blackened or charred in spots, so much the better. That’s what makes it taste so good. By leaving the corn in the husk, natural steaming keeps the corn moist rather than dry and brittle. And if it rains? By all means, get out the kitchen torch and improvise. Toppings still apply.

GRILLED CORN ON THE COB

Ingredients:

4 ears corn, in husks

1 teaspoon sea salt

Butter to taste

1/4 cup parmesan cheese, grated

1/8 teaspoon red pepper flakes

1/8 teaspoon Mrs. Dash Garlic and Herb seasoning*

Salt to taste

Instructions:

Peel the husks without removing at the base. Strip away the corn silk. Fold the husks back into place. Fill a bowl with cold water. Add sea salt. Submerge the corn for 10 minutes. Heat the grill to medium-high. Remove corn and let drain. Place on the grill for 15 minutes. Cover. Turn the corn occasionally. Allow the corn to get slightly charred in places. When done, transfer corn cobs to a serving platter. Slather with butter. Sprinkle with grated parmesan cheese, red pepper flakes, and Mrs. Dash Garlic and Herb seasoning. Add sea salt to taste. Serve immediately.

*I receive no recompense for mentioning Mrs. Dash Garlic and Herb seasoning.

Urban Taco Pizza

What’s Cooking in Gail’s Kitchen? Sunshine Eats: Urban Taco Pizza! If you’re caught between the Taco/Pizza dilemma of what to have for dinner, simply combine the two for a taste extravaganza. Everyone wins. By using a prepared crust, taco seasoning packet, and bottled salsa, dinner can be ready in as fast as 30 minutes. For the cooking enthusiast, I know you already have all the homemade ingredients on hand. Either way, time is valuable in a life of constant motion. Do yourself a favor and prepare a healthy option at home. It’s easy, delicious, and most of all kid-friendly!

URBAN TACO PIZZA

Ingredients:

1 prepared pizza crust, any variety

1 tablespoon cornmeal

1 pound lean ground beef

1-ounce packet taco seasoning mix

1 cup salsa plus more for topping

1 cup Monterey Jack cheese, shredded

1 cup Sharp Cheddar cheese, shredded

1 cup Spring Mix salad greens

1-2 tomatoes, chopped

1/4 cup slices black olives

Crushed tortilla chips

Instructions:

Preheat oven to 400°. Spray a pizza pan with nonstick oil. Sprinkle cornmeal on pan. Cover with pizza dough. Bake 5 minutes. Remove from oven and set aside. In a skillet, cook ground beef until crumbly. Add taco seasoning mix. Mix well. Cover pizza dough with 1 cup salsa. Layer ground beef mixture, spreading almost to the edge. Top with both cheeses. Bake 15-18 minutes or until crust is golden brown and cheese is completely melted. Remove from oven. Top with mixed salad greens, chopped tomatoes, and sliced black olives. Spoon on more salsa, to taste.

Kielbasa Grilled Romaine

What’s Cooking in Gail’s Kitchen? After the Holidays: Kielbasa Grilled Romaine! When the sun comes out and the wind dies down, it’s not unusual to see Northerners uncover the gas grill for a momentary glimpse of Summer. Everyone needs a reprieve from the winter doldrums, right? Nothing works better than a protein-rich complex carbohydrate meal, in my opinion. And grilled foods definitely lift the mood like a breath of fresh air. Sound painless? It pretty much is. Even the birds are chirping louder than usual.

KIELBASA GRILLED ROMAINE

Ingredients:

1 pound kielbasa sausage link

2 romaine hearts

3 tablespoons olive oil

1/4 teaspoon seasoned salt

1/4 teaspoon garlic and herb seasoning

1/8 teaspoon red pepper flakes

1/2 pint cherry tomatoes, halved

4 ounces parmesan cheese, crumbled

Instructions:

Remove kielbasa sausage link from package. Rinse and pat dry. Transfer to a platter. Rinse romaine lettuce hearts. Pat dry. Trim the end stalks, leaving enough to keep the bunches intact. Transfer to a platter. In a small dish, combine olive oil, seasoned salt, garlic and herb seasoning, and red pepper flakes. Using a silicone brush, coat the leaves of the romaine hearts, inside and out with the olive mixture. Halve the cherry tomatoes; place in a serving bowl. Preheat the outdoor grill on High setting. Using tongs, transfer the seasoned romaine lettuce hearts directly to the grill. Repeat with kielbasa sausage link. Grill for 3 minutes. Flip the romaine lettuce and grill 2 minutes longer. Rotate the kielbasa sausage for even browning. Remove all to clean platters. To serve, place charred romaine lettuce hearts on a dinner plate. Divide the kielbasa sausage between plates. Add cherry tomato halves. Top with crumbled parmesan cheese. Drizzle with remaining olive oil mixture. Serve immediately.

Grill Pan Pork Loins

What’s Cooking in Gail’s Kitchen? After the Holidays: Grill Pan Pork Loins! My latest kitchen essential is an enameled cast iron skinny grill that just happens to fit perfectly across two burners on my newly installed glass stovetop. As you can see, the vibrant red handles not only allow for attractive table service, but also make it easy to manage while cooking. Now I get that unique grilled taste all year long, no matter what the weather. The cast iron feature is the secret to even cooking. Plus, the nonstick finish makes cleanup a flash, in addition to enhanced seasoning qualities. I like the idea that foods, once grilled, show the little black grill marks. After all, it’s about the presentation, isn’t it? In addition, vegetables work out quite nicely. No more frustrating pieces falling through the grill grates. I can see you agree with me.

GRILL PAN PORK LOINS

Ingredients:

4 pork loins, boneless, and one-inch thick

1 tablespoon olive oil

1/8 teaspoon sea salt

1/8 teaspoon black pepper

1/8 teaspoon garlic powder

1/4 red onion, sliced

1 cup broccoli florets

1/3 cup pineapple chunks

4 fingerling potatoes, halved

Instructions:

Preheat the stovetop grill pan on medium heat setting. Brush lightly with olive oil. Sprinkle the pork loins with sea salt, black pepper, and garlic powder. Arrange on grill pan. Add red onion slices, broccoli florets, and pineapple chunks in a single layer. Pierce fingerling potatoes with a fork. Microwave on High setting for two minutes. Cut in half and add to grill pan. Cook pork loins until golden brown, about 7 minutes per side. Turn vegetables as needed to prevent scorching. When pork reaches 145° on a meat thermometer, transfer loins to a cutting board; tent with foil for 5 minutes. Turn stovetop setting to Off. Divide food into four portions. Serve warm.

Pretzel Nuggets

Experience the Holidays: Pretzel Nuggets! Anyone who has been to an outlet mall, movie theater complex, or shopping center may have been seduced by the tantalizing aroma of freshly baked pretzels. How about those wonderful travel cups of soft buttery nuggets speared with a wooden pick? Who can resist? Especially with a side of gooey molten cheese? Here’s a shortcut to making a batch at home in your own kitchen. It’s all about portion control to keep it real. The next time you’re at the grocery, pick up a tube of refrigerated biscuit dough. You can thank me later.

PRETZEL NUGGETS

Ingredients:

1 tube refrigerated biscuit dough, 8-count

1/4 cup baking soda

1 egg, beaten

1-2 teaspoons Everything But Bagel Seasoning*

1 tablespoon coarse sea salt

Instructions:

Preheat the oven to 425°. Line a baking sheet with parchment paper. Cut each biscuit slice into quarters. Roll each quarter into a ball. Bring 4 cups of water to a boil in a 2 1/2 quart pan. Slowly stir in baking soda. Reduce the heat to a simmer. Drop the biscuit dough rounds into the water. Avoid overcrowding by working in batches. Cook dough for one minute. Remove with a slotted spoon and place on parchment paper-lined baking sheet. Brush with beaten egg to assist browning. Sprinkle with Everything But Bagel seasoning. Finish with coarse sea salt. Bake 15-20 minutes until pretzel nuggets are golden brown. Repeat with remaining dough. Cool pretzel nuggets on a wire rack. Serve with cheese dip.

*To make your own Everything But Bagel Seasoning, click the link below.

https://snapshotsincursive.com/2018/07/17

Original Pistachio Party Ball

What’s Cooking in Gail’s Kitchen? Splurge-Worthy Goodness: Original Pistachio Party Ball! Nothing says par-tay like a holiday cheese ball. Instead of picking one up at the grocery store this year, why not surprise the family and make something a little different. Pistachios tend to be shoved aside in favor of walnuts and pecans, mostly due to their cost. But I guarantee you, people will sit up and take notice of them embedded in this party cheese ball. A little goes a long way, especially when rolled on the outside of the cheese ball. For those who enjoy the experience of cracking the shell to pluck out the pistachio, you not only get to nibble as you crack, you also justify the savings involved over the cost of pistachios without shells. Now there’s a thought worth considering.

ORIGINAL PISTACHIO PARTY BALL

Ingredients:

8 ounces Neufchâtel cheese, room temperature

4 tablespoons unsalted butter, softened

1 teaspoon zesty Italian salad dressing dry mix

1 teaspoon Worcestershire sauce

1/2 teaspoon red pepper flakes

1 cup extra sharp cheddar cheese, shredded

1 cup pistachios, roughly chopped

Instructions:

In a bowl, cream together Neufchâtel cheese and unsalted butter until smooth. Sprinkle in zesty Italian dry mix. Mix well. Add Worcestershire sauce and red pepper flakes. Fold in sharp cheddar cheese. Stir until well combined. Place a sheet of plastic wrap on the counter. Layer with chopped pistachio nuts. Transfer cheese mixture onto the nuts. Wearing disposable gloves, form the cheese mixture into a ball, turning to cover each side with chopped nuts. When completely covered, wrap the pistachio cheese ball in a clean piece of plastic wrap. Refrigerate at least one hour to intensify flavors. Serve with assorted crackers.