Onion Basil Bread

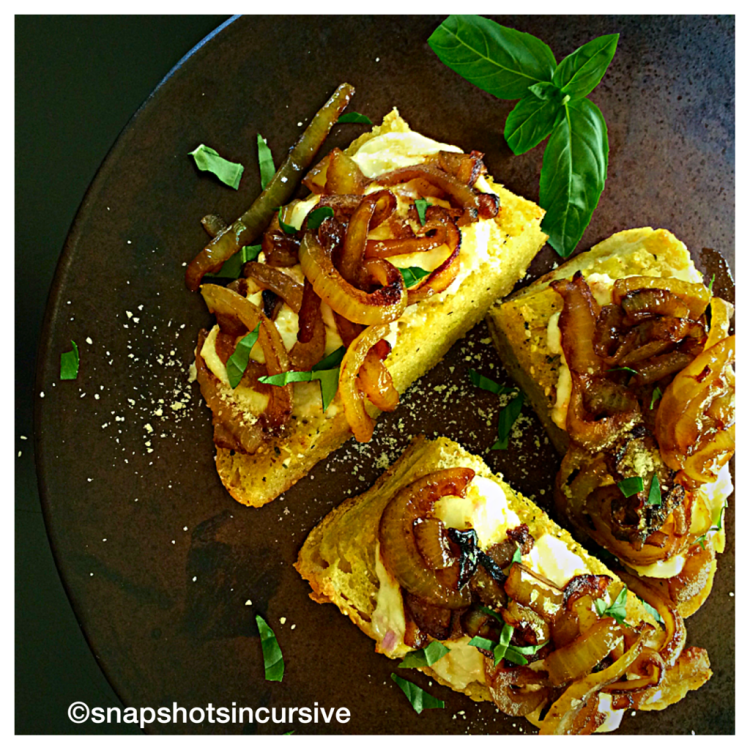
What’s Cooking in Gail’s Kitchen? All the Buzz: Onion Basil Bread! You have got to try this! Tasty Vidalia onions are unbelievably sweet and mild. They are grown locally in the state of Georgia, yet recognized all over the world. You begin to see them pop up in the neighborhood markets from mid-April to mid-June. Their unique fresh taste makes them an outstanding option for eating raw or cooking in recipes. Packed with nutritional value makes them a bonus. Become a believer; discover why Vidalia onions are all the buzz!

ONION BASIL BREAD

Ingredients:

Loaf of sesame artisan bread

1/3 cup olive oil plus 2 tablespoons 

1/8 teaspoon garlic powder

1/4 teaspoon marjoram

1/8 teaspoon sea salt

1 large size Vidalia onion, sliced

1/4 teaspoon seasoned salt

1 cup Jarlsberg cheese, shredded

2-3 tablespoons Parmesan cheese, grated

Fresh basil

Instructions:

Preheat the oven to 400°. Line a baking sheet with foil. Cut the bread in half, then length-wise, and quarters. Dredge the cut sides in 1/3 cup olive oil. Sprinkle with garlic powder, marjoram, and sea salt. In a skillet on medium-high heat, add 2 tablespoons olive oil. Add onion slices and seasoned salt. Cover and cook one minute. Stir, reduce heat to medium-low and cook until the onions are caramelized, about 12 minutes. Watch carefully to reduce scorching and stir if necessary. Meanwhile divide Jarlsberg cheese equally over the face of the bread. Top with caramelized onions. Bake for 10 minutes, or until the cheese is bubbly. Remove from oven, sprinkle with Parmesan cheese and garnish with fresh basil. 
Instant Mac ‘n Cheese

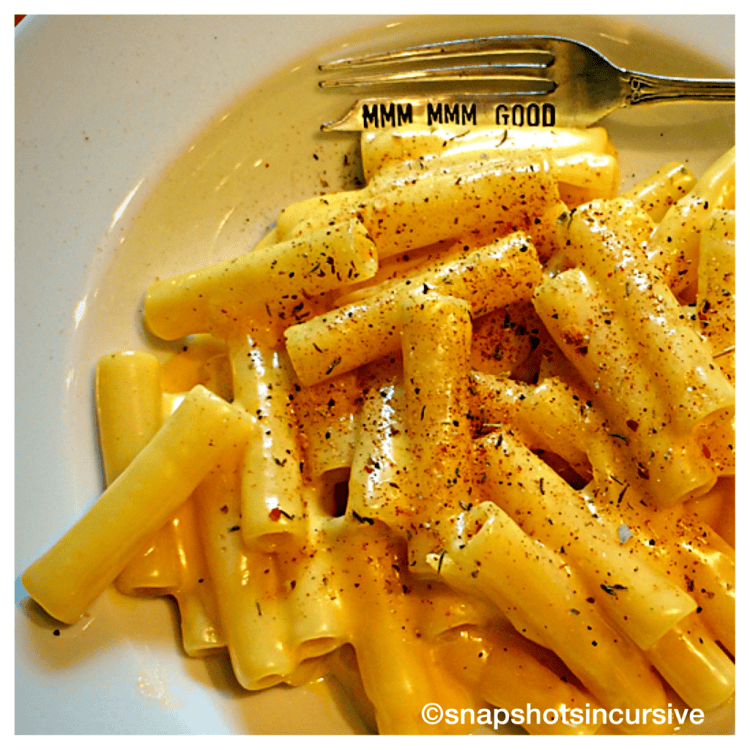
What’s Cooking in Gail’s Kitchen? All the Buzz: Instant Mac ‘n Cheese! Face it. Every once in awhile the craving hits us to settle into a comfy chair with a warm bowl of Mac ‘n Cheese. Most pantries have all the ingredients you need to make it at home in a flash. Pasta, butter, milk, cheese, and seasonings. If you don’t have elbow macaroni, substitute ziti. If you’re low on cheddar cheese, use a couple slices of Velveeta instead. It’s all good. Sprinkle the gooey Mac ‘n Cheese with Cajun seasoning for extra zest. Oh, yeah!

INSTANT MAC ‘N CHEESE 

Ingredients:

4 ounces pasta

2 tablespoons butter

2 tablespoons flour

1/8 teaspoon sea salt

1 cup milk

1 cup cheddar cheese, shredded

Dash of Cajun seasoning 

Instructions:

Cook pasta according to package directions. In medium saucepan, melt butter over low heat. Add flour and sea salt. Stir until smooth. Raise heat to medium. Slowly add milk, stirring occasionally. Cook until bubbly. Add cheese and stir well until melted. Drain pasta. Blend with cheese sauce stirring to coat. Sprinkle with Cajun seasoning. 

Effortless Pineapple Chicken

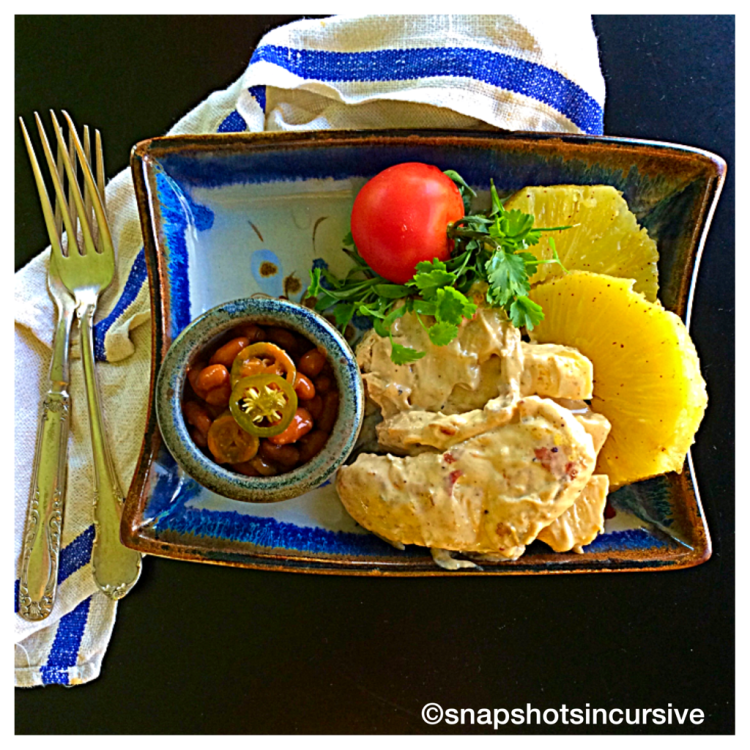
What’s Cooking in Gail’s Kitchen? All the Buzz: Effortless Pineapple Chicken! Has anyone noticed May is the peak season for pineapple? Yes, I’m talking about fresh pineapple. It is naturally sweet and loaded with juice. If you’ve never cut a fresh pineapple, there are plenty of step-by-step instructions on the Internet, not to mention YouTube videos that walk you through it. Trust me, the benefits outweigh the mystery. Step out of your comfort zone and take a walk on the wild side. Fresh pineapple, it’s the bomb!

EFFORTLESS PINEAPPLE CHICKEN 

Ingredients:

6 chicken tenders, boneless and skinless

1/2 cup buttermilk 

6 pineapple rings 

1/8 teaspoon paprika 

2 tablespoons olive oil

1/8 teaspoon garlic powder

1/4 teaspoon sea salt

1/8 teaspoon red pepper flakes 

8 ounces Monterey Jack cheese, thinly sliced

2 tablespoons cooking sherry

Instructions:

Rinse chicken; pat dry. Place in a shallow dish. Pour buttermilk over all and marinate for 30 minutes. Roast pineapple rings on a baking sheet in a preheated oven set to 400° for 20 minutes. Sprinkle with paprika. Set aside. In a large skillet on medium heat, add olive oil. Take the buttermilk-laden chicken tenders and place in the skillet. Sprinkle with garlic powder, sea salt, and red pepper flakes. Reduce heat to medium-low and cook chicken 2 minutes per side. Add pineapple rings, sherry, and Monterey Jack cheese. Reduce heat to low; cover and cook 5 minutes longer until cheese is melted. 

Diablo Pepper Poppers

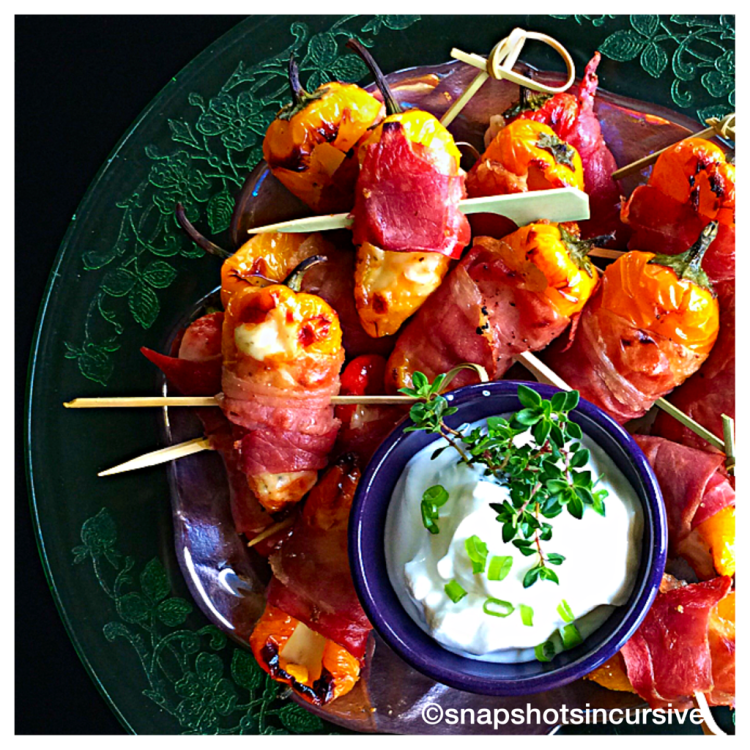
What’s Cooking in Gail’s Kitchen? All the Buzz: Diablo Pepper Poppers! Sometimes you need an appetizer that doesn’t come across as a flame thrower sending your guests to the nearest source of water to put out the fire. I have discovered mini sweet peppers are a great stand-in for their high intensity cousin, the jalapeño. These little jewels are a colorful sight and taste even better than they look, which is pretty appealing. The green, orange, red, and yellow “pops” of color are bursting with flavor as well. No fire extinguisher needed. 

DIABLO PEPPER POPPERS 

Ingredients:

12 mini sweet peppers

2 tablespoons garlic olive oil

1/8 teaspoon garlic and herb seasoning 

1/8 teaspoon seasoning salt

3 green onions, snipped

7 Pepper Jack string cheese sticks

3 ounces prosciutto, deli sliced

Instructions:

Preheat oven to 400°. Line a baking sheet with foil. Spray a wire rack with nonstick spray and place on the pan. Set aside. Wash the sweet peppers. Pat dry. Slice the top of each pepper vertically, removing a small portion to create a well. Remove any seeds. Brush each pepper with the garlic olive oil. Sprinkle on seasonings. Place peppers on the wire rack with cut side down. Bake 10 minutes; then set the broiler to High and broil for 2-3 minutes until the peppers are slightly charred. Remove from oven. Cool slightly. Using a tongs, flip them over. Divide the green onion snips into the bottom of each pepper well. Using a kitchen shears, cut the string cheese to fit each pepper. Take each deli portion of prosciutto and slice it in half lengthwise. Carefully wrap the prosciutto around each filled sweet pepper and place upright on wire rack. Broil on High another 2-3 minutes or until the prosciutto gets crispy. Remove pan from oven and let cool slightly. Taking a cake tester, pierce each pepper from one side to another to make an opening. Insert a wooden pick in the opening. Now you have a finger food appetizer. Serve with herbed yogurt for dipping. 

Yellow Bloomin’ Onion

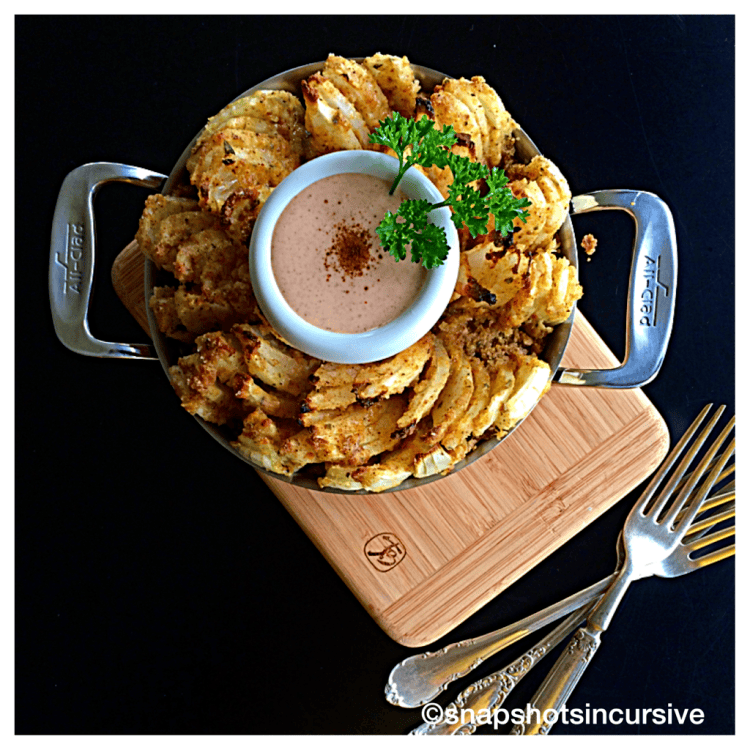
What’s Cooking in Gail’s Kitchen? Food Junkie Favorites: Yellow Bloomin’ Onion! Nothing is more fitting for Spring than an appealing appetizer that resembles a flower, in my opinion. Now you can make a healthy version at home by baking the breaded onion instead of deep-frying it. The last few minutes under the broiler give it a crispy finish that adds extra crunch to the delicious petals. And the dipping sauce….oh my gosh, you have to try it!

YELLOW BLOOMIN’ ONION

Ingredients:

1 large yellow onion

2 tablespoons flour

1/4 cup Italian bread crumbs

1/4 cup Panko crumbs

1/4 cup Parmesan cheese, grated

1 tablespoon Cajun spices

2 eggs, beaten

1 tablespoon milk

1-2 tablespoons butter, melted

Seasoning salt to taste

Instructions:

Preheat oven to 400°. In one bowl, combine the flour, bread crumbs, Panko crumbs, Parmesan cheese, and Cajun spice. Mix well. Set aside. In another bowl, combine beaten eggs and milk. Whisk together. Set aside. Cut the top side of the onion. Turn over and carefully cut the root side just enough to peel the outer skin of the onion. Leave the root intact as this will be the base and hold the onion together. Discard onion skins. In order to give the appearance of an open flower, 16 sections are made. With the root side up, place the knife 1/8″ away from the core and slice straight down. It is best to begin with quarters and then make 3 slices in each quadrant all the way around. Carefully turn the onion over and spread the “petals” apart. Dip the onion in the milk bath and wash it completely using a pastry brush. Carefully transfer the onion to the bowl filled with breading. Beginning at the bottom, cover each petal with dry coating. Again using the pastry brush, continue coating the petals until the egg wash is gone. You may alternate the egg mixture and dry coating to cover the petals. Transfer the onion to an oven-safe pie plate or dish. Cover with foil and bake for 15 minutes. Using hot pads, take the pan from the oven and remove the foil. Using a pastry brush, coat the onion with melted butter. Return to the oven. Bake 10 minutes longer, or until crispy. I set the broiler on High and broiled it for 4-5 minutes to make it extra-crunchy. Watch carefully so it does not burn. Remove from oven. Sprinkle with seasoned salt. Place on a serving platter. Serve with dipping sauce. 

DIPPING SAUCE

Ingredients:

1/4 cup mayonnaise 

1/4 cup Greek yogurt

3 teaspoons ketchup 

2 teaspoons Lea and Perrins 

2 tablespoons horseradish 

1/2 teaspoon paprika 

1/8 teaspoon cayenne 

Instructions:

Combine mayonnaise, yogurt, ketchup, Lea and Perrins, horseradish, paprika, and cayenne. Mix well and refrigerate for one hour. Pour into a small cup and place in the center of the onion. 

Corned Beef Brisket

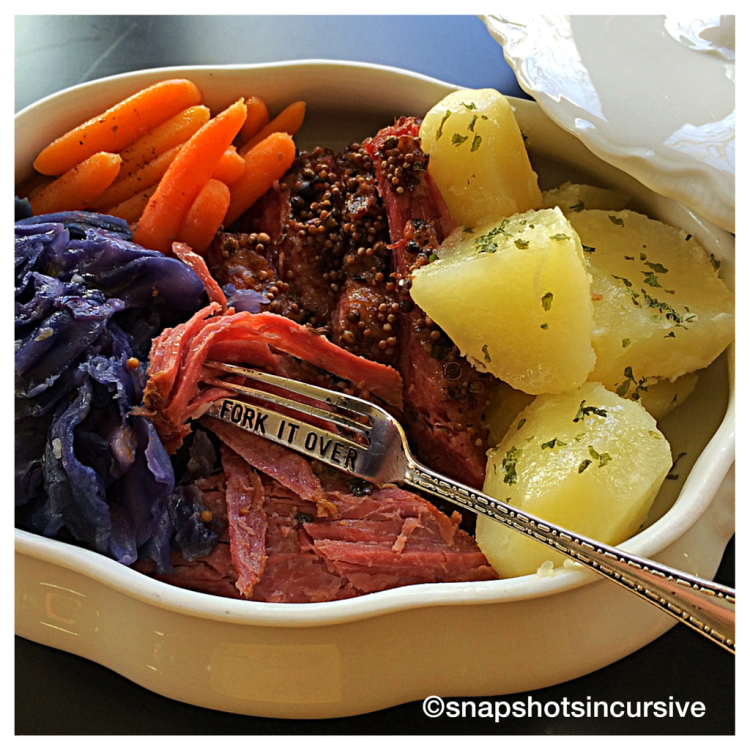
What’s Cooking in Gail’s Kitchen? Food Junkie Favorites: Corned Beef Brisket! Eating corned beef brisket isn’t just for St. Patrick’s Day anymore. However, it’s the best time to stock up when it’s popular and readily available at the nearby market.  Go from the traditional favorite dinner one day to corned beef hash and eggs the next morning and Reuben sliders for a late night snack. Are you getting the idea? Be creative and tell me yours!

CORNED BEEF BRISKET 

Ingredients:

3-pound corned beef brisket, boneless

1/8 teaspoon thyme

1/8 teaspoon garlic powder 

1/8 teaspoon allspice

1 tablespoon peppercorns 

1 tablespoon bay leaves

1 cup ginger beer or water

1-pound baby carrots, peeled

4 tablespoons butter

1/8 teaspoon paprika 

Instructions:

Preheat oven to 300°. Place corned beef brisket, fat side up, in a covered roaster. Sprinkle spices on top. Add 1 cup of ginger beer or water. Cover and roast for three hours. The guideline is one hour per pound. After 2 hours add carrots to roaster. Cover and cook for 1 hour. At that time, the contents should be fork tender. Let the brisket rest for 15 minutes before slicing across the grain. Remove carrots and place in a bowl. Add butter to coat. Sprinkle with paprika. 

BOILED CABBAGE 

Ingredients:

1 head of cabbage

1/2 teaspoon salt

4 tablespoons butter

Instructions:

In a deep pan, add 2 inches of water. Bring to a boil. Add cabbage quarters and salt. Reduce heat; simmer 10 minutes. Turn cabbage with tongs. Simmer 5 minutes longer until tender. Drain well. Add butter to coat cabbage thoroughly. 

PARSLEY BOILED POTATOES 

Ingredients:

3 medium potatoes, peeled and cut into sections

1/2 teaspoon salt

4 tablespoons butter

1/4 teaspoon parsley

Instructions:

Place potatoes in 2 quart saucepan. Pour in enough water to cover. Add salt. Bring to a boil over medium heat. Cook potatoes 15-20 minutes, or until tender. Drain. Add butter to coat. Garnish with parsley. 

Zinfandel Balsamic Reduction Sauce

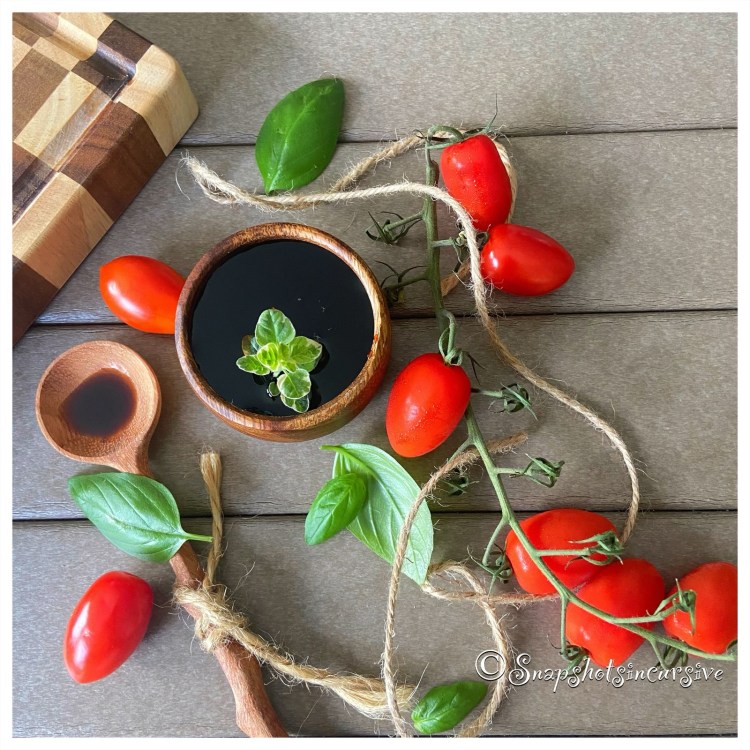
What’s Cooking in Gail’s Kitchen? Grocery List Ideas: Zinfandel Balsamic Reduction Sauce. By now you’re probably very familiar with that finishing touch to garden salads, grilled meats, roasted veggies, and creamy desserts. Look for glossy, syrupy, deep dark brown swirls that taste sweet and smell tangy. It’s the final garnish that stands alone. Pretend you’re writing in cursive or freeform as you drizzle it atop foods. The natural sugars in red wine and raw honey create a thick fine stream that makes any food sit up and take notice. We call it balsamic reduction sauce. 

ZINFANDEL BALSAMIC REDUCTION SAUCE 

Ingredients: 

1 cup Zinfandel red wine 

2 tablespoons balsamic vinegar 

1 tablespoon raw honey

1 tablespoon unsalted butter, cold 

Sea salt & black pepper, to taste 

Instructions: 

In a stainless steel tapered sauce pan over high heat, place the Zinfandel wine, balsamic vinegar, and raw honey. Bring to a boil, stirring constantly. In 15-20 minutes it will reduce by half, and thicken. It should coat the back of a spoon. Remove from heat. Allow the mixture to cool slightly. Whisk in the cold butter until melted for a glossy finish. Season with sea salt and black pepper. 

Xtra Peas, Please

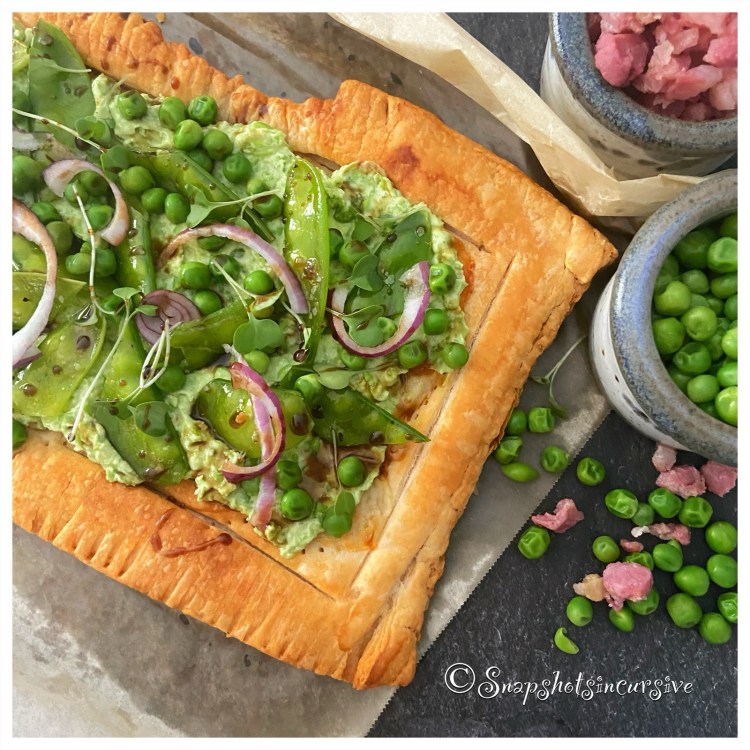
What’s Cooking in Gail’s Kitchen? Grocery List Ideas: Xtra Peas, Please. For an appetizer that will elevate any party, think puff pastry smothered in cheese. When these two partners are baked together, the flaky air-filled pastry surrounds the warm gooey cheese adding a depth of gourmet flavor that makes it unforgettable. On occasion I’ve even been known to toss a handful of flash fried pancetta over the top. It adds another layer of texture that makes it melt-in-your-mouth rich, savory, and buttery. Food for thought. 

XTRA PEAS, PLEASE 

Ingredients: 

2 cups frozen peas 

1 sheet frozen puff pastry, thawed 

3/4 cup Gouda cheese, grated 

8 ounces herbed goat cheese 

2 teaspoons Tupelo honey 

1/2 teaspoon kosher salt

1/8 teaspoon black pepper 

1/2 cup snow peas, trimmed and halved crosswise 

1/2 teaspoon olive oil 

Balsamic glaze, for garnish

Red onion slices, optional

Diced pancetta, optional

Instructions: 

Preheat the oven to 400°. Place a piece of parchment paper on a rimmed baking sheet. Set aside. Cook the frozen peas according to package directions; drain and set aside to cool. For the crust, roll out the puff pastry and place it on the parchment paper. Using a fork, score a border all the way around the edge of the pastry, about 3/4 inch. Use the fork tines to prick the pastry inside the border. Sprinkle evenly with the shredded Gouda cheese. Bake until puffed and golden brown, 18 to 20 minutes. Allow to cool for 15 minutes. Meanwhile, combine the goat cheese, Tupelo honey, one cup of the cooked peas, kosher salt, and black pepper in a food processor. Process until smooth and green in color. Spread the goat cheese mixture on the cooled tart. Sprinkle with the remaining cooked peas. In a medium bowl, gently toss the snow peas in olive oil. Arrange them over the top. Garnish with a drizzle of balsamic glaze, red onion slices, and diced pancetta. Serve. 

Ultimate Mexican Pizza

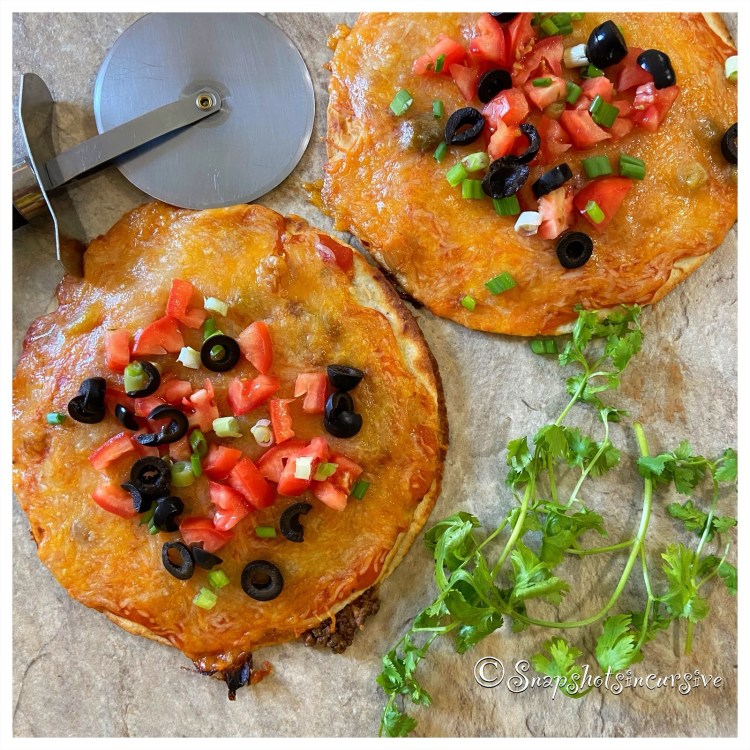
What’s Cooking in Gail’s Kitchen? Grocery List Ideas: Ultimate Mexican Pizza. It may not be pretty, but it is definitely cheesy. The hub says “more cheese, more flavor”. Does anyone else have this problem? Thank goodness crisping up the flour shells keeps them from getting soggy or producing an  undercooked bottom crust since the top layer is a blanket of thick Mexican cheese. Whatever you decide is just right, enjoy the ultimate. That’s what it’s all about. 

ULTIMATE MEXICAN PIZZA 

Ingredients: 

1 pound ground beef 

1 taco seasoning packet 

1/2 cup water

8 soft taco shells 

16-ounce can refried beans 

1 cup red enchilada sauce 

1/2 cup taco sauce 

8 ounces Mexican cheese, shredded 

1/4 cup tomatoes, diced

1/4 cup black olives, sliced 

Green onions, for garnish 

Instructions: 

Preheat oven to 400°. In a large skillet, brown the ground beef over medium-high heat. Drain excess fat and discard. Stir in the taco seasoning and water. Cook until sauce thickens. Spray both sides of the tortillas with nonstick oil. Warm a griddle to medium heat and cook each side of the tortillas until golden brown. Allow them to cool completely. Set aside. Warm the refried beans in a microwave safe dish until they are spreadable, about 2-3 minutes. Spread a layer of refried beans onto a tortilla. Top with a quarter of the ground beef mixture. Place another tortilla on top and transfer to a baking sheet. Repeat process with remaining tortillas. In a small mixing bowl, combine enchilada sauce and taco sauce. Spread a few spoonfuls of the sauce onto the top of the tortillas. Sprinkle with Mexican cheese blend. Place baking sheet in the preheated oven. Bake 3-4 minutes or until the cheese is bubbly. To serve, top each pizza with diced tomatoes, sliced black olives, and green onion snips. Cut into quarters and serve immediately.