Pan-Seared Tilapia

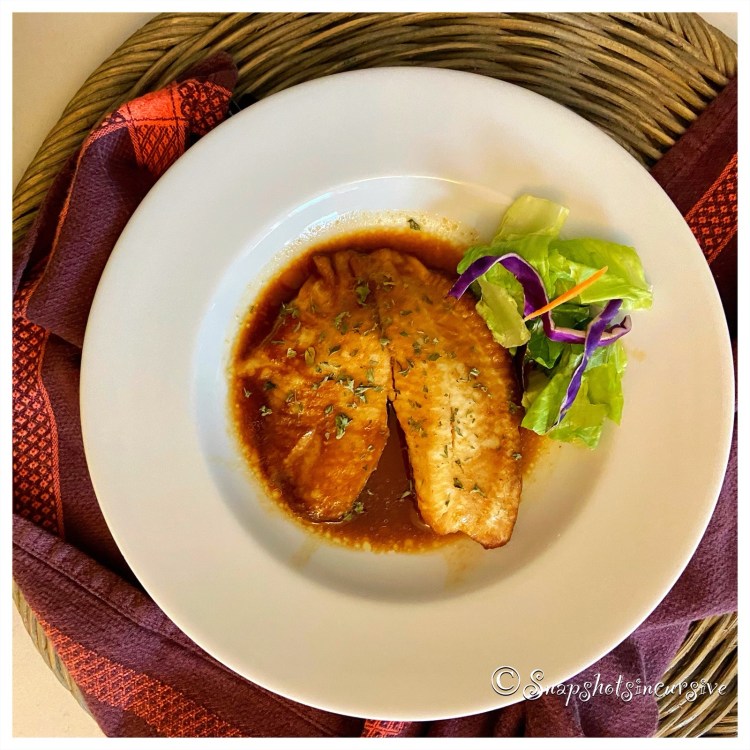
What’s Cooking in Gail’s Kitchen? Splurge-Worthy Goodness: Pan-Seared Tilapia! I don’t often “fry” foods, but once in awhile nothing else will do. The secret to pan-searing fish involves five key steps. First, make sure the skillet is nonstick or a trustworthy cast iron skillet. Secondly, choose a neutral-flavored oil which has a higher smoke point. You won’t need much, so it’s crucial to make sure the oil is not going to turn black from high heat. The third point, and this is just as important, make sure moisture is removed from the fish. If not, there is guaranteed to be steam-created soggy fish or dangerous grease splatters. Step Four: When the fish is placed in the pan, do not overcrowd it. The pieces should not touch each other at all. Finally, allow the fish to sear without moving it. This is how you get that beautiful crispy surface. Use a timer. Once the fillets are carefully flipped over, you’re almost done. By this time everyone in the house will be heading to the kitchen to discover what smells so incredibly good. Well Done, Grasshopper.

PAN-SEARED TILAPIA

Ingredients:

2 frozen tilapia fillets, thawed

1/2 tablespoon brown sugar

1/2 tablespoon chili powder

1/2 teaspoon kosher salt

1/4 teaspoon garlic powder

1/2 lime, juice and zest

2 tablespoons vegetable oil

1 pat butter, divided

Fresh dill, for garnish

Instructions:

Defrost fish fillets overnight in the refrigerator. Remove from package, pat dry with paper towels. Set aside. In a shallow dish, combine brown sugar, chili powder, kosher salt, garlic powder, and lime zest. Mix well. Warm vegetable oil in a cast iron skillet over medium-high heat. Rub both sides of each fillet with the spice mixture. Cook tilapia fillets for 4 minutes. Carefully flip them over. Squeeze lime juice over fish in pan. Divide a pat of butter over the top of each fillet. Cook 3 minutes longer, or until opaque and flaky. Transfer pan-seared tilapia fillets to a platter. Allow to rest for 5 minutes. Garnish with fresh dill. Serve immediately.

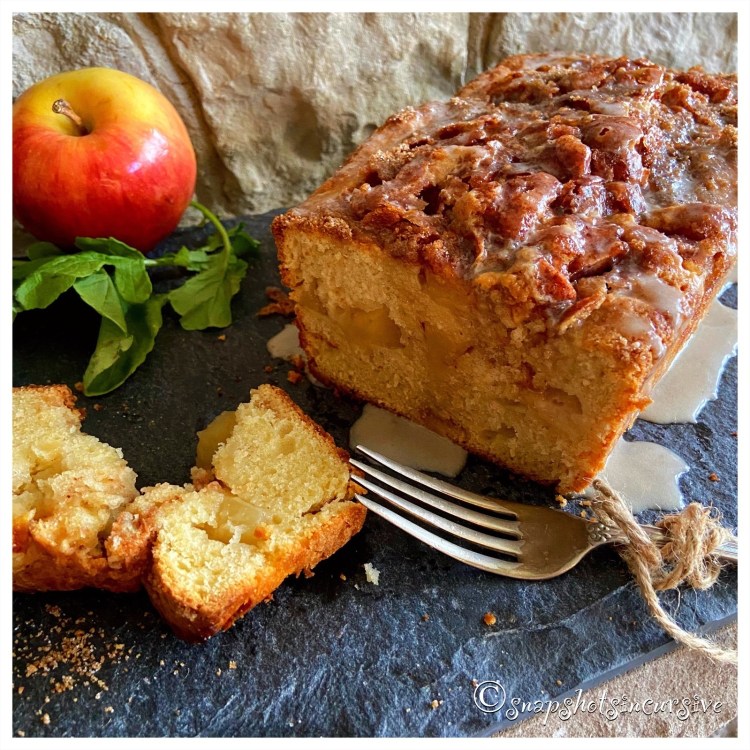
Mincemeat Quick Bread

What’s Cooking in Gail’s Kitchen? Splurge-Worthy Goodness: Mincemeat Quick Bread! Don’t look at me that way. I know what you’re thinking. “If this recipe has mincemeat in it, I’m not eating it.” But hold on a sec. There are plenty of foods with names that sound downright gross. Think about it: head cheese, tripe, mung beans, and blood sausage to name a few. I’m here to tell you mincemeat is a sweet and savory filling that basically contains dried fruits, citrus, spices, and brandy. Ahhh. Now I have your attention. This particular recipe has about 1/4 cup apricot brandy in it. Just know if you do choose to add brandy or rum to a jar of prepared mincemeat, be sure to allow it to marinate in the refrigerator at least 8 hours before using. Now you can understand why some people eat it straight out of the jar.

MINCEMEAT QUICK BREAD

Ingredients:

1 egg, room temperature

1/4 cup vegetable oil

1 tablespoon orange zest

2 tablespoons orange juice

2 cups prepared mincemeat pie filling (with 1/4 cup apricot brandy, optional)

2 cups flour

1/2 cup sugar

1 1/2 teaspoons baking powder

1/2 teaspoon baking soda

1/2 teaspoon sea salt

Instructions:

Preheat oven to 350°. Grease and flour a 9”x5” loaf pan. Set aside. Combine egg, vegetable oil, orange zest, orange juice, and mincemeat pie filling. Stir until well blended. Set aside. In another bowl, whisk together flour, sugar, baking powder, baking soda, and sea salt. Gradually add flour mixture to egg mixture, stirring just until combined. Pour into prepared loaf pan. Bake for 50-60 minutes. Check loaf with a cake tester to make sure center is done. Remove from oven. Cool on a wire rack. Slice and serve.

Limoncello Upside Down Cake

What’s Cooking in Gail’s Kitchen? Splurge-Worthy Goodness: Limoncello Upside Down Cake! I love everything lemon, so imagine my excitement at trying this exquisite dessert with limoncello lemon liqueur. Limoncello is produced mainly along Italy’s scenic Amalfi Coast. Every sip transports you to the rugged hillsides along the deep blue cerulean waters of the Mediterranean Sea. Imagine the lemon trees engorged with ripe fruit. You can almost smell the heady scent of natural citrus wafting from the arbors. Now that I have your complete and undivided attention, read on.

LIMONCELLO UPSIDE DOWN CAKE

Ingredients:

1/4 cup brown sugar

1/2 cup water

1/2 cup plus 3 tablespoons sugar, divided

6 thin lemon slices, seeds removed

3 tablespoons olive oil

Zest of 1/2 lemon

1 tablespoon lemon juice

1/4 teaspoon vanilla extract

1/8 teaspoon sea salt

1 egg, room temperature

2 tablespoons limoncello lemon liqueur

1/2 cup flour plus 2 tablespoons flour

2 tablespoons cornmeal

1/2 teaspoon baking powder

1/4 teaspoon baking soda

Powdered sugar, for dusting

Instructions:

Preheat oven to 350°. Spray ramekins with nonstick oil. Cut 6 parchment paper circles to fit ramekins. Place a circle in the bottom of each. Set aside. Bring brown sugar, 1/4 cup sugar, and water to a simmer in a saucepan. Cook until reduced and sugar has dissolved, about 5 minutes. Turn off heat. Submerge lemon slices in syrup. Let sit until rind and pith are translucent, 20-30 minutes. Using a hand mixer on medium speed, beat olive oil, lemon zest, lemon juice, vanilla extract, sea salt, egg, remaining sugar, and limoncello just until blended. Whisk together flour, cornmeal, baking powder, and baking soda in a bowl. Gradually add wet mixture, beating just until blended. Pour one tablespoon syrup from lemon slices into each ramekin. Using tongs, gently place a lemon slice in each ramekin. Reserve remaining syrup. Place ramekins on a baking sheet. Evenly divide batter between them. Bake 25 minutes, or until a cake tester comes out clean. Let cool on a rack for 10 minutes. Run a small knife around the cake before inverting onto a platter. Remove parchment paper circles. Brush with remaining syrup. Dust with powdered sugar.

Eagle Brand Magic Cookies

What’s Cooking in Gail’s Kitchen? Splurge-Worthy Goodness: Eagle Brand Magic Cookies! One definition of the word magic is “wonderful; exciting”. That’s what these quick and easy holiday cookies are all about. The magic ingredient is the sweetened condensed milk. It may not be something you use everyday, but special occasions call for special ingredients. Homemade cookies are chocked full of sweetness in chocolate morsels, flaked coconut, and chopped pecans. How delightful and different. That’s what I call exciting. Create your own magical moment for the next festive gathering, after school snack, or weekend party-for-two.

EAGLE BRAND MAGIC COOKIES

Ingredients:

3/4 cup flour

1/2 teaspoon baking powder

1/8 teaspoon sea salt

7 tablespoons butter, room temperature

1 tablespoon sugar

1/4 cup sweetened condensed milk

1/4 cup mini chocolate chips

1/4 cup butterscotch chips

3 tablespoons sweetened coconut flakes

2 tablespoons pecans, finely chopped

Sugar, for dusting

Instructions:

In a bowl, whisk together flour, baking powder, and sea salt. Set aside. Using a hand mixer, beat the butter and sugar together until creamy. Add the sweetened condensed milk. Beat until combined. Slowly add the flour mixture until thoroughly combined. Fold in the mini chocolate chips, butterscotch chips, flaked coconut, and chopped pecans. Cover dough and refrigerate for 20 minutes. Preheat oven to 350°. Line a baking sheet with parchment paper. Take a heaping teaspoon of cookie dough, roll into a ball, and place on the parchment paper-lined baking sheet. Repeat. Bake 8-10 minutes; cool 2 minutes. Dust cookies with sugar and transfer to a wire rack. Enjoy!

Decadent Chocolate Cheesecake Cookies

What’s Cooking in Gail’s Kitchen? Splurge-Worthy Goodness: Decadent Chocolate Cheesecake Cookies! Mention the word “cheesecake” and wait for an automatic human response. It might be a low sensuous moan or perhaps a catch of breath. Either way, the reaction is suggestive of a rewarding self-indulgence. Add chocolate for a superb combination. Now you can make your own bite-size cheesecake cookie that is worthy of bakery status. The cookie becomes a soft crust for the creamy vanilla filling. Can you imagine? If so, you’re only a few steps away from making it a dream-come-true.

DECADENT CHOCOLATE CHEESECAKE COOKIES

Ingredients:

1/4 cup butter, room temperature

1/4 cup vegetable oil

1 egg

1 teaspoon vanilla extract

1/4 teaspoon kosher salt

18-ounce box Dark Chocolate Fudge Cake mix

Powdered sugar, for dusting

Fresh strawberries, for garnish

Ingredients for Filling:

8-ounces cream cheese, softened

1/2 cup sugar

1 egg

1/2 teaspoon vanilla extract

Instructions:

In a large bowl, beat butter, vegetable oil, egg, and vanilla extract until smooth and creamy. Add kosher salt and prepared chocolate cake mix. Thoroughly blend together, scraping sides, as needed. Refrigerate dough for one hour. While cookie dough is chilling, beat cream cheese, sugar, egg, and vanilla extract until smooth. Set aside. Preheat oven to 350°. Remove chilled cookie dough from the refrigerator. Form tablespoon-size portions into a ball. Make an indentation in the center. Place onto ungreased baking sheet. Fill with one teaspoon of cream cheese filling. Repeat with remaining dough and filling. Bake until edges are set, about 12 minutes. Allow cookies to cool completely, about 20 minutes, before removing from baking sheet. Transfer cookies to a wire rack. Dust with powdered sugar. Serve with fresh strawberries.

Yellow & White Cake Mix Cookies

What’s Cooking in Gail’s Kitchen? Uplifting Aromas: Yellow & White Cake Mix Cookies! I never want to live in a world where there are no cookies. I’m one of those people who insist on tasting a freshly baked cookie, still warm from the oven. My kitchen, my rules. I also like the idea of choices. By taking a simple cake mix and ramping up the extra ingredients, I was able to offer my family plain, powdered sugar, and turbinado sugar cookies. Does that mean I needed three taste-tests? I’ll never tell.

YELLOW & WHITE CAKE MIX COOKIES

Ingredients:

15-ounce box yellow cake mix

2 eggs

1/3 cup oil

1 cup white chocolate chips

1/2 cup macadamia nuts, chopped

Powdered sugar, for rolling

Turbinado sugar, for rolling

Instructions:

Preheat the oven to 350°. Combine the yellow cake mix, eggs, and oil together in a large bowl; stir. The batter will be thick. Fold in the white chocolate chips and chopped macadamia nuts. Use a cookie scoop to form the cookies. Place them two inches apart on a nonstick baking sheet. Bake 8-10 minutes until the cookies appear slightly brown on the edges. Allow them to cool slightly before rolling in powdered sugar or turbinado sugar. Cool on a wire rack. Repeat baking steps until all the cookie dough has been used.

Old-Fashioned Strawberry Milkshake

What’s Cooking in Gail’s Kitchen? Uplifting Aromas: Old-Fashioned Strawberry Milkshake! We’ve all been there. Trying to remove the leaves and stems from a luscious strawberry without wasting half the berry. If you’re impatient, or in a hurry, you may grab a paring knife and start hacking, or at the very least completely cut off the entire crown. Been there, done that. If your kitchen drawer is full of gadgets, you may already own a neat little tool known as a Strawberry Stem Remover. Its pincher-like claws dig in, twist, and pull the stem completely out. One and Done. (My husband prefers that method.) Or you could be a little more refined and use the Plastic Straw Method. It requires cradling the juicy red gems and inserting the plastic straw in the bottom of the strawberry, while pushing upward until the leaves pop off. Maybe you have a method that works for you. If so, leave it in the comments below. Don’t mind me, I’ll be here slurping on the decadent treat while I wait.

OLD-FASHIONED STRAWBERRY MILKSHAKE

Ingredients:

16 ounces fresh strawberries, tops removed

2 cups vanilla ice cream

1-2 tablespoons sugar

3/4 cup whole milk

1/2 teaspoon vanilla extract

Whipped Cream & Strawberry slices, for garnish

Instructions:

In a blender, add fresh strawberries, reserving a couple for garnish, if desired. Next add vanilla ice cream, sugar, whole milk, and vanilla extract. Pulse to combine. Leave small chunks for appealing texture and thickness. Do not over blend. When milkshake is “pourable”, divide the contents into tall glasses. Top with whipped cream and strawberry slice, for garnish. Serve immediately with a paper straw and parfait spoon.

No-Bake Granola Cookies

What’s Cooking in Gail’s Kitchen? Uplifting Aromas: No-Bake Granola Cookies! I’m learning something new everyday. Honestly, I had no idea granola came with a boost of coffee flavor. That makes sense because when I checked the ingredient list on the package, sure enough….coffee was actually there. I sampled a taste before making the cookies and realized this could be a match made in heaven, especially when paired with chocolate and peanut butter. A little more research revealed not only does iced coffee come in this popular combination, but also milkshakes and ice cream. Perhaps I need to explore these other foods that offer a mind-boggling caffeine jolt. Now we’re talking.

NO-BAKE GRANOLA COOKIES

Ingredients:

1/2 cup peanut butter, creamy

1/2 cup Tupelo honey

1/4 cup brown sugar

2 cups coffee booster granola, slightly crushed in a mini chopper

1/4 cup quick oats

1/3 cup mini chocolate chips

Instructions:

In a microwave-safe bowl, combine creamy peanut butter, Tupelo honey, and brown sugar. Microwave on High setting for 30 seconds. Stir completely and microwave on High 60 seconds longer. Stir again and set aside. In a mixing bowl, combine coffee booster granola and quick oats. Pour warm peanut butter mixture over top. Mix well. Line a baking sheet with waxed paper. Place mini chocolate chips in a shallow dish. Using a cookie scoop, portion dough into rounded cookies. Firmly press mini chocolate chips into the top. Place each cookie, chocolate chip side up, onto the waxed paper. Repeat until all dough is formed into bite-sized cookies. Chill slightly to set. Store in a sealed container.

Korean Pork Tacos

What’s Cooking in Gail’s Kitchen? Uplifting Aromas: Korean Pork Tacos! Chile paste is a unique condiment that gives food a fiery kick of flavor whether you’re spicing up soups and dips, or veggies and meat. Keep in mind, Gochujang has a pungent flavor a notch hotter than sriracha, without the sweetness. Personally, I like the feel of the lingering heat on the roof of my mouth. Slow cooking makes it taste marvelous when mixed with the other ingredients. Gochujang is usually found near the barbecue sauces in the grocery aisle. In case you need to find a substitute, Sriracha gets my vote. Friendly Footnote: remember to use sriracha IN the sauce rather than splashing it on top afterwards.

KOREAN PORK TACOS

Ingredients:

1/4 cup rice wine vinegar

2 tablespoons soy sauce

1/2 cup gochujang

3 tablespoons garlic, minced

3 tablespoons fresh ginger root, minced

2 tablespoons red pepper flakes

1/2 teaspoon black pepper

3 tablespoons sugar

3 green onions, chopped

1/2 yellow onion, chopped

2 pounds pork loin

Instructions:

In a large bowl, combine rice wine vinegar, soy sauce, gochujang, minced garlic, minced ginger, red pepper flakes, black pepper, sugar, green onions, and yellow onions. In a slow cooker, place pork loin. Pour prepared sauce over meat. Cover. Heat on High setting for 4 hours; reduce to Low setting and cook 4 hours longer. Using two forks, shred the pork loin to mix well with the sauce. (Don’t let that yummy sauce go to waste.) Keep warm until ready to serve. Use your favorite taco shells, cheese, and fillings to make a meal.