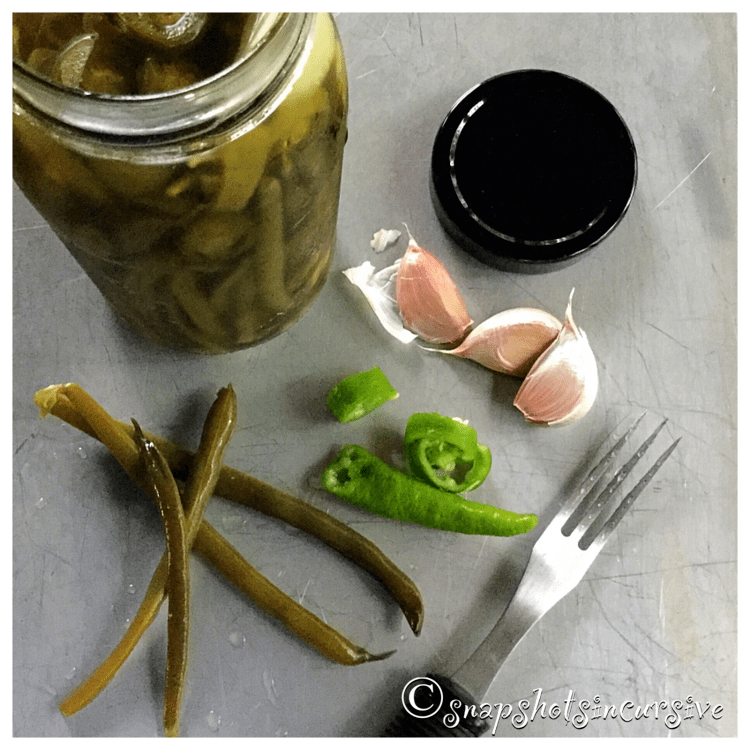
Nonpareil Thumbprint Cookies

Experience the Holidays: Nonpareil Thumbprint Cookies! Ask my husband what his favorite candy is and without hesitation, he’ll respond “Nonpareils”. Think about it… dark chocolate buttons sprinkled with tiny beads of white candy. And they’re French! With today’s recipe, the nonpareil takes center stage crowned over a dark chocolate thumbprint cookie as rich as a brownie. Dusted in powdered sugar, it’s just the right size for nibbling.

NONPAREIL THUMBPRINT COOKIES

Ingredients:

2 cups flour

1 cup cocoa powder

1 teaspoon coarse salt

1 cup butter, softened

1 1/3 cups sugar

2 egg yolks

2 tablespoons heavy cream

2 teaspoons vanilla

3/4 cup powdered sugar for rolling

40 nonpareils

Instructions:

Preheat oven to 350°. Sift flour, cocoa powder, and salt into a small bowl. Using a mixer, cream butter and sugar until fluffy. Reduce speed to medium, add yolks, cream, and vanilla. Beat in flour mixture just until combined. Roll balls using 1/2 tablespoon sized scoops of dough. Roll each ball in powdered sugar. Place on parchment-lined baking sheets. Press gently in the center to form an indentation. Bake 10 minutes or until set. Remove from oven. While cookies are warm, place one nonpareil in the middle of each cookie. Let cool before transferring to wire rack.

Zucchini ‘Nana Bread

What’s Cooking in Gail’s Kitchen? Splurge-Worthy Goodness: Zucchini ‘Nana Bread! This isn’t your usual old-fashioned banana bread. And if you’ve been hesitant to try zucchini bread, well…just because, then I implore you to give it one more chance. You honestly cannot taste the zucchini. What you will notice, though, is that the bread is incredibly moist, not gummy. And the cinnamon streusel topping is a winning combination worth shouting about. Remember to only stir the batter until it is mixed. The more you stir, the more gluten comes into play. While gluten is crucial in bread-baking, it is not your friend in quick breads. The results could be dense and rubbery. After all, the purpose of baking is to share with others. Slather on the butter or cream cheese…and Enjoy!

ZUCCHINI ‘NANA BREAD

Ingredients:

1 medium zucchini, shredded

1 ripe banana, mashed

2 eggs, room temperature

1/2 cup vegetable oil

3/4 cup sugar

1 cup flour

1/8 teaspoon baking powder

1/2 teaspoon baking soda

1 teaspoon cinnamon

1 teaspoon sea salt

1 teaspoon vanilla extract

Ingredients for Cinnamon Topping:

1/4 cup sugar

1 teaspoon cinnamon

Instructions:

Preheat oven to 350°. Line a loaf pan with parchment paper. Set aside. Peel zucchini. If there are seeds, remove them with a spoon; discard. Shred zucchini and set aside. Mash banana and set aside. In a mixing bowl, beat eggs, sugar, and vegetable oil until combined. Add flour, baking powder, baking soda, cinnamon, sea salt, and vanilla extract. Stir only until incorporated. Fold in shredded zucchini and mashed bananas. Stir slightly until blended. Pour into prepared loaf pan. Whisk together sugar and cinnamon in a small bowl. Sprinkle evenly over the top of the batter. Bake 45-55 minutes, or until cake tester comes out clean. Remove from oven and allow bread to cool 10 minutes before removing from pan. Cool Zucchini ‘Nana Bread on a wire rack before slicing.

Xmas Crinkle Cookies

What’s Cooking in Gail’s Kitchen? Splurge-Worthy Goodness: Xmas Crinkle Cookies! Shortcuts are the key to success for that next cookie-exchange the kids forgot to tell you about. “Oh yeah, Mom, sorry.” No worries. Head to the kitchen to clang some pans around, preheat the oven, and dust a little powdered sugar on your nose. They’ll be none the wiser. By the time the house begins to smell like a neighborhood bakery, you’ll have rows of cookies lined up ready to be boxed. And if you’re one of those organized parents, just so you know, these cookies freeze well. Arrange them in a freezer gallon bag, layered between squares of waxed paper. I have literally taken these crinkle cookies out of the freezer and handed them to a little girl to eat. Other than being slightly chilled, they retain a chewiness that makes them simply delicious. You deserve a pat on the back. You’re welcome.

XMAS CRINKLE COOKIES

Ingredients:

1/2 cup powdered sugar, for dusting

15.25-ounce box strawberry cake mix

1/2 cup vegetable oil

2 eggs, room temperature

Instructions:

Preheat oven to 350°. Place powdered sugar in a shallow dish. Set aside. In a mixing bowl, combine strawberry cake mix, vegetable oil, and eggs. Stir until a dough forms. Chill dough for 20 minutes. Shape dough into 1” balls. Roll in powdered sugar and place 2” apart on ungreased baking sheet. Bake 7-9 minutes, or until center is just set. Remove pan from oven; cool for 2 minutes. Transfer cookies to a wire rack. Dust with more powdered sugar.

School Cafeteria Peanut Butter Bars

What’s Cooking in Gail’s Kitchen? Splurge-Worthy Goodness: School Cafeteria Peanut Butter Bars! Remember the good old days when the grade school menu would come out and we’d peruse it like the Sears and Roebuck Christmas Catalog? We’d jump for joy when we saw Fish Sticks, Baked Meatloaf, Apple Crisp, Chocolate Cake, and Pizza Squares. On the other hand, Creamed Spinach made us wince and turn up our noses. Back then you had two options, buy a hot lunch ticket or bring a sack lunch from home. No in-betweens. As a general rule, the good canceled out the bad, especially in the category of scrumptious desserts. The “Lunchroom Ladies” really knew their business when it came down to sweets. Nobody could layer on the frosting like they could. And it was always homemade right there. I wonder who got to lick the spoon.

SCHOOL CAFETERIA PEANUT BUTTER BARS

Ingredients:

1/2 cup butter

3/4 cup peanut butter, creamy

3/4 cup sugar

1/4 cup brown sugar

3/4 teaspoon kosher salt

2 eggs, room temperature

1 1/2 teaspoons vanilla extract

1 cup flour

Ingredients for Icing:

1/2 cup powdered sugar

2 tablespoons creamy peanut butter, melted

2 tablespoons hot water

Instructions:

Preheat oven to 350°. Line a 9”x9” square baking pan with parchment paper. Set aside. Melt butter and peanut butter in a microwave-safe bowl on 50% for 30 seconds. Stir and repeat, if necessary. Set aside to cool to room temperature. In a large bowl, sift together sugar, brown sugar, and kosher salt. Whisk in one egg at a time until combined. Add vanilla extract. Whisk in peanut butter mixture until combined. Sift in flour; mix until flour disappears. Do not over mix. Pour into prepared pan. Bake for 35-40 minutes, or until cake tester comes out with tiny moist crumbs. Cool pan on a wire rack. Once the pan has cooled, remove the cake from pan and transfer on the parchment paper to a rimmed baking sheet. Combine powdered sugar, creamy peanut butter, and hot water. Stir until frosting has a smooth consistency. Drizzle over dessert. Allow icing to set up before cutting into individual bars.

Pan-Seared Tilapia

What’s Cooking in Gail’s Kitchen? Splurge-Worthy Goodness: Pan-Seared Tilapia! I don’t often “fry” foods, but once in awhile nothing else will do. The secret to pan-searing fish involves five key steps. First, make sure the skillet is nonstick or a trustworthy cast iron skillet. Secondly, choose a neutral-flavored oil which has a higher smoke point. You won’t need much, so it’s crucial to make sure the oil is not going to turn black from high heat. The third point, and this is just as important, make sure moisture is removed from the fish. If not, there is guaranteed to be steam-created soggy fish or dangerous grease splatters. Step Four: When the fish is placed in the pan, do not overcrowd it. The pieces should not touch each other at all. Finally, allow the fish to sear without moving it. This is how you get that beautiful crispy surface. Use a timer. Once the fillets are carefully flipped over, you’re almost done. By this time everyone in the house will be heading to the kitchen to discover what smells so incredibly good. Well Done, Grasshopper.

PAN-SEARED TILAPIA

Ingredients:

2 frozen tilapia fillets, thawed

1/2 tablespoon brown sugar

1/2 tablespoon chili powder

1/2 teaspoon kosher salt

1/4 teaspoon garlic powder

1/2 lime, juice and zest

2 tablespoons vegetable oil

1 pat butter, divided

Fresh dill, for garnish

Instructions:

Defrost fish fillets overnight in the refrigerator. Remove from package, pat dry with paper towels. Set aside. In a shallow dish, combine brown sugar, chili powder, kosher salt, garlic powder, and lime zest. Mix well. Warm vegetable oil in a cast iron skillet over medium-high heat. Rub both sides of each fillet with the spice mixture. Cook tilapia fillets for 4 minutes. Carefully flip them over. Squeeze lime juice over fish in pan. Divide a pat of butter over the top of each fillet. Cook 3 minutes longer, or until opaque and flaky. Transfer pan-seared tilapia fillets to a platter. Allow to rest for 5 minutes. Garnish with fresh dill. Serve immediately.

Limoncello Upside-Down Cake

What’s Cooking in Gail’s Kitchen? Splurge-Worthy Goodness: Limoncello Upside-Down Cake! I love everything lemon, so imagine my excitement at trying this exquisite dessert with limoncello lemon liqueur. Limoncello is produced mainly along Italy’s scenic Amalfi Coast. Every sip transports you to the rugged hillsides along the deep blue cerulean waters of the Mediterranean Sea. Imagine the lemon trees engorged with ripe fruit. You can almost smell the heady scent of natural citrus wafting from the arbors. Now that I have your complete and undivided attention, read on.

LIMONCELLO UPSIDE-DOWN CAKE

Ingredients:

1/4 cup brown sugar

1/2 cup water

1/2 cup plus 3 tablespoons sugar, divided

6 thin lemon slices, seeds removed

3 tablespoons olive oil

Zest of 1/2 lemon

1 tablespoon lemon juice

1/4 teaspoon vanilla extract

1/8 teaspoon sea salt

1 egg, room temperature

2 tablespoons limoncello lemon liqueur

1/2 cup flour plus 2 tablespoons flour

2 tablespoons cornmeal

1/2 teaspoon baking powder

1/4 teaspoon baking soda

Powdered sugar, for dusting

Instructions:

Preheat oven to 350°. Spray ramekins with nonstick oil. Cut 6 parchment paper circles to fit ramekins. Place a circle in the bottom of each. Set aside. Bring brown sugar, 1/4 cup sugar, and water to a simmer in a saucepan. Cook until reduced and sugar has dissolved, about 5 minutes. Turn off heat. Submerge lemon slices in syrup. Let sit until rind and pith are translucent, 20-30 minutes. Using a hand mixer on medium speed, beat olive oil, lemon zest, lemon juice, vanilla extract, sea salt, egg, remaining sugar, and limoncello just until blended. Whisk together flour, cornmeal, baking powder, and baking soda in a bowl. Gradually add wet mixture, beating just until blended. Pour one tablespoon syrup from lemon slices into each ramekin. Using tongs, gently place a lemon slice in each ramekin. Reserve remaining syrup. Place ramekins on a baking sheet. Evenly divide batter between them. Bake 25 minutes, or until a cake tester comes out clean. Let cool on a rack for 10 minutes. Run a small knife around the cake before inverting onto a platter. Remove parchment paper circles. Brush with remaining syrup. Dust with powdered sugar.

Kiwi Dessert Pizza

What’s Cooking in Gail’s Kitchen? Splurge-Worthy Goodness: Kiwi Dessert Pizza! What do you get when you cross a bakery crust with a sweet and creamy fruit topping? At first glance, it appears as though frosting is smeared over the mini flatbread crust. It kinda is. The secret is cream cheese with a hint of sweetened coconut. The rest is simply fresh fruit…until you detect the toasted coconut flakes. Now it’s tough to decide if this dessert is a cookie or a fruit tart. Either way, it’s a delightful change from traditional pies or standard cakes. Not too sweet, not too bland. It’s just right.

KIWI DESSERT PIZZA

Ingredients:

2 mini naan prepared flatbreads

4 ounces cream cheese

2 tablespoons sweetened condensed milk

1 teaspoon coconut syrup

2 strawberries, tops removed and quartered

1 kiwi, peeled, sliced, and quartered

3 sliced peaches, cubed

10 blueberries, divided

Toasted coconut, for garnish

Lemon thyme, for garnish

Instructions:

Remove naan from packaging. Spritz with water before heating. Place in toaster on medium setting. Transfer to a platter. In a bowl, combine cream cheese, sweetened condensed milk, and coconut syrup. Stir until smooth. Spread over surface of the naan. Arrange strawberries, kiwi, peaches, and blueberries. Garnish with toasted coconut and lemon thyme.

Java White Chocolate Mocha Cookies

What’s Cooking in Gail’s Kitchen? Splurge-Worthy Goodness: Java White Chocolate Mocha Cookies! Get ready for a cookie that combines three incredible cravings: chocolate, coffee, and cream. It’s the perfect mid-morning break, lunchtime nibble, mealtime morsel, or late night snack. There’s something about the slightly bitter taste of coffee that complements the sugary sweetness of chocolate. The creaminess of white chocolate is similar to adding a splash of milk to your morning cuppa joe. Unlock all the flavors in a single bite. Take things slow; pamper yourself. Savor the sweetness and focus on the texture. Isn’t it time to spotlight the things that make you happy?

JAVA WHITE CHOCOLATE MOCHA COOKIES

Ingredients:

1 tablespoon instant espresso powder

2 teaspoons vanilla extract

18-ounce box chocolate cake mix

1/3 cup vegetable oil

2 eggs

3/4 cup white chocolate chips

1/2 cup mini chocolate chips

1/3 cup sugar, for rolling

1/4 teaspoon instant espresso powder

Instructions:

Preheat oven to 350°. In a small bowl, stir together espresso powder and vanilla extract until dissolved. In a large bowl, combine chocolate cake mix, espresso mixture, vegetable oil, and eggs until a soft dough forms. Fold in white chocolate chips and mini chocolate chips. On ungreased baking sheets, drop dough by rounded teaspoons, spacing 2 inches apart. Bake 9 minutes, or until tops appear dry. In a small bowl, whisk together sugar and espresso powder. Set aside. Remove cookies from oven; cool 1 minute. Roll cookies in espresso sugar and transfer to a wire rack to cool completely.

Itty Bitty Pumpkin Cake

What’s Cooking in Gail’s Kitchen? Splurge-Worthy Goodness: Itty Bitty Pumpkin Cake! Do you have a love affair with pumpkin spice? You know, that delectable blend of bakery spices recognized as nutmeg, cinnamon, ginger, and allspice. Perhaps they remind you of autumn. The days are still warm as the evenings turn chilly enough to gather around the fire pit in a thick cozy sweater. Childhood memories conjure up bumpy hayrides through apple orchards, jack-o-lanterns on the front porch, and disheveled piles of newly-raked leaves. Plus there’s all things pumpkin: pumpkin pie, pumpkin cake, pumpkin roll, pumpkin latte, and now this.

ITTY BITTY PUMPKIN CAKE

Ingredients:

1 1/4 cups flour

1/2 teaspoon baking soda

1/4 teaspoon sea salt

1 teaspoon baking powder

1 tablespoon pumpkin spice

1/4 tablespoon cinnamon

1/2 cup butter, softened

1/2 cup sugar

1 egg

3/4 cup pumpkin purée

1/3 cup buttermilk

1/2 teaspoon vanilla extract

Powdered sugar, for dusting

Fresh strawberries, for garnish

Instructions:

Preheat oven to 350°. Spray six mini bundt pans with nonstick oil containing flour. Place pans on a baking sheet. Set aside. In a bowl, whisk together flour, baking soda, sea salt, baking powder, pumpkin spice, and cinnamon. Set aside. In another bowl, cream together butter and sugar. Beat on High setting with a hand mixer for 2 minutes. Add egg and beat two minutes longer. Set aside. In a third bowl, combine the pumpkin purée, buttermilk, and vanilla extract. Mix well. Gradually pour half the pumpkin mixture and half the flour mixture into the egg mixture. Mix well, scraping the sides down as needed. Add the remaining ingredients; stirring only until combined. Do not over stir. Fill each prepared mini bundt pan 3/4 full. Bake 25-30 minutes or until a cake tester comes out clean. Allow cakes to cool 5 minutes before inverting onto a wire rack. Once cool, dust with powdered sugar. Garnish with a fresh strawberry before serving.