Zapata Tequila Shots

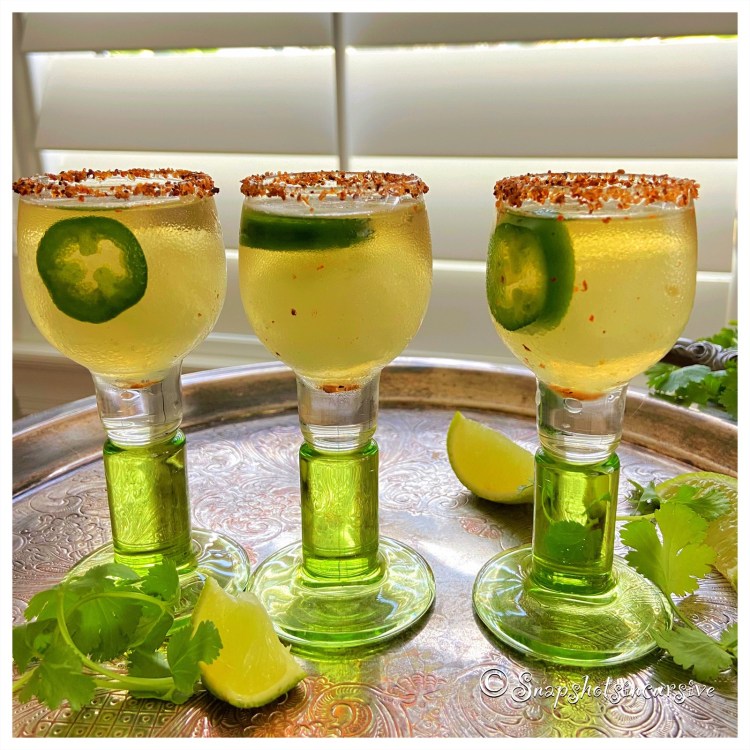
What’s Cooking in Gail’s Kitchen? Uplifting Aromas: Zapata Tequila Shots! You’re either going to love me or hate me for this recipe, so first hear me out. I’m a tequila-girl; not a crazy one, but one who has a zest for life. I like chili peppers, too. As you read through the recipe, let me offer alternative ways to “tone down” the cocktail. Because the non-alcoholic margarita mix is frozen into cubes, they can be dropped into a blender and made into a tasty frozen margarita. Simply adjust the amount of spicy tequila (or not) to suit your taste. A slushy is also very tasty, using the non-alcoholic margarita mix ice cubes and adding sparkling water. Now you see, everyone can be happy with this tasty margarita.

ZAPATA TEQUILA SHOTS

Ingredients:

Chili-lime seasoning blend

1 cube of frozen margarita mix*

1 1/2 ounces pepper-infused tequila**

Jalapeño slice, for garnish

Lime wedge, for garnish

Instructions:

Sprinkle the chili-lime seasoning onto a saucer. Circle the rim of a stemmed cocktail shot glass with a fresh cut lime. Dip the glass onto the saucer of chili-lime seasoning to create a flavorful rim. Add one cube of frozen margarita mix. Pour the pepper-infused tequila over the ice cube. Add a jalapeño slice and lime wedge for garnish. Serve.

Advanced Instructions for Frozen Margarita Mix Ice Cubes:

*Using small 15-count square silicone ice cube trays, fill each tray with your favorite margarita mix. Freeze overnight. Remove cocktail ice cubes and store in zipper freezer bags. Repeat until all the margarita mix is frozen into ice cubes.

Advanced Instructions for Pepper-Infused Tequila:

**To make your own version of pepper-infused tequila, begin with 750 mL of blue agave tequila gold. Using gloves, slice 2-3 chili peppers. Remove stems and partial seeds to control heat; discard. Add the sliced chili peppers to bottle of tequila. Reseal; shake bottle. Store in a cool, dry area for one week. Then pour the tequila through a fine mesh sieve into a large measuring cup. Transfer the pepper-infused tequila back into the bottle. Seal and store in the refrigerator.

Old-Fashioned Strawberry Milkshake

What’s Cooking in Gail’s Kitchen? Uplifting Aromas: Old-Fashioned Strawberry Milkshake! We’ve all been there. Trying to remove the leaves and stems from a luscious strawberry without wasting half the berry. If you’re impatient, or in a hurry, you may grab a paring knife and start hacking, or at the very least completely cut off the entire crown. Been there, done that. If your kitchen drawer is full of gadgets, you may already own a neat little tool known as a Strawberry Stem Remover. Its pincher-like claws dig in, twist, and pull the stem completely out. One and Done. (My husband prefers that method.) Or you could be a little more refined and use the Plastic Straw Method. It requires cradling the juicy red gems and inserting the plastic straw in the bottom of the strawberry, while pushing upward until the leaves pop off. Maybe you have a method that works for you. If so, leave it in the comments below. Don’t mind me, I’ll be here slurping on the decadent treat while I wait.

OLD-FASHIONED STRAWBERRY MILKSHAKE

Ingredients:

16 ounces fresh strawberries, tops removed

2 cups vanilla ice cream

1-2 tablespoons sugar

3/4 cup whole milk

1/2 teaspoon vanilla extract

Whipped Cream & Strawberry slices, for garnish

Instructions:

In a blender, add fresh strawberries, reserving a couple for garnish, if desired. Next add vanilla ice cream, sugar, whole milk, and vanilla extract. Pulse to combine. Leave small chunks for appealing texture and thickness. Do not over blend. When milkshake is “pourable”, divide the contents into tall glasses. Top with whipped cream and strawberry slice, for garnish. Serve immediately with a paper straw and parfait spoon.

Devil’s Food Cake Mix Brownies

What’s Cooking in Gail’s Kitchen? Uplifting Aromas: Devil’s Food Cake Mix Brownies! Most of us began a love affair with chocolate long before we were ever old enough to date. First there was the anticipation of climbing onto the kitchen counter to grab the coveted candy bar in a chubby little fist, out of sight from mother’s watchful eye. Then came the rich aroma of seduction as it was being unwrapped layer by layer. The lure of delicious expectation became a natural mood enhancer, which required quick-thinking. Never mind that baby sister was starting to fuss and attract attention, wanting her fair share. Long before she began a full-blown wail of rebellion, the entire chocolate bar was stuffed in brother’s mouth, chewed up like a dog treat, and swallowed with greedy satisfaction. Until…….. mother leapt into the room as graceful as a gazelle and gasped! She quickly deducted from the melted goo around his mouth that he had just consumed her entire supply of chocolate-flavored laxative guaranteed to work effectively on a constipated child. What can I say? My brother ate the whole thing and I never did get a single bite. Thankfully so, Chocolate is still my friend today.

DEVIL’S FOOD CAKE MIX BROWNIES

Ingredients:

15-ounce box Devil’s Food Cake Mix

1/2 cup olive oil

2 eggs, lightly beaten

1 tablespoon vanilla extract

2 teaspoons espresso powder

1 cup semi-sweet miniature chocolate chips, divided

Vanilla Ice Cream, for serving

Instructions:

Preheat the oven to 350°. Spray an 8”x8” baking pan with nonstick oil. Set aside. In a mixing bowl, combine cake mix, olive oil, lightly beaten eggs, vanilla extract, and espresso powder. Stir until smooth. Fold in 3/4 cup of miniature chocolate chips. Transfer the batter to the prepared pan. Sprinkle remaining 1/4 cup miniature chocolate chips on top. Bake 25 minutes, or until a cake tester comes out clean. Allow brownies to cool completely before cutting. Serve with vanilla ice cream.

Bananas Foster Ice Cream

What’s Cooking in Gail’s Kitchen? Uplifting Aromas: Bananas Foster Ice Cream! What do you do when there are too many bananas in the house and everyone turns up their noses at the mere mention of (yet) another loaf of boring banana bread? Spin on your heel and sashay back to the kitchen as they scatter like a flock of birds. Now that it’s quiet, tune into your favorite music station, dance in bare feet, and get cooking. I like to scoop the ice cream into serving bowls and then place them back in the freezer to chill. As the stovetop cooking progresses, a very subtle buttery sweet aroma of cinnamon and bananas will fill the air. And just when you think you’re all alone, you’ll turn around to discover 3 pairs of puppy-like eyes begging for a treat. Now tell me, please, how can I say “No” to faces like that?

BANANAS FOSTER ICE CREAM

Ingredients:

1/4 cup butter

1 cup brown sugar

1/2 teaspoon cinnamon

4 bananas, peeled and sliced

1/4 dark rum

Vanilla Ice Cream

Sugared Pecans, for garnish

Instructions:

In a skillet over low heat, combine butter, brown sugar, and cinnamon. Stir constantly until butter melts and the sugar is dissolved. Gently add the sliced bananas to the pan. Slowly stir to coat the bananas in the sugary syrup. When the bananas begin to soften, add the dark rum. Continue cooking until the sauce is heated through. Scoop the vanilla ice cream into serving bowls. Spoon the banana mixture over the ice cream. Top with sugared pecans and serve immediately.

X-otic Black Raspberry Ice Cream

What’s Cooking in Gail’s Kitchen? Clean Eating: X-otic Black Raspberry Swirl Ice Cream! Creamy concoctions are so decadent with swirls of tangy sweetness mixed in. You control the tart flavor among the smooth texture by making this version of gourmet ice cream at home. No special gadgets required, except that counter workhorse stand mixer. But how hard can it be to flip a switch and scrape down the sides of the bowl? This “tried and true” no-churn ice cream recipe has been reliable on more than one occasion. The secret to my success is chilling the utensils overnight in the freezer. Also, begin with ingredients that are refrigerator cold. The greatest hardship is waiting 24 hours for the ice cream to chill. Don’t believe me? Guess you need to see for yourself.

X-OTIC BLACK RASPBERRY SWIRL ICE CREAM

Ingredients:

2 cups heavy cream

14 ounces sweetened condensed milk

1 tablespoon Mexican vanilla extract

1/2 cup black raspberry sauce*

Instructions:

Using a stand mixer, whip the heavy cream, sweetened condensed milk, and vanilla extract on medium-high speed for 4-5 minutes. Transfer half to the chilled loaf pan. Smooth with a spatula. Add dollops of black raspberry sauce on top. Swirl the sauce with a knife to create a design. Pour the remaining ice cream mixture over top. Smooth. Repeat swirling process. Cover tightly. Place loaf pan in the freezer overnight. To serve, scoop ice cream into bowls and garnish with fresh mint leaves.

*To make the black raspberry sauce, click on the link below.

https://snapshotsincursive.com/2018/07/05

Ice Cream Grilled Pineapple

What’s Cooking in Gail’s Kitchen? Clean Eating: Ice Cream Grilled Pineapple! If you’ve decided it’s better to unplug with a “staycation” this year, there’s no need to give up guilty pleasures. Minimizing expenses with less stress is smart living. Take advantage of the leisure activities and points of interest in your own community. When was the last time you popped in to the local Welcome Center or Chamber of Commerce? You may see things through a fresh pair of eyes. Others do. Make a tropical dessert that will transport you to your very own private island. Dress it up with colorful parasol party picks.

ICE CREAM GRILLED PINEAPPLE

Ingredients:

1 cup brown sugar

1/2 teaspoon cinnamon

4-6 fresh pineapple rings

Vanilla Bean Ice Cream

Maraschino Cherry, for garnish

Instructions:

Preheat a gas grill to medium-high temperature. Combine brown sugar and cinnamon in a shallow dish. Mix well. Rub both sides of pineapple rings with brown sugar mixture. Transfer to a large baking dish for 10 minutes. Using a heat-proof brush, lightly grease the grill with vegetable oil. Place pineapple slices directly on grill, leaving space between fruit slices. Cook 1-2 minutes per side to sear the pineapple rings. You should see grill marks. The pineapple will turn a golden yellow. Remove from grill. Allow pineapple rings to cool before adding a scoop of vanilla bean ice cream. Garnish with maraschino cherry. Serve immediately.

Rum-Topped Ginger Beer Float

What’s Cooking in Gail’s Kitchen? Waste Not, Want Not: Rum-Topped Ginger Beer Float! I gotta tell you, there are some fantastic-tasting nonalcoholic ginger beers on the market right now. One of my absolute favorites is made with organic agave and extracts of chili pepper, coriander, cardamom, lime, and orange. Don’t get me wrong, ginger is still the star attraction. These flavors go extremely well in a Mexican Mule with chile pepper-infused tequila. But that’s another story. I went with a much lighter version of ginger beer for a refreshingly light twist on an old favorite. Granted, with a dark rum floater, it definitely has a boozy punch. Obviously, this is an adult beverage and should not be served to anyone under the age of 21.

RUM-TOPPED GINGER BEER FLOAT

Ingredients:

3 scoops vanilla bean ice cream

6.8-ounce bottle ginger beer, chilled

1.5 ounce spiced dark rum

Lime wedge, for garnish

Instructions:

Place ice cream in a glass or mason jar. Slowly pour ginger beer over ice cream. Squeeze a touch of lime juice into the glass. Top with a spiced dark rum floater. Garnish with lime wedge. Serve with a spoon. Cheers!

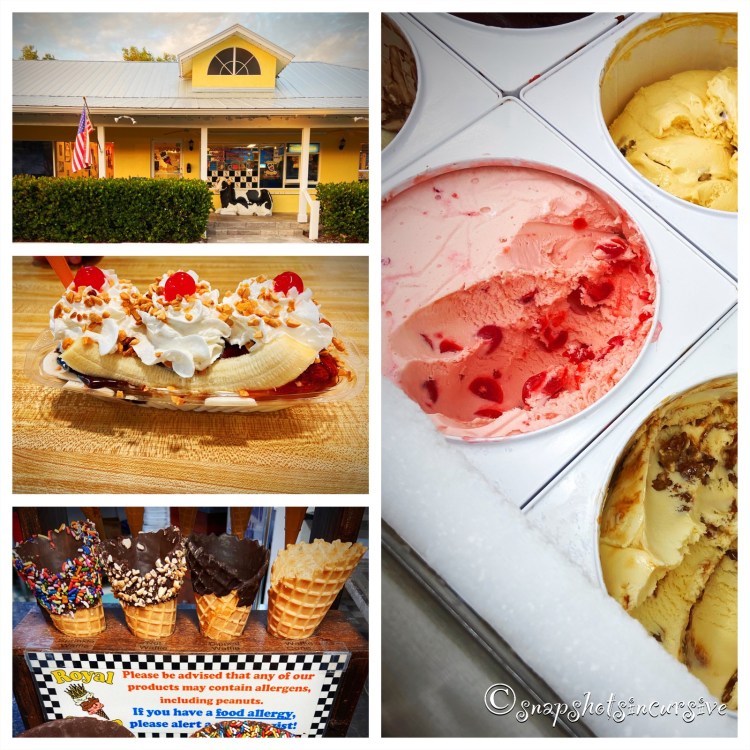
Royal Scoop Homemade Ice Cream in Bonita Springs, Florida

Dining Outside the Home: Royal Scoop Homemade Ice Cream in Bonita Springs, Florida! One of the oldest homemade hand-dipped ice cream parlors in the area goes by the slogan, “Time tested and taste bud approved”! Don’t believe me? Ask around. You may be surprised to discover that Royal Scoop Homemade Ice Cream is so popular that several restaurants and area businesses also offer it on their dessert menu. How convenient is that? It’s still fun to go to the original location to satisfy your sweet tooth craving. Flavors are visible in glass showcases, making decisions difficult as well as drool-worthy. More often that not, there’s a line of customers. Look at it this way, it’ll give you more time to make a choice, or two. The taste-tempting categories including original, regular, premium, deluxe, specialty, no sugar, low fat, vegan, and more. Sugar cones, dipped bowls, candy sprinkles, chopped nuts, whipped cream, and maraschino cherries are also on the table when making a decision. In the mood for a banana split? Go ahead, we’ll call that dinner.

Apple Orchard Pie

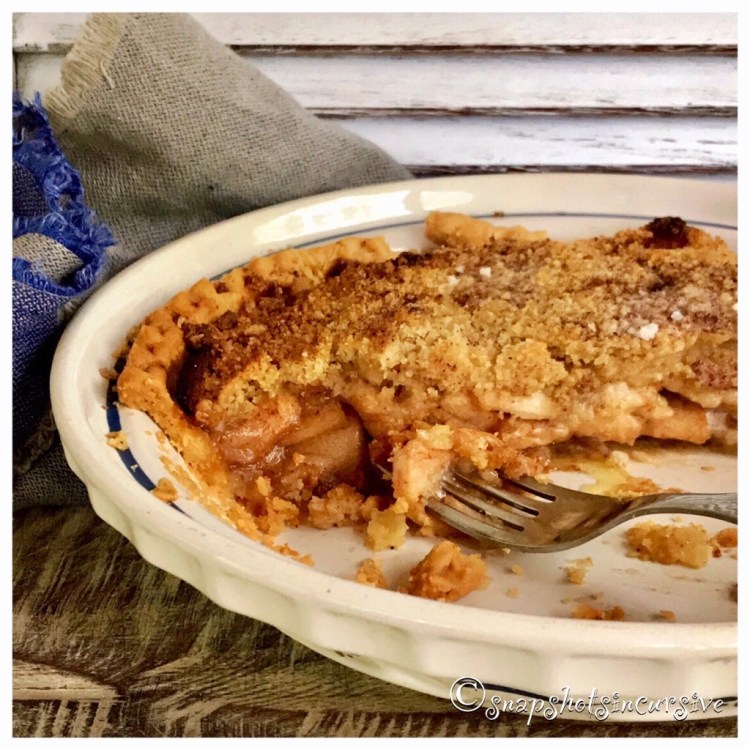
What’s Cooking in Gail’s Kitchen? Start Smart: Apple Orchard Pie! Nothing conjures up autumnal nostalgia like a slice of apple pie, still warm enough from the oven to soften a scoop of vanilla ice cream. Inhale the aromas of cinnamon, nutmeg, and allspice. It’s delectable, isn’t it? I realize making pies may not be on the top of the list for everyone who loves it. So, I’m telling you today, it’s okay to begin with a prepared pie crust. There are some pretty decent brands out there for you to try. Some refrigerated brands are made to unroll and crimp the edges; others are frozen and meant to be thawed. Some are buttery, super-flaky, and even taste as good as homemade. That’s where you’ll need the help of an assistant, or taste-tester, so to speak. Just remember, pie doesn’t have to be picture perfect to taste spot on. It’s dessert, after all.

APPLE ORCHARD PIE

Ingredients:

1 prepared pie crust, 9”

4-5 large sweet apples, peeled, cored, and sliced

4 large tart apples, peeled, cored, and sliced

1 cup sugar

1/2 teaspoon cinnamon

1/4 teaspoon nutmeg

1/4 teaspoon allspice

1/4 teaspoon sea salt

2 tablespoons butter

Ingredients for Crumb Topping:

1 cup flour

3/4 cup brown sugar

1/3 cup butter, softened

1/2 teaspoon cinnamon (optional)

Instructions:

Preheat oven to 350°. Form prepared pie crust into a pie plate that has been sprayed with nonstick oil. Crimp edges. Set aside. Combine sugar, flour, cinnamon, nutmeg, allspice, and sea salt. Sprinkle about a quarter cup of mixture over the bottom of the pie crust. In a large bowl, toss the apple slices with the remaining sugar mixture. Coat well. Transfer apples to the pie plate, forming a mound in the center. Dot with 2 tablespoons of butter. Bake for 30 minutes. Meanwhile, combine flour, brown sugar, butter, and cinnamon for crumb topping. It should resemble small peas when mixed. Carefully add the topping to the apple pie. Bake 30 minutes longer. If necessary, cover the pie with foil to prevent burning.