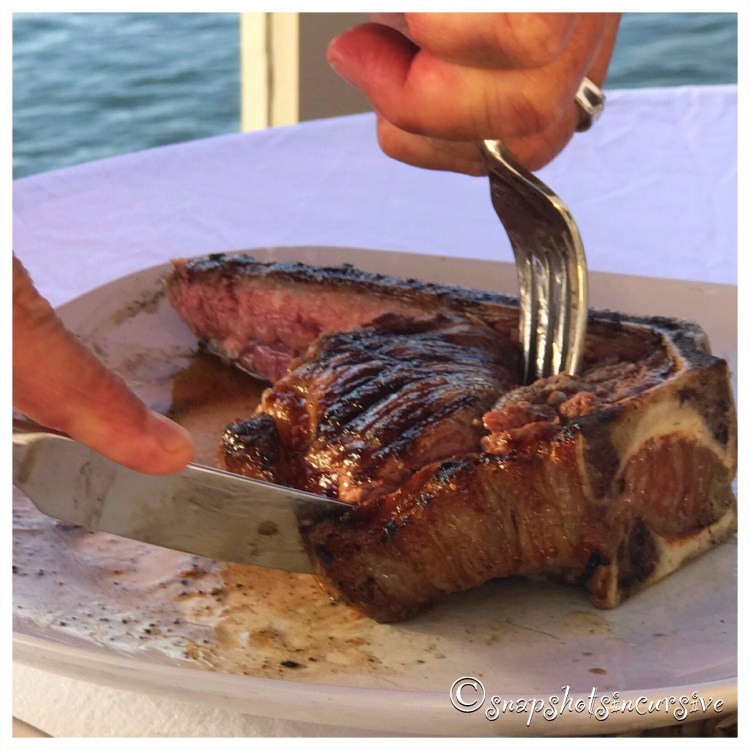
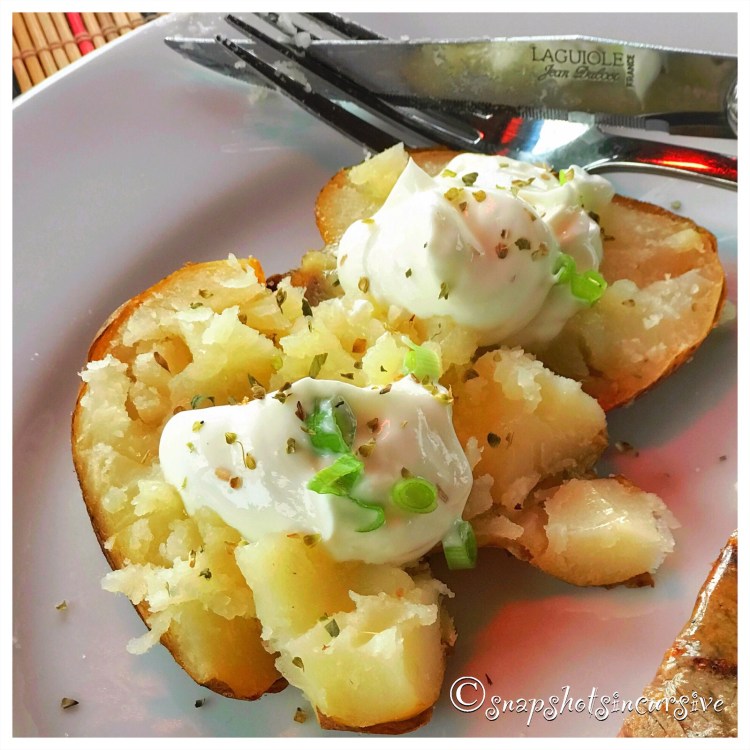
Okinawan Sweet Potato Medley

What’s Cooking in Gail’s Kitchen? Waste Not, Want Not: Okinawan Sweet Potato Medley! Way back when I was in middle school, my home economics teacher actually graded us on how colorful the foods looked on the plate. Her thoughts were “If it tempts your eyes, your stomach will want it.” I never forgot that message. She was pretty adamant about food presentation. So having mashed potatoes, rolls, and cauliflower was kind of a no-no when meal planning. That’s one of the reasons I was intrigued by Okinawan sweet potatoes when visiting Kauai. They are buff-skinned on the outside with a violet-purple flesh inside. It’s not as sweet as the orange variety I’m accustomed to, but nonetheless, it’s pretty tasty. And as you can see, it passes the color test.

OKINAWAN SWEET POTATO MEDLEY

Ingredients:

1 large Okinawan sweet potato, skin on, washed and sliced

1 medium sweet onion, sliced

2 each of mini sweet peppers in red, yellow, and orange; stems and seeds removed, cut in wedges

1 teaspoon seasoned salt

1 teaspoon oregano

1/2 teaspoon cinnamon

4 tablespoons butter

Instructions:

Spray a sheet of heavy aluminum foil with nonstick oil. Arrange Okinawan sweet potatoes on foil. Add sweet onion slices and mini sweet pepper wedges. Sprinkle with seasoned salt, oregano, and cinnamon. Dot with pats of butter. Place another sheet of heavy aluminum foil over top of vegetables. Fold sides twice to seal. Fold ends twice to seal. Avoid puncturing foil. Place packet on a 425° preheated grill. Close lid. Cook 25 minutes, or until vegetables are fork tender. Remove from grill. Carefully open one corner of foil packet to release steam. Then remove top layer of foil. Transfer sweet potatoes and vegetables in the herbed butter to a platter. Serve immediately.

New York Strip Steak

What’s Cooking in Gail’s Kitchen? Waste Not, Want Not: New York Strip Steak! The secret to a good steak, when grilling, is to crank up the heat. It took years to figure this out because grilling is different than baking. A steak likes to have the outside seared, or even charred, in order to keep those wonderful juices inside. The secret is to get the outside seared as soon as possible. When I asked my husband how high the gas grill was set, he replied, “All the way up!” Next, take your cell phone because you’re going to need a timer. For me, the soft pink center of a medium-rare steak is perfection. Obviously, if you prefer it more well done, you add extra time. Ready? Grilling season is upon us.

NEW YORK STRIP STEAK

Ingredients:

1-inch thick New York strip steaks,(for two)

1 teaspoon sea salt

1/2 teaspoon black pepper

1/2 tablespoon butter, per steak

Instructions:

Remove steak(s) from the refrigerator 20 minutes before grilling. Season both sides with sea salt and black pepper. Preheat gas grill to highest setting. When you hold your hand over the grill, you have to pull it back immediately. Place steaks directly on grill for 4 minutes. Close the lid. Flip and sear the remaining side for another 3 minutes, with lid closed. Remove from heat and allow steaks to “rest” on a platter for 5 minutes. Add a pat of butter at this time. Serve steak immediately.

French Baguettes

What’s Cooking in Gail’s Kitchen? Timeless Classics: French Baguettes! Ever wonder why the daily baguette, le baguette quotidien, in France tastes so much better than in the US? For one, it is meant to be baked and eaten the same day. After that, don’t be surprised if it goes stale. No preservatives. Well, I can attest that as soon as the aromas filled the kitchen and drifted throughout the house, I had to ask myself, “Why would anyone want to wait?” The crunch of crispy crust, the melted sea salt French butter, and the hint of honey sweetness were enough to be convincing. Plus, I let the bread machine do half the work. Another bonus, the perforated French bread pan “simplifies baking baguettes worthy of a Parisian boulangerie.”* I agree.

FRENCH BAGUETTES

Ingredients:

1 cup water

2 1/2 cups bread flour

1 tablespoon sugar

1 teaspoon sea salt

1 1/2 teaspoons active dry yeast

1 egg yolk

1 tablespoon water

Instructions:

Using a bread machine, combine water, bread flour, sugar, sea salt, and yeast. Select Dough cycle and press Start. When the cycle is completed, transfer dough to a greased bowl. Coat all sides of dough with grease. Cover; Place bowl in a warm area for 30 minutes. Dough will rise to double its size. Punch down dough. Place onto a lightly floured surface. Roll out to a 12″x16″ rectangle. Cut dough in half to equal two 12″x8″ rectangles. Beginning at the 12” side, roll dough tightly, pounding out air bubbles. Roll gently back and forth to taper ends. Transfer loaves to a divided and perforated French bread pan. Make diagonal slashes across each loaf every 3 inches. Cover and let dough rise in a warm area for 40 minutes, or until doubled in size. Preheat oven to 375°. Mix egg yolk and water. Brush over tops of loaves. Bake 20-25 minutes until golden brown.

* I receive no recompense for mentioning the Williams-Sonoma Perforated French Bread Pan.

Walnut Brown Sugar Butter

What’s Cooking in Gail’s Kitchen? Enjoyable Eats: Walnut Brown Sugar Butter! Ahh, sweet butter. I don’t know if it’s the winter weather or the upcoming holidays that get me in the mood for bakery ideas. Who doesn’t appreciate aromatic cinnamon, sweet nutmeg, or pumpkin pie spice? The smell of bread baking in the oven triggers all kinds of emotions. It can lift our mood and impact our behavior. Honestly, it would have been pretty easy to feature today’s compound butter all by itself. But tell me, isn’t it better to imagine slathering it all over those freshly-baked cinnamon rolls?

WALNUT BROWN SUGAR BUTTER

Ingredients:

8 tablespoons unsalted butter, room temperature

1 tablespoon packed brown sugar

1/4 teaspoon sea salt

1/3 cup walnuts, chopped

Instructions:

In a mixing bowl, combine unsalted butter, brown sugar, and sea salt until smooth. Fold in chopped walnuts. Place a sheet of plastic wrap on the counter. Spoon compound butter onto plastic wrap. Roll layer of plastic wrap over butter to form a log. Roll tight and place in refrigerator for one hour or until firm. Serve over toast, cinnamon rolls, pancakes, or muffins.

Quick Savory Butter

What’s Cooking in Gail’s Kitchen? Start Smart: Quick Savory Butter! For some time now we’ve gotten pretty spoiled by restaurants, bistros, and cafés serving compound butter with the artisan bread basket. You almost hear us clapping our hands as we sink our teeth into the savory herbs or sweet concoctions. I know it makes me feel special. Chefs have been creating compound butters for years, though. It’s one of the ways they save time and add a level of sophistication for the customer. In my own kitchen, I found it’s best to begin with unsalted butter. That way I can add just enough sea salt to tease the palate. Lemon, believe it or not, adds a hint of flavor that embellishes steak or seafood. I see you nodding your head in agreement. Although I began smearing this combination on rolls and crackers, I couldn’t resist warming it to pour over a bowl of freshly popped popcorn. Talk about gourmet!

QUICK SAVORY BUTTER

Ingredients:

1 stick (1/2 cup) unsalted butter, room temperature

1 tablespoon lemon juice

1/4 teaspoon garlic powder

1/2 teaspoon sea salt

1 tablespoon fresh rosemary, chopped

2 tablespoons fresh parsley, chopped

Instructions:

In a mixing bowl, cream butter with lemon juice. Add garlic powder and sea salt; stir. Fold in fresh rosemary and parsley leaves. Mix until combined. Place a sheet of waxed paper on the counter. Spoon compound butter onto sheet. Roll the waxed paper over butter to form a log. Roll tight and twist both ends. Refrigerate one hour or until firm.

Presto, Pesto

What’s Cooking in Gail’s Kitchen? Start Smart: Presto, Pesto! The garden went wild this year with an abundance of basil. I mean, you can only dry so much. Granted, I happen to like fresh basil with anything tomato, but not everyone agrees. So, this time I threw together a couple cups of basil leaves with my favorite pairing: parmesan cheese! Pesto freezes well, so it can be stored in an airtight container, or initially, ice cube trays. Once it’s frozen, transfer the cubes to airtight freezer bags for later on. Always defrost in advance. Pesto tastes best served at room temperature or only slightly warmed. Keep in mind, a little goes a long way. Mix it into salad dressing or guacamole; the olive oil creates a smooth texture. Add a dollop to your evening vegetables, pasta noodles, or meat dish. Get creative and go Pesto!

PRESTO, PESTO

Ingredients:

2 cups fresh basil leaves, packed

2 cloves garlic, peeled and chopped

1/3 cup pine nuts, finely chopped

1 teaspoon sea salt

1/4 teaspoon black pepper

1/2 cup parmesan cheese, grated

1/3 cup olive oil

Instructions:

In a mini chopper, combine basil leaves, chopped garlic, pine nuts, sea salt, black pepper, and parmesan cheese. Pulse to blend; approximately 30 seconds. Slowly pour the olive oil into the top of the lid while the blade is on the Low setting. The olive oil will drizzle through the little hole for smooth results. Remove the lid and scrape down the sides with a spatula. Stir. Transfer pesto to a covered jar. Store in the refrigerator.

Underrated Summertime Supper

What’s Cooking in Gail’s Kitchen? Fab Foodstuff: Underrated Summertime Supper! Does anyone have a Himalayan Salt Block besides me? Well, one of the things I like about it is, it can take the guesswork out of adding seasoning to food. It’s a block of pink salt, after all. When serving cold foods like salads, fruits, and cheeses, refrigerate the salt block overnight before using. This helps to keep foods chilled for hours when you need it. Simply arrange the ingredients directly on the block, drizzle on the dressing, and you’re good-to-go. Clean up is easy. Never use soap; salt is naturally antibacterial. Remove food residue with a damp cloth or sponge. Rinse it with a clean swipe, then dab dry. Allow the salt block to air-dry before next use. You’re done.

UNDERRATED SUMMERTIME SUPPER

Ingredients:

4 ounces goat’s milk cheese, plain

1 teaspoon Italian dry mix spice blend

1/4 teaspoon red pepper flakes

8 ounces mixed greens, washed

1 Roma tomato, chopped

4 assorted mini sweet peppers, stems and seeds removed, sliced into rings

2 radishes, sliced very thin

1/4 red onion, thinly sliced

1 teaspoon Herbes de Provence

Balsamic Reduction Sauce

Crusty Artisan Bread

Instructions:

On a sheet of waxed paper, sprinkle Italian dry mix spice blend and red pepper flakes. Form the goat’s milk cheese into a ball. Roll it in the spice mix to cover all sides. Place cheese ball on the chilled Himalayan salt block. Next, arrange mixed greens in a single layer. Arrange Roma tomatoes, mini sweet peppers, radish slices, and red onion rings. Sprinkle Herbes de Provence over top. Drizzle balsamic reduction sauce over salad. Serve with crusty artisan bread.

Perfect Pot Roast

What’s Cooking in Gail’s Kitchen? Fab Foodstuff: Perfect Pot Roast! Today all chefs get the day off from cooking. Seriously. This one-pot meal will turn out perfectly, as long as you ignore it. Use a slow-cooker or a Dutch Baker in a low temperature oven. I actually begin with a frozen chuck roast and forget about it, that is until the savory aromas lightly waft throughout the house. The liquid turns into a pleasant au jus or can be thickened into gravy. Personally, I ladle the juice into a food storage container to use as a sauce for beef carnitas, but that’s another story. Leftovers promise delicious options.

PERFECT POT ROAST

Ingredients:

3-4 pound chuck roast, frozen

3/4 cup vinegar

3/4 cup orange juice

1/2 cup butter, melted

1/4 cup kosher salt (or less)

1 teaspoon garlic powder

1 tablespoon oregano

1 pound baby carrots

3-4 white potatoes, skin on, quartered

2-3 sprigs thyme

Instructions:

Preheat oven to 275°. Place frozen roast in Dutch Baker. Combine vinegar, orange juice, and melted butter. Pour over roast. Sprinkle roast with kosher salt, garlic powder, and oregano. Lay thyme sprigs across the top of the meat. Put the lid on the Dutch Baker and bake for 4 hours. Then add carrots and cut-up potatoes to the pot. Reduce oven temperature to 185°. Bake 4 hours longer. The roast is fall-apart tender and ready to serve.

Kosher Salt Dill Pickles

What’s Cooking in Gail’s Kitchen? Eat More: Kosher Salt Dill Pickles! When I visited the Farmers Market this week, I was impressed by the cute little cucumbers in abundant supply. The fact that my dill was showcasing its yellow flowery blossoms in proud display earlier that morning nudged me to take advantage of both. Canning a jar of classic dill pickles was about to become the focus of the day. So….when choosing a variety of cucumber to pickle remember three things: 1.) Choose small cukes about the size of your thumb. 2.) Make sure they have a thicker skin in order to maintain a crunchy snap. 3.) And remember to ask for the ones that were just freshly picked. Time is of the essence. The crucial time to pickle is as soon as practical after picking. This recipe will make one jar, which is exactly what I wanted.

KOSHER SALT DILL PICKLES

Ingredients:

1 pound pickling cucumbers; cut off tips of both ends and slice in half

2 fresh dill sprigs, with heads

1 cup filtered water

1 cup distilled white vinegar

4 tablespoons sugar

2 tablespoons Kosher salt

2 garlic cloves

1 teaspoon black peppercorns

1/8 teaspoon red pepper flakes

Instructions:

In a medium saucepan, combine water, vinegar, sugar, Kosher salt, garlic, peppercorns, and red pepper flakes. Heat to boiling. Stir to dissolve sugar and salt. Remove the pan from the heat and let it sit for 10 minutes. Meanwhile in a clean quart jar, place one dill sprig and one garlic clove in bottom of jar. Arrange cucumber halves against the side of the jar working your way to the center. Do not crush. Add one more dill sprig. Pour cooled juice into the jar. Be sure to include the spices. Stop liquid within 1/4″ of top. Seal and store in refrigerator for 12 hours before opening. Keep refrigerated.