Xtra Tender Crockpot Carrots

What’s Cooking in Gail’s Kitchen? After the Holidays: Xtra Tender Crockpot Carrots! Take advantage of a favorite workhorse at your disposal for men and women alike. Some call it a crockpot (from the 1970s) while others refer to it as a modern-day slow cooker. It basically became popular because it was a handy appliance that could be filled with traditional stew ingredients left to cook slowly all day long. People plugged it in and trotted off to work. When they returned home, the entire house was filled with savory aromas that could make a macho man weep. The only thing missing was the synthesized beat of the disco hit by the Village People. Now I’m really dating myself.

XTRA TENDER CROCKPOT CARROTS

Instructions:

2 pounds whole carrots, washed and peeled

1/3 cup apricot jam

6 tablespoons butter, melted

2 tablespoons raw honey

2 tablespoons brown sugar

1 teaspoon balsamic vinegar

1 teaspoon garlic powder

3/4 teaspoon kosher salt

1/4 teaspoon dried thyme

1/4 teaspoon dry mustard

1/4 teaspoon black pepper

1 1/2 tablespoons cornstarch

1 1/2 tablespoons water

Instructions:

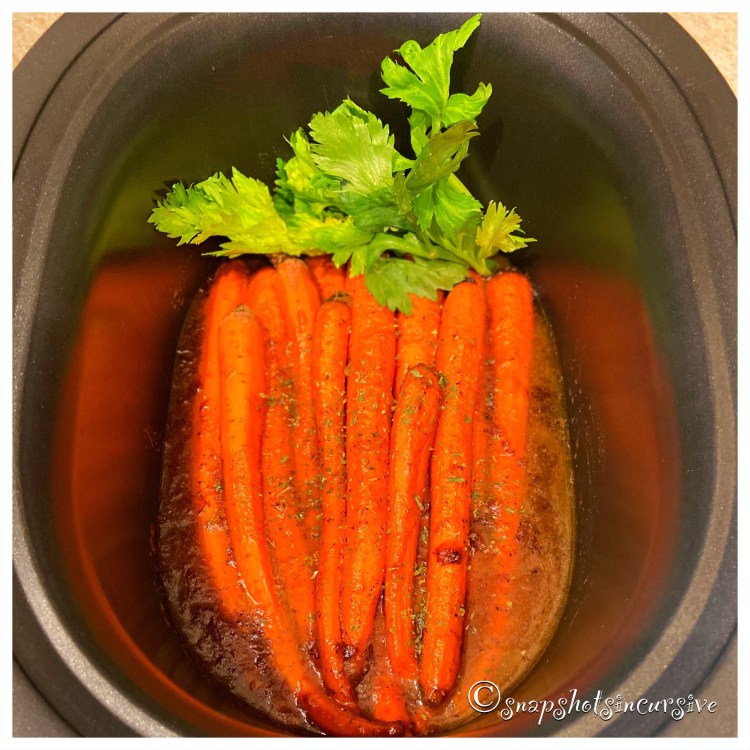
Trim carrots, as needed, to fit lengthwise in a crockpot or slow cooker. Remove all but an inch of the carrot tops. In a bowl, combine apricot jam, melted butter, raw honey, brown sugar, balsamic vinegar, garlic powder, kosher salt, dried thyme, dry mustard, and black pepper. Stir until thoroughly mixed. In a glass measuring cup, whisk together cornstarch and water. Pour into the apricot sauce. Stir well. Drizzle apricot sauce over carrots. Cover crockpot. Cook on LOW setting for 5-6 hours, or until tender. Carrots are done when pierced easily with a fork. Serve immediately.

Plum Coffee Cake

What’s Cooking in Gail’s Kitchen? After the Holidays: Plum Coffee Cake! Plums have a way of making a person feel special. They’re not as plentiful as apples, but when they’re available I can’t wait to snag a few to plunk into a homemade coffee cake. The sweet flavor reminds me of stepping into a pastry shop where fruit-filled delicacies are placed front and center in the glass-domed showcase. From mini fruit tarts overflowing with ripe, juicy berries to cheesecakes smothered in exotic options. Turnovers become too tempting when a smidgen of filling seeps out. And just look at the succulent strudels and rustic galettes. But I digress. Today’s feature is all about the mouthwatering palatable pleasure of the plum.

PLUM COFFEE CAKE

Ingredients:

1 1/4 cup flour

1 teaspoon cinnamon

1/4 teaspoon nutmeg

1/8 teaspoon cardamom

2 teaspoons baking powder

1/2 teaspoon sea salt

1/3 cup butter, softened

3/4 cup sugar

1 teaspoon vanilla extract

1 egg, room temperature

1/2 cup buttermilk

1/2 pound plums, pitted and sliced

Powdered sugar, for dusting

Instructions:

Preheat oven to 350°. Spray a 9” cake pan with nonstick oil. Set aside. In a bowl, whisk together flour, cinnamon, nutmeg, cardamom, baking powder, and sea salt. Set aside. In another bowl cream together butter and sugar, using an electric mixer, for 3 minutes. Add vanilla extract and egg. Beat on Low speed until well mixed. Gradually add the flour mixture, alternating with buttermilk. Beat on Low speed until smooth. Transfer the batter to the prepared pan. Arrange sliced plums on top in a circular pattern. Bake for one hour until golden brown. Center is set when a cake tester comes out clean. Cool cake on a wire rack. Dust with powdered sugar before serving.

Half-Baked Skillet Pizza Dip

What’s Cooking in Gail’s Kitchen? After the Holidays: Half-Baked Skillet Pizza Dip! Who likes bread dough? I do, I do. Who keeps a bag of frozen bread dough rolls in their freezer? Me, too. Whether you’re making this amazing pizza dip as an afternoon snack, midday appetizer, or late-night dinner, you will impress yourself with the chewy bread dough base. That is, until the mouthwatering moment you feast your eyes on the gooey strands of pizza cheese. Melted mozzarella cheese pulls can stretch from the iron skillet to your mouth like a tightrope stretched across Niagara Falls. Either snap it off in one bite or twirl it around your index finger for satisfying nibbling. Did I fail to mention the layers of deliciousness? Read on to see what I mean.

HALF-BAKED SKILLET PIZZA DIP

Ingredients for Crust:

12 frozen dinner roll dough balls

4 tablespoons butter, melted

1/4 teaspoon garlic powder

1/4 teaspoon black pepper

1/8 teaspoon sea salt

1/8 teaspoon red pepper flakes

1 teaspoon parsley flakes

Ingredients for Dip:

8 ounces cream cheese, softened

1/2 cup mayonnaise

1 teaspoon zesty Italian salad dressing mix

1/2 cup parmesan cheese, grated

1/2 cup provolone cheese, shredded

2 cups mozzarella cheese, shredded

1/2 cup prepared pizza sauce

5 slices deli-style hard salami, cut into triangles (or mini pepperoni slices)

Fresh Parsley, for garnish

Instructions:

Preheat oven to 400°. Spray an iron skillet with nonstick oil. Remove frozen bread dough rolls from the freezer. Set aside. In a small bowl, combine melted butter, garlic powder, black pepper, sea salt, red pepper flakes, and parsley flakes. Mix well. Coat each frozen bread dough roll with butter mixture and arrange around the outside edge of the iron skillet. Cover pan with a tea towel, place in a warm area, and allow the dough to rise for 20 minutes for a half-baked doughy crust. Meanwhile, to prepare dip filling, combine cream cheese, mayonnaise, Italian seasoning, and grated parmesan cheese. Mix well. Fold in shredded provolone cheese and 1 1/2 cups shredded mozzarella cheese. Spoon half the filling into the center of the iron skillet. Add a layer of pizza sauce. Spoon the remaining cheese filling on top. Sprinkle the rest of the mozzarella cheese over all. Arrange with salami or pepperoni slices. Place the iron skillet in the preheated oven. Bake for 20-25 minutes, or until crust is golden brown and pizza dip is bubbly. Remove from oven. Garnish with fresh parsley. Serve warm.

Bacon Bit Sweet Potato Bisque

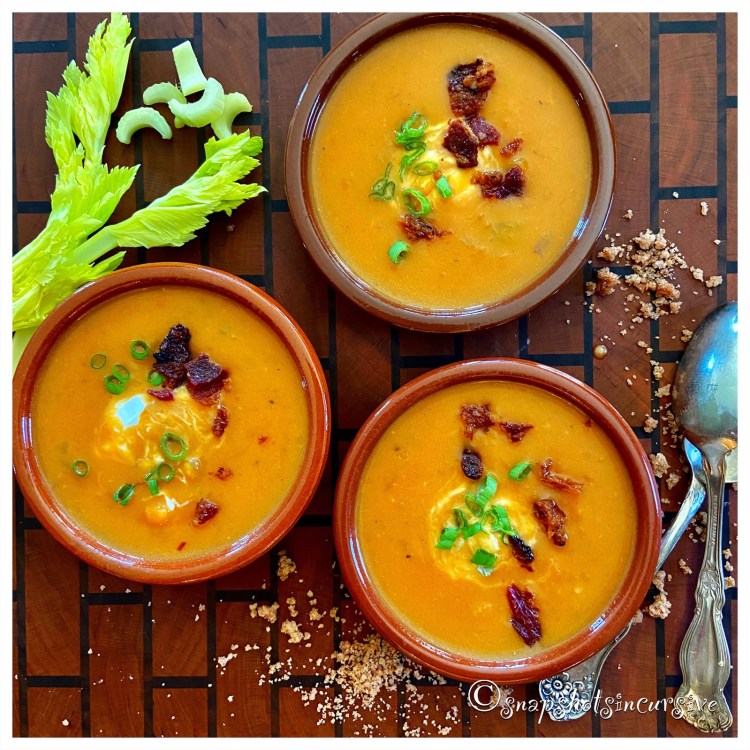
What’s Cooking in Gail’s Kitchen? After the Holidays: Bacon Bit Sweet Potato Bisque! My pantry is sometimes filled with good intentions. I envision a nutritious meal and then get sidelined by other ingredients, especially in the Produce Department of the local grocery. I mean, just look at the bin overflowing with organic sweet potatoes. Medium-sized, smooth skin, pretty color, and screaming “Pick me. I’m healthy.” Soon after I get home, I store them out of sight in a cool, dark area only to discover them three weeks later. Thank goodness, sweet potatoes are very forgiving. Their shelf life is easily 5 weeks. If you ever wondered how to tell if it’s time to toss them out, press the skin. If it’s soft, discolored, or has an unpleasant odor, throw them out and promise yourself you’ll do better next time.

BACON BIT SWEET POTATO BISQUE

Ingredients:

2 large sweet potatoes, cut in half

1 tablespoon olive oil

1 tablespoon butter

1/2 cup yellow onion, diced

1/4 cup celery, diced

1/4 teaspoon garlic powder

1/2 teaspoon oregano

1/2 teaspoon ground ginger

1/4 teaspoon cumin powder

1/4 teaspoon sea salt

1/4 teaspoon black pepper

1 1/2 cups chicken broth

Green onion snips, for garnish

Bacon bits, for garnish

Dollop Greek yogurt, for garnish

Instructions:

Preheat oven to 400°. Brush olive oil over the skins of the sweet potatoes. Place cut-side down on a baking sheet. Roast for 30 minutes. Remove from oven. Scoop the sweet potatoes into a bowl and thoroughly mash. Discard peels. Warm butter in a saucepan over medium heat. Do not scorch. Add diced onion and celery. Cook, stirring occasionally for 5 minutes. Sprinkle with garlic powder, oregano, ground ginger, cumin powder, sea salt, and black pepper. Cook, stirring constantly, for one minute longer. Add chicken broth; reduce heat to simmer. Transfer sweet potatoes to a food processor and Pulse until consistency is smooth. Whisk sweet potatoes into broth until heated through. Ladle into bowls. Garnish with green onion snips, bacon bits, and a dollop of Greek yogurt.

Apple Cinnamon Slab Pie

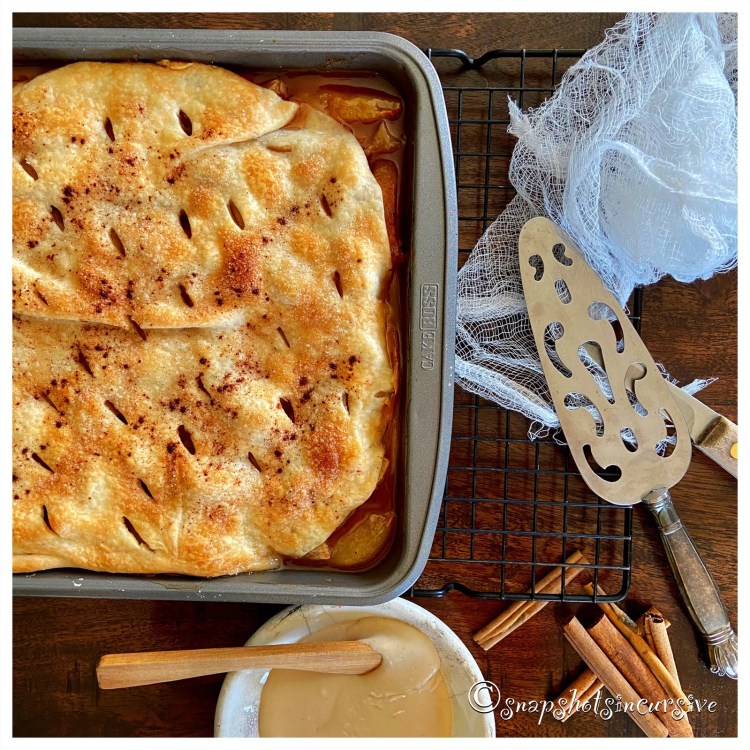
What’s Cooking in Gail’s Kitchen? After the Holidays: Apple Cinnamon Slab Pie! For those who were lucky enough to be gifted with one of the spectacular supermarket fruit baskets and are now wondering how to eat everything before it spoils, think outside the box. Citrus fruits can be refrigerated, as long as you don’t forget about them out-of-sight in the crisper drawer. And we all know what happens to bananas in the fridge. Ugh. Not a pretty sight. But today we’re going to talk about everyone’s favorite fruit, the mouth-watering juicy apple. In reality, slab pies are the grown-up version of a pop tart, only better. The apple filling is honest-to-goodness fruit instead of a smearing of sugary jam. And the crust is more than a pastry shell of dry dough. Its layers of flaky goodness and buttery deliciousness are magically separated by pockets of air.

APPLE CINNAMON SLAB PIE

Ingredients:

2 9-inch pie crusts, refrigerated dough

8 apples, peeled, cored, and sliced

1 tablespoon lemon juice

1 cup sugar

1 tablespoon flour

1 1/2 teaspoons cinnamon

1/4 teaspoon sea salt

1/8 teaspoon nutmeg

1 cup powdered sugar

1 tablespoon butter, melted

1 teaspoon vanilla extract

1 tablespoon warm milk, if needed

Instructions:

Preheat oven to 400°. Spray a baking sheet with nonstick oil. Set aside. Place sliced apples in a large bowl. Sprinkle with lemon juice. Gently toss. In another bowl, combine sugar, flour, cinnamon, sea salt, and nutmeg. Mix well. Pour over sliced apples. Toss to coat. Roll one prepared pie crust to fit the baking sheet. Trim the dough to only fit the bottom of the pan. If necessary, use the extra dough to fill in the corners. Spread apple filling over bottom crust. Roll out second pie crust. Place over the apple filling. Pierce top of dough with a fork in several places. Sprinkle with cinnamon, if desired. Bake 35-40 minutes. To make the glaze, combine powdered sugar, melted butter, and vanilla extract. Stir until smooth. For a slightly thinner consistency, add the warm milk. Remove Apple Cinnamon Slab Pie from oven when the crust is golden brown and the juices are bubbly. Cool slab pie on a wire rack for 10 minutes before pouring glaze over top. Spread to edges. When pie is cool, slice to serve.

Mincemeat Quick Bread

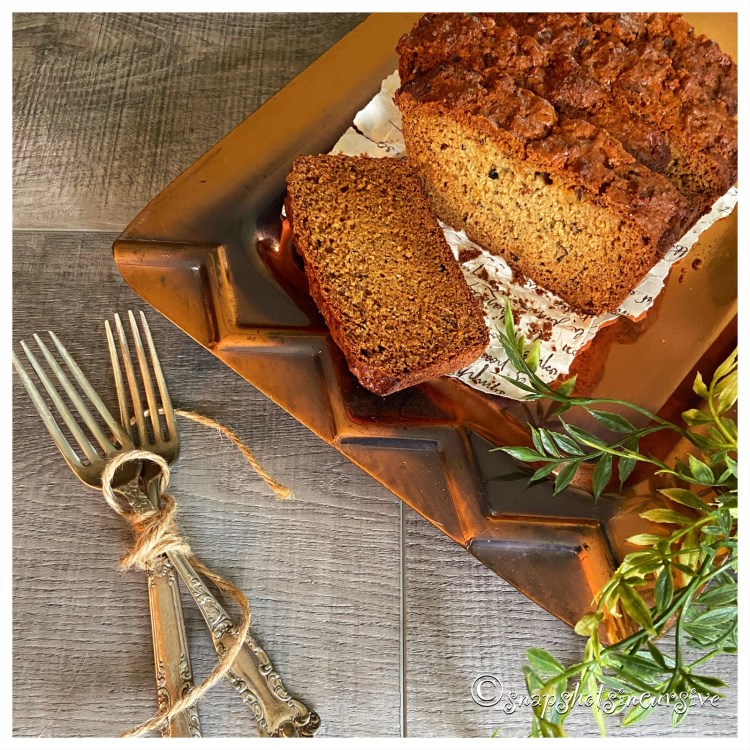
What’s Cooking in Gail’s Kitchen? Splurge-Worthy Goodness: Mincemeat Quick Bread! Don’t look at me that way. I know what you’re thinking. “If this recipe has mincemeat in it, I’m not eating it.” But hold on a sec. There are plenty of foods with names that sound downright gross. Think about it: head cheese, tripe, mung beans, and blood sausage to name a few. I’m here to tell you mincemeat is a sweet and savory filling that basically contains dried fruits, citrus, spices, and brandy. Ahhh. Now I have your attention. This particular recipe has about 1/4 cup apricot brandy in it. Just know if you do choose to add brandy or rum to a jar of prepared mincemeat, be sure to allow it to marinate in the refrigerator at least 8 hours before using. Now you can understand why some people eat it straight out of the jar.

MINCEMEAT QUICK BREAD

Ingredients:

1 egg, room temperature

1/4 cup vegetable oil

1 tablespoon orange zest

2 tablespoons orange juice

2 cups prepared mincemeat pie filling (with 1/4 cup apricot brandy, optional)

2 cups flour

1/2 cup sugar

1 1/2 teaspoons baking powder

1/2 teaspoon baking soda

1/2 teaspoon sea salt

Instructions:

Preheat oven to 350°. Grease and flour a 9”x5” loaf pan. Set aside. Combine egg, vegetable oil, orange zest, orange juice, and mincemeat pie filling. Stir until well blended. Set aside. In another bowl, whisk together flour, sugar, baking powder, baking soda, and sea salt. Gradually add flour mixture to egg mixture, stirring just until combined. Pour into prepared loaf pan. Bake for 50-60 minutes. Check loaf with a cake tester to make sure center is done. Remove from oven. Cool on a wire rack. Slice and serve.

Guacamole Deviled Eggs

What’s Cooking in Gail’s Kitchen? Splurge-Worthy Goodness: Guacamole Deviled Eggs! Tired of the same old thing? For years deviled eggs were served two ways: with real mayonnaise or without. Oh, sometimes you might’ve sprinkled a little paprika on top or added an olive slice. But not without criticism from the loudmouth brother-in-law who made sure everyone thought he was the know-it-all on every subject. I see you nodding your head. But now things are different. We have the freedom to be as creative in our cooking as we do in our lifestyle. If you are an avocado-lover, and could devour an entire bowl of guacamole in one sitting, then bookmark this recipe for now and for later. It’s worth it.

GUACAMOLE DEVILED EGGS

Ingredients:

6 large eggs, hard-boiled

1 ripe avocado, cut in half, put removed

1 tablespoon lime juice

1/2 teaspoon sea salt

1/8 teaspoon garlic powder

1/4 teaspoon cayenne pepper

1 tablespoon mayonnaise

Cilantro leaves, for garnish

Crushed tortilla chips, for garnish

Instructions:

Peel the eggs; cut in half horizontally; remove yolks. Set aside. Scoop the flesh of the avocado into a bowl. Add lime juice, sea salt, garlic powder, and cayenne pepper. Mash together with a fork. Add crumbled egg yolks and mayonnaise. Mix until smooth. Scoop a spoonful of the avocado filling into the well of each hard-boiled egg white. Top with fresh cilantro. Garnish with crushed tortilla chips. Refrigerate until ready to serve.

Thyme Tomato Toss

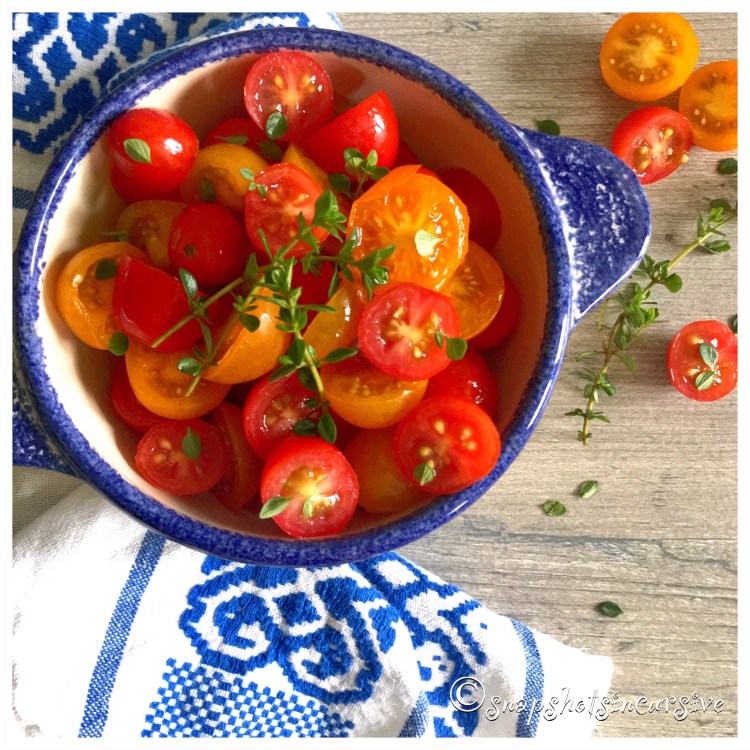
What’s Cooking in Gail’s Kitchen? Elevated Edibles: Thyme Tomato Toss! Hop aboard the yellow tomato bus for a ride that will take you down a two-lane country road. These golden nuggets, about the size of a cherry, are often less acidic and milder than their popular red cousins. I find them a touch sweeter as well. Their colors can range from pale yellow to sunny gold to bright orange, which makes for a stunning combo in marinated tomatoes or tasty fresh salsa. Just so you know, the skins are pretty tender, if that’s ever been an issue for you. With all that being said, now sit back, and enjoy the ride.

THYME TOMATO TOSS

Ingredients:

8 ounces yellow and red cherry tomatoes, cut into halves

1/4 cup olive oil

1 1/2 tablespoons garlic wine vinegar

1/8 teaspoon garlic powder

1/8 teaspoon cayenne pepper

1/8 teaspoon marjoram

1/4 teaspoon sea salt

1/2 teaspoon basil

1 teaspoon sugar

1 teaspoon fresh thyme leaves

Thyme sprigs, for garnish

Instructions:

Place yellow and red cherry tomatoes is a bowl. Set aside. In a measure cup, whisk together olive oil, garlic wine vinegar, garlic powder, cayenne pepper, marjoram, sea salt, basil, and sugar. Sprinkle in thyme leaves. Drizzle over tomatoes. Gently toss to coat. Serve immediately. Garnish with thyme sprigs.

Queso Chicken Flautas

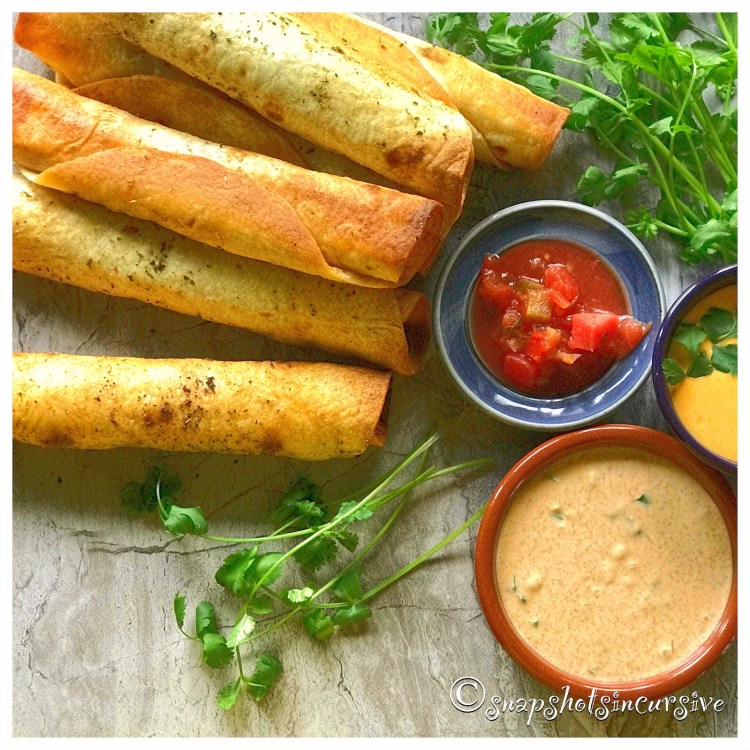
What’s Cooking in Gail’s Kitchen? Elevated Edibles: Queso Chicken Flautas! Are you as torn between corn tortillas and flour tortillas as I am? There are days, and certain dishes, where nothing but corn will do: tamales, taquitos, enchiladas, tacos, and chips. Corn tortillas, generally, are much smaller and easier to hold. When they are soaked in sauce, they are more pliable and suitable for baking. If you like the taste of toasted corn as well as the chewy texture, corn tortillas are for you. The same applies to flour tortillas: quesadillas, flautas, fajitas, chimichangas, and burritos. Flour tortillas are bigger, not to mention softer for folding. You already know this if you’ve ever eaten a monster burrito or ginormous chimichanga. One is baked, the latter is fried. Today’s recipe features the sturdiness of a flour tortilla to hold the juicy chicken and melted cheese filling without turning soggy or falling apart. What a delicious dilemma.

QUESO CHICKEN FLAUTAS

Ingredients for Herbed Sour Cream:

8 ounces sour cream

1 tablespoon honey

1 tablespoon lime juice

1/4 teaspoon sea salt

1/4 cup cilantro leaves, chopped

2 tablespoons green onions, chopped

Ingredients:

1 cup cooked chicken, shredded

1 cup Mexican cheese blend, shredded

4 ounces cream cheese, softened

4.5 ounce can green chiles, drained and diced

1 envelope taco seasoning mix, less 1 tablespoon for remaining recipe

12-count flour tortillas

2 tablespoons vegetable oil

15-ounce jar queso cheese dip, warmed

Instructions:

To make the herbed sour cream, combine sour cream, honey, lime juice, and sea salt in a bowl. Stir until smooth. Gently fold in chopped cilantro leaves and green onions. Cover and refrigerate until ready to serve. In a medium bowl, combine shredded chicken, Mexican cheese blend, cream cheese, and diced green chilies. Sprinkle with taco seasoning mix (less 1 tablespoon of mix). Stir thoroughly. Set aside. In a small dish, whisk vegetable oil with reserved taco seasoning mix. Set aside. Preheat oven to 425°. Spray a baking sheet with nonstick oil. To assemble flautas, place 1/4 cup chicken mixture on bottom third of each flour tortilla. Roll up tightly, leaving ends open. Place seam-side down on prepared baking sheet. Brush filled chicken flautas with seasoned oil mixture. Repeat until all tortillas are filled. Bake 10-12 minutes, or until flautas are crispy. Serve with warmed queso cheese dip, herbed sour cream, and chunky salsa.