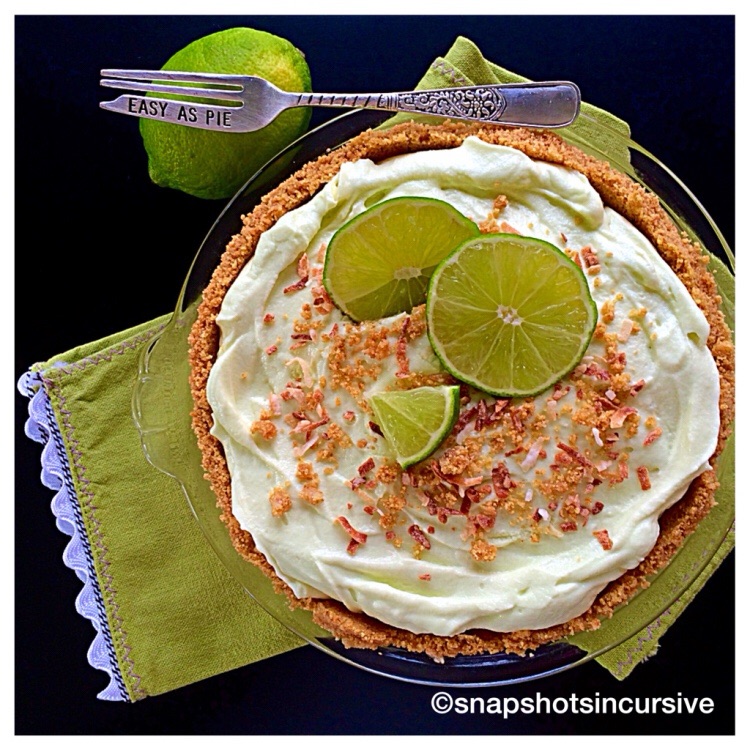
No-Boil Mac ‘n Cheese

What’s Cooking in Gail’s Kitchen? Stir. Spread. Flip. Repeat: No-Boil Mac ‘n Cheese! Depending on who you talk to, there are probably over 100 ways to make macaroni and cheese. No wonder when the grandkids order it in a restaurant, they sometimes take one bite, turn up their noses, and push the plate away. Odds are, ever since they could hold a spoon as a toddler from the comfort of a high chair, more than likely Mother was busy preparing dinner and relied on the store-bought variety in the blue and orange box. It was cheesy, buttery, salty, and established itself as a comfort food early on. This recipe is more an adult version of an old favorite. Try it, if you dare.

NO-BOIL MAC ‘N CHEESE

Ingredients:

8 ounces dry pasta shells

1/2 cup mozzarella cheese, shredded

1/2 cup cheddar cheese, shredded

1/2 cup fontina cheese, shredded

1 1/2 cups milk

1/4 cup Greek yogurt

1/8 teaspoon mustard powder

1/8 teaspoon cayenne pepper

1 teaspoon kosher salt

1/4 teaspoon black pepper

3 ounces cream cheese, cut into cubes

3/4 cup saltine crackers, crushed

1 tablespoon butter, room temperature

1/4 teaspoon onion powder

1/4 teaspoon garlic powder

1/8 teaspoon paprika

Instructions:

Preheat oven to 375°. Butter a 9”x9” baking dish. In the baking dish, add dry pasta, half the mozzarella cheese, half the cheddar cheese, and half the fontina cheese. Add the milk, Greek yogurt, mustard powder, cayenne pepper, and 3 ounces of water. Season with kosher salt and black pepper. Stir to combine. Press the cubes of cream cheese into the pasta. Tightly cover the baking dish; bake for 25 minutes. Meanwhile, in a bowl, mix the saltine crackers, butter, onion powder, garlic powder, and paprika. Uncover the pasta; sprinkle with the remaining mozzarella cheese, cheddar cheese, and fontina cheese. Top evenly with the crushed cracker mixture. Bake, uncovered, 15-20 minutes longer, or until the cheese is melted and bubbly. Remove from oven and serve immediately.

Icebox Lemon-Lavender Pie

What’s Cooking in Gail’s Kitchen? Front-Runner Favs: Icebox Lemon-Lavender Pie! Are you ready for a decadent dessert that is light, luscious, and requires no baking? Take a trip with me down South, where the summers are balmy and the desserts are as cool and refreshing as a glass of southern iced tea. The dessert begins with a foolproof graham cracker crust, store-bought is fine. The filling is a blend of tart lemon and flowery lavender swaddled in a lush sweet creamy texture that literally melts in your mouth. Mix it all together and pop it in the freezer, although it won’t stay there for long.

ICEBOX LEMON-LAVENDER PIE

Ingredients:

1 graham cracker crust

2 cans sweetened condensed milk

1 teaspoon lemon extract

1 teaspoon lavender extract

3/4 cup lemon juice

1 teaspoon citrus peel, granulated

1 tablespoon organic lavender buds, dried

Lavender sprigs for garnish

Instructions:

Chill prepared pie crust, stand mixer bowl, and beater beforehand. Mix sweetened condensed milk, lemon extract, and lavender extract on Low setting until blended. Add lemon juice and citrus peel, mixing until filling thickens and is smooth. Fold in lavender buds. Pour into chilled pie crust. Cover and freeze overnight. Remove from freezer, cut, and serve. Garnish with fresh lavender sprigs. Store leftovers in the freezer.

Key Lime Pie Bakery in Key West, Florida

Dining Outside the Home: Key Lime Pie Bakery! Key limes are as popular in the Florida Keys as conch shells on the beach. If you’ve never tasted one, imagine this: Key limes are more aromatic as well as a bit smaller than regular limes, thus making them less acidic and more tart. By adding sugar, eggs, and a graham cracker crust, the results are a tangy, sweet, light, and creamy dessert that may or may not cry out for a delicious dollop of whipped cream. Merengue is definitely not out of the question either. Drop in for a single slice or an entire pie. It’s convenient enough to make a second trip.

Killer Skillet S’Mores

What’s Cooking in Gail’s Kitchen? Fab Foodstuff: Killer Skillet S’Mores! You were probably wondering if I’d ever get around to satisfying your sweet tooth. Look no further than your favorite fire pit companion: sticky chocolaty marshmallow s’mores. Bring out the inner child who remembers camping trips with family members when you’d circled a crackling fire, balancing a roasting stick on your knee. Not too close to the flames or you’d end up with a charred gooey mess. Then again, those marshmallows were ones you got to gobble down before skewering another one. Fast-forward to the Present where you can recreate that same incredible taste in an iron skillet.

KILLER SKILLET S’MORES

Ingredients:

3/4 cup butter, melted

1/2 cup sugar

3/4 cup brown sugar

1 egg, plus 1 egg yolk

2 1/2 teaspoons vanilla extract

1 3/4 cup flour

1/4 cup graham cracker crumbs

1 teaspoon salt

1/2 teaspoon baking soda

1/4 teaspoon cinnamon

3/4 cup chocolate chips, divided

1 cup mini marshmallows

1 graham cracker, broken into chunks

1 milk chocolate bar, broken into pieces

8 large marshmallows, cut in half

Instructions:

Preheat oven to 375°. Combine melted butter, sugar, brown sugar, egg, egg yolk, and vanilla extract. Beat mixture for 30 seconds. Let rest 30 seconds. Repeat 3 times. In another bowl, whisk together flour, graham cracker crumbs, salt, baking soda, and cinnamon. Slowly add the butter mixture. Fold in 1/2 cup of chocolate chips and 1/2 cup of mini marshmallows. Press mixture into the bottom of a 10” iron skillet. Top with remaining chocolate chips, mini marshmallows, graham cracker chunks, and chocolate bar pieces. Bake 18-20 minutes. Remove hot skillet and carefully arrange the large marshmallows around the edge of the cookie. Return pan to the oven and continue baking until the marshmallows turn golden brown. Remove from oven and allow cookie to cool 15 minutes before serving.